
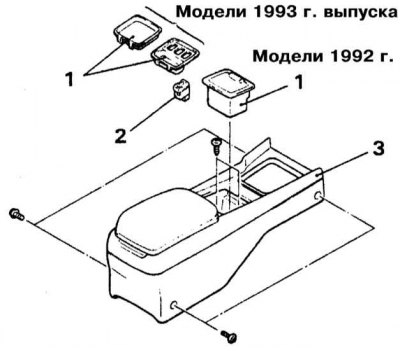
Installation details of the center console sections on Mirage models up to 1992 vol.
1 - Coin holder; 2 - Pocket; 3 - Switch for controlling the electric drive of door mirrors / plug; 4 - Facing; 5 - Rear section of the console assembly; 6 - Gear lever handle (RKPP); 7 - Front section of the console assembly
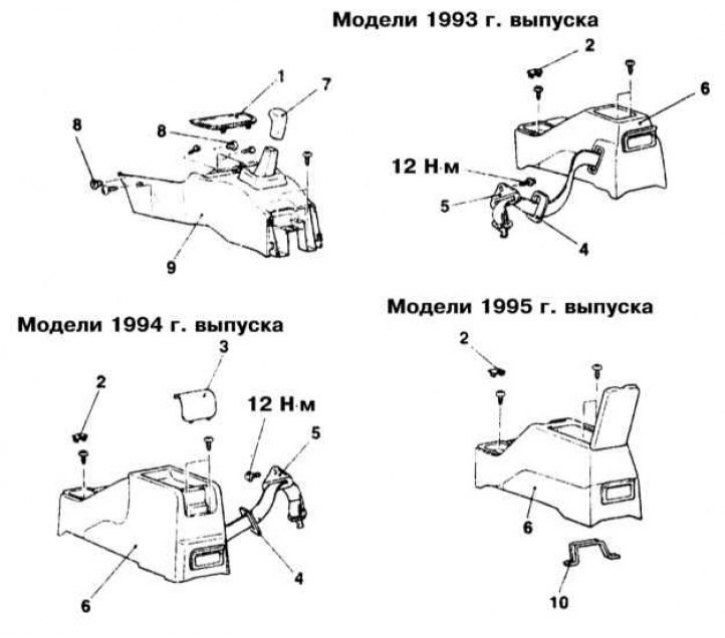
Installation details of the center console sections on Mirage models 1993÷1996. issue
1 - Finishing panel; 2 - Plug; 3 - Plug; 4 - Facing; 5 - Guide frame; 6 - Rear section of the console assembly; 7 - Gear lever handle (RKPP); 8 - Retainer; 9 - Front section of the console assembly; 10 - Support bracket
Installation details of the center console sections on Mirage models since 1997 vol.
1 - Rear section of the console assembly; 2 - Ashtray; 3 - Radio facing panel; 4 - Front section of the console assembly; 5 - Facing panel of the selector lever (AT); 6 - Front section of the console assembly; 7 - Support bracket
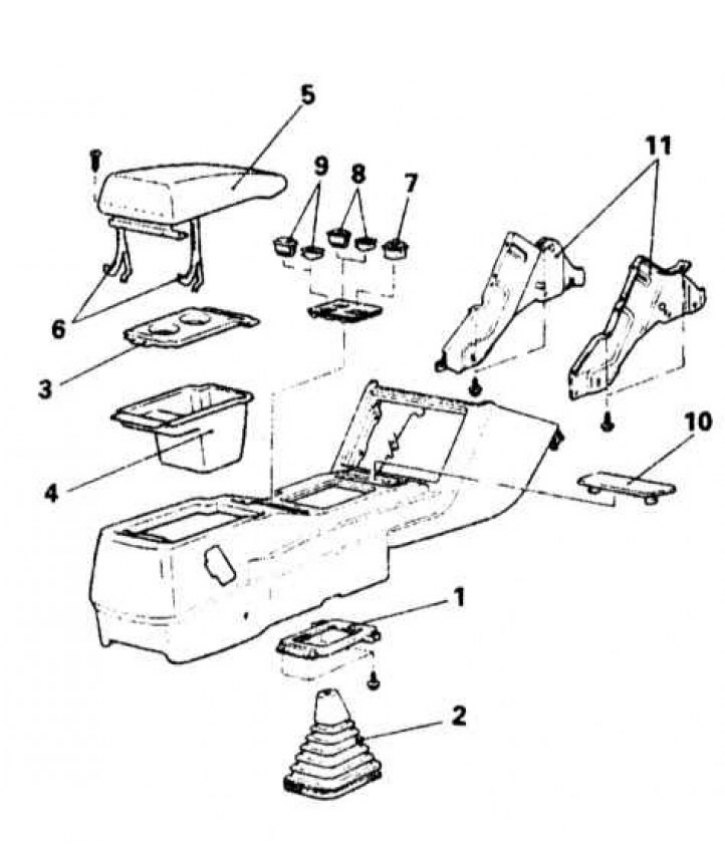
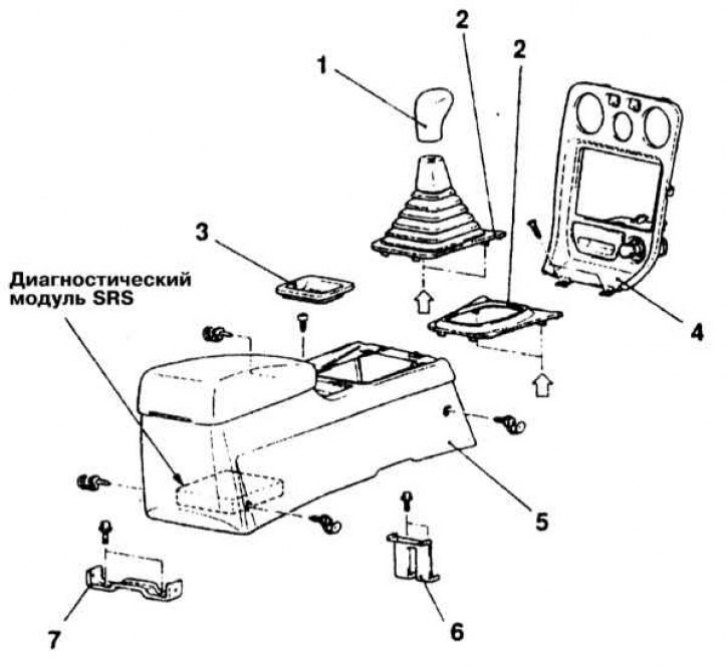
Installation details of the center console sections on Galant models up to 1993 vol.
1 - Facing panel of the gear lever (RKPP); 2 - Protective cover of the gear lever; 3 - Cup holder; 4 - Console glove box; 5 - Console glove box cover; 6 - Loop fasteners; 7 - Switch for controlling the functioning of the electric drive of door mirrors; 8 - Driving mode switch (POWER/ECONO) /stub; 9 - Switch for electronic control of the power steering system / plug; 10 - Finishing panel; 11 - Support brackets
Installation details of the center console sections on Galant models 1994÷1998. issue
1 - Gear lever handle (RKPP); 2 - Panel facing the gear lever; 3 - Pocket; 4 - Central (console) dashboard trim section; 5 - Front section of the console assembly; 6 - Support bracket A; 7 - Support bracket B
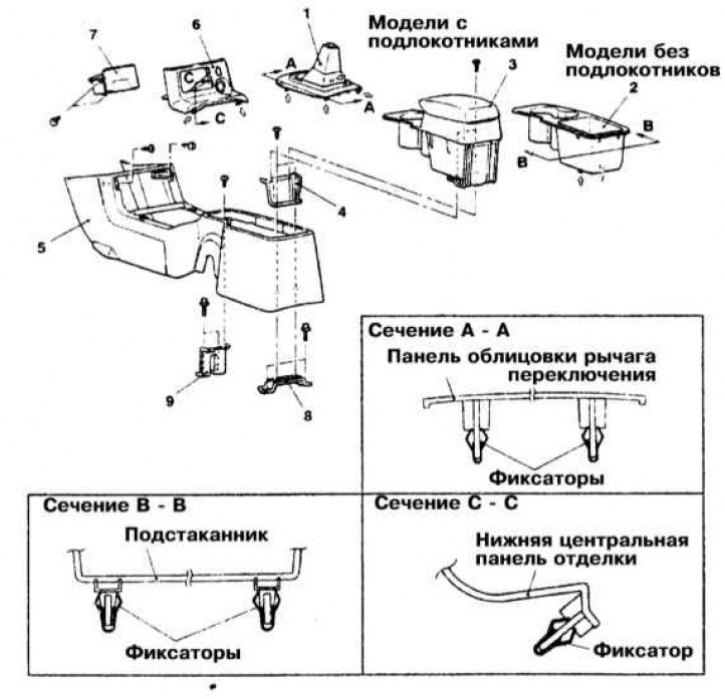
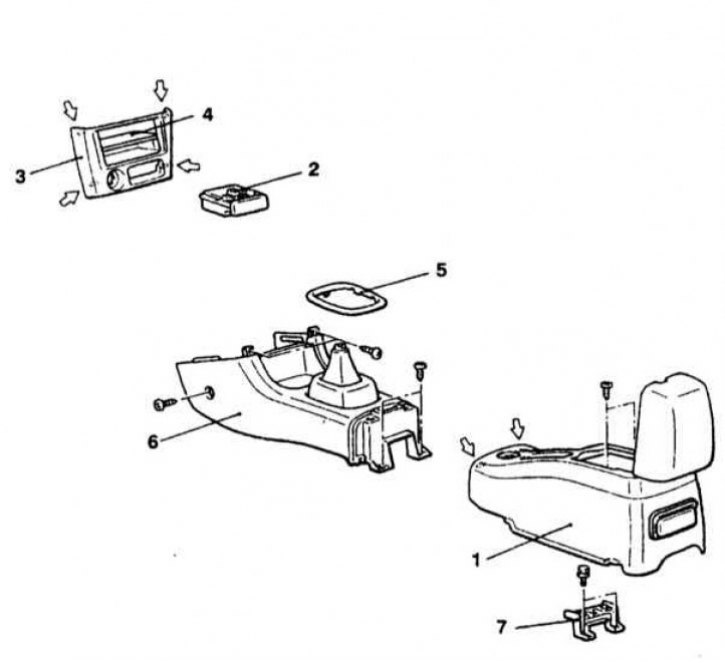
Installation details of the center console sections on Galant models since 1999 vol.
1 - Facing of the gear lever; 2 - Cup holder (models without armrests); 3 - Armrest (models with armrests); 4 - Support bracket A (models to be with armrests); 5 - Console assembly; 6 - Lower central trim panel; 7 - Ashtray; 8 - Support bracket C; 9 - Support bracket A
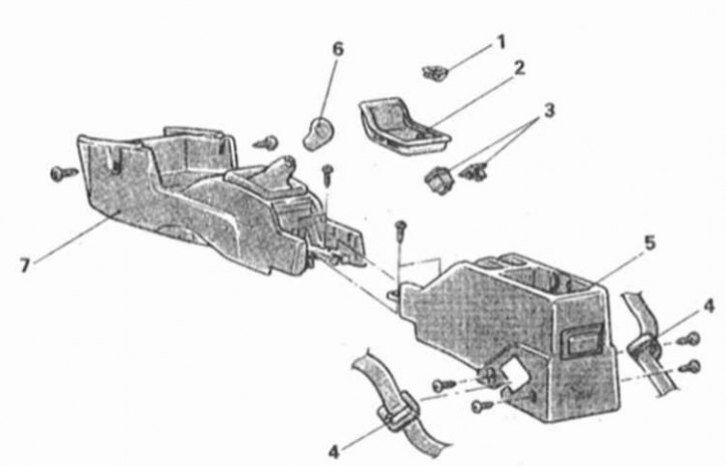
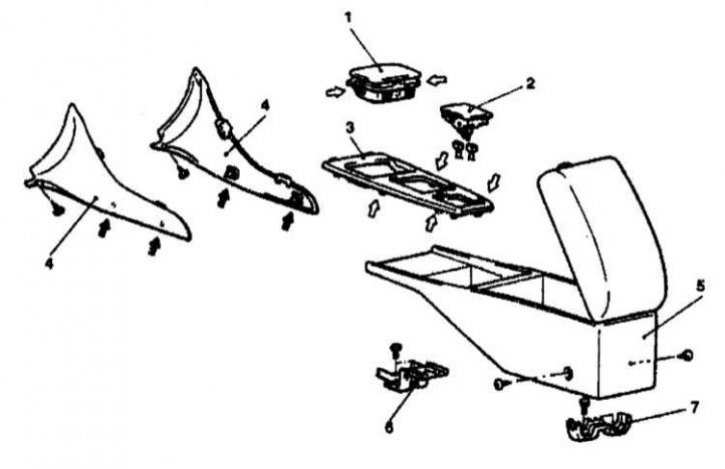
Installation details of the center console sections on Diamante models 1992÷1996. issue
1 - Ashtray / switch panel; 2 - Switch / plug; 3 - Console assembly
Installation details of the center console sections on Diamante models since 1997 vol.
1 - Cup holder; 2 - Coin holder; 3 - Finishing panel; 4 - Side covers; 5 - Console assembly; 6 - Support bracket A; 7 - Support bracket C
Rear section
Removing
1. The installation details of the rear section of the center console are shown in the illustrations.
2. Disconnect the negative cable from the battery.
Attention! If the stereo system installed in the car is equipped with a security code, before disconnecting the battery, make sure that you have the correct combination to activate the audio system!
Attention! On models equipped with airbag (amii) safety, wrap the end of the wire with electrical tape and start working after at least 60 seconds, during which the SRS should turn off!
3. Open the lid of the console storage box.
4. If necessary, fold back the edge of the carpet at the bottom of the cantilever assembly.
5. Remove the mounting screws along the bottom rear section of the cantilever assembly.
6. If necessary, remove the plugs and remove the front fixing screws.
7. Raise the console and remove it from the vehicle.
Note. On some models, the seat belts are threaded through the cantilever assembly and must be carefully released from the cantilever assembly.
Installation
Installation is in the reverse order.
Front section
Removing
1. The installation details of the front section of the center console are shown in the illustrations.
2. Disconnect the negative cable from the battery.
Attention! If the stereo system installed in the car is equipped with a security code, before disconnecting the battery, make sure that you have the correct combination to activate the audio system!
Attention! On models equipped with airbag (amii) safety, wrap the end of the wire with electrical tape and start working after at least 60 seconds, during which the SRS should turn off!
3. If necessary, remove the rear section of the console.
4. If necessary, remove the ashtray and cup holder.
5. If necessary, remove the carpet inserts of the cantilever assembly.
6. On models with a manual transmission, remove the handle from the gear lever.
7. On models with АТ remove the facing panel of the selector lever.
8. Remove plugs, turn out fixing screws and remove lateral covers of the console.
9. Remove the front mounting screw caps.
10. Having previously marked, disconnect all electrical wiring brought to the console assembly.
11. Turn out fixing screws and remove console assembly.
Installation
Installation is in the reverse order.