English Русский
Български
Беларускі
Український
Српски
Hrvatski
Română
Polski
Slovenský
Magyar
Articles Bookmark Contacts Sitemap   
Company Audi Company Ford Company Hyundai Company Kia Company Mazda Company Mercedes-Benz Company Nissan
MitsubishiMan.ru


Home Colt Lancer Galant L200 Outlander Pajero Others
Galant 6 and 7 (1987-1998) Galant 5 (1983-1989, petrol)

Removal and installation seats (Mitsubishi Galant 6)

  • Home
  • Galant
  • 6 (1987-1998)
  • Body and interior
  • Interior (internal elements)
  • Removal and installation seats
0
Contents: Front seats ⤓ Rear seat cushion ⤓ Rear seat backs ⤓


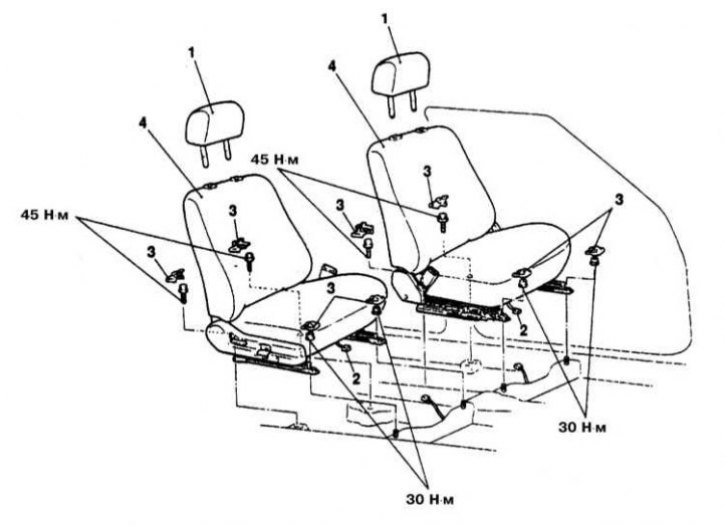
Front Seat Installation Details
1 - Headrests; 2 - Electrical wiring connectors; 3 - Anchor bolt covers; 4 - Seat assemblies


Front seats


Removal


1. Front seat installation details are shown in the illustration.

2. Disconnect the negative cable from the battery.

Warning! If the car stereo system is equipped with a security code, make sure you have the correct combination to activate the audio system before disconnecting the battery!


3. If the vehicle is equipped with a drive motor failure, the seat must be moved manually to gain access to the fasteners. Loosen the bolts securing the drive box to the left and right ends of the guide rails. Remove the drive shaft on the left side and pull the box to the right towards you, then disconnect the transmission from the side rail. Move the seat manually to gain access to the fasteners.

4. Remove the decorative covers of the anchor bolts.

5. If equipped, disconnect the corresponding electrical wiring.

6. Loosen the mounting bolts/nuts, remove the seat and take it out of the vehicle interior.


Installation


1. Install the seat in its regular place - make sure that the regulators on both sides of the seat are locked correctly.

2. First, temporarily tighten the front mounting nuts, then the rear bolts.

3. In the same order, finally tighten the fasteners to the required torque (30 Nm: nuts and 44 Nm: bolts).

4. Install decorative anchor bolt covers.

5. If equipped, restore the original electrical wiring connection.

6. Connect the negative cable to the battery.

Rear seat cushion


Removal
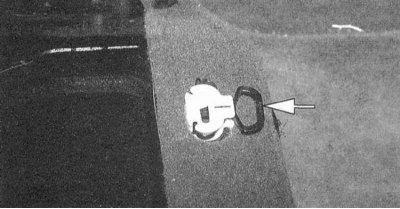


1. Locate the retaining clips located under the lower front edge of the rear seat cushion.
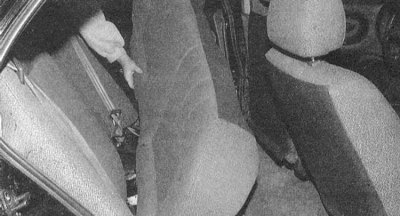


2. Pull the handles of the locking brackets to lift the cushion and remove it from the vehicle interior.

Installation


Install the cushion in its regular place and press firmly. Make sure that the cushion is securely fixed with the locking brackets.


Rear seat backs


Removal


1. Remove the rear seat cushion (see above).
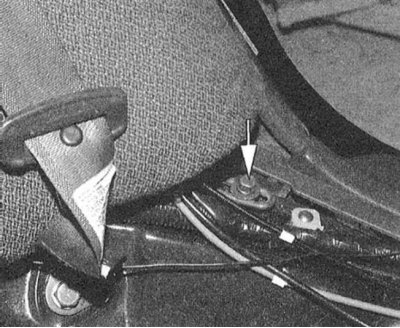


2. Loosen the mounting bolts/nuts, remove the corresponding rear seat back and take it out of the vehicle interior.
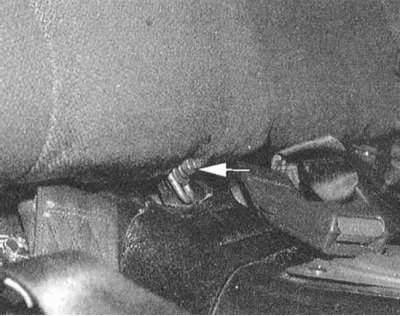

Installation


1. Install the backrest in its regular place and tighten the mounting bolts/nuts to the required torque (22 Nm).

2. Replace the seat cushion.
This article is available at: russian, bulgarian, belarusian, ukrainian, serbian, croatian, romanian, polish, slovak, hungarian
This article was reviewed by: Dmitry Vasiliev
Share with friends:
◀ Previous
Galant 6 and 7: Interior (internal elements)
Next ▶

Replacing the interior rear view mirror
Removal and installation interior door trim panels
Removal and installation the center console
Removal and installation the instrument panel
Caring for upholstery and carpeting
Removal and installation the seat drive electric motor
Similar materials for other Mitsubishi models

➤ Valves, valve seats and guides — inspection and repair Mitsubishi Colt 4 and 5 (1991-2003)
➤ Lapping of diesel engine valve seats Mitsubishi Lancer 3 and 5 (1984-1992)
➤ Seats with electrically adjustable positions Mitsubishi L200 4 (2005-2014, diesel)
➤ Electrically heated seats Mitsubishi Outlander 1 (2003-2008)
➤ Folding the seats Mitsubishi Pajero 1 and 2 (1982-1999)
➤ Front seats — removal and installation Mitsubishi Carisma (1995-2004)
Link in different formats to this article
Comments and feedback from visitors
No comments yet


Add up two numbers 16 + 23


Galant 6 and 7 (1987-1998) 
  • General information
  • Introduction to guide
  • User manual
  • Driving and operation
  • Maintenance
  • Power unit
  • Dismantling the engine
  • Engine overhaul
  • Cooling and heating
  • Power and exhaust systems
  • Engine electrical equipment
  • Engine management systems
  • Transmission
  • Mechanical gearbox
  • Automatic gearbox
  • Clutch
  • Drive shafts and transfer case
  • Chassis and running gear
  • Brake system
  • Car suspension
  • Steering
  • Body and interior
  • Exterior (external elements)
  • Interior (internal elements)
  • Doors, locks and windows
  • Electrical equipment
  • Equipment and devices
  • Wiring diagrams Galant
  • Wiring diagrams Mirage
  • Wiring diagrams Diamante
Galant 5 (1983-1989, petrol) 
  • General information
  • Troubleshooting
  • Maintenance
  • Power unit
  • Engine repair
  • Engine overhaul
  • Cooling and heating
  • Fuel and exhaust system
  • Engine electrical equipment
  • Reducing exhaust toxicity
  • Transmission
  • Manual gearbox
  • Automatic gearbox
  • Clutch and drive shafts
  • Chassis and running gear
  • Brake system
  • Car suspension
  • Steering
  • Body and interior
  • Exterior (external elements)
  • Interior (internal elements)
  • Doors, locks and windows
  • Electrical equipment
  • Equipment and devices
  • Electrical diagrams
MitsubishiMan.ru © 2018–2026 • Mobile version • Articles about Mitsubishi • Contacts • Sitemap: EN BG BY UA RS HR RO PL SK HU • Site search • Bookmark
Colt 2 and 3 (1983-1993) · Colt 4 and 5 (1991-2003) · Colt 5 (1995-2003) · Lancer 3 and 5 (1984-1992) · Lancer 9 (2000-2007) · Galant 5 (1983-1989) · Galant 6 and 7 (1987-1998) · L200 4 (2005-2014) · Outlander 1 (2003-2008) · Pajero 1 and 2 (1982-1999) · Pajero 4 (2006-2021) · Carisma (1995-2004) · Space Star (1998-2005) ·
This resource sets cookies 🍪 to avoid bothering you with repeated data entry.