
Share with friends:
Brake system of the car Mitsubishi Galant 6 and 7

General information about the brake system
All car models covered in this manual are equipped with a hydraulic brake system with vacuum boost. Disc brakes are always installed on the front wheels, both disc and...
All car models covered in this manual are equipped with a hydraulic brake system with vacuum boost. Disc brakes are always installed on the front wheels, both disc and...

Brake Specifications
Common parameters Type of brake fluid see chapter Settings and ongoing maintenance Gap between the sensor-switch of stoplights and an emphasis of a pedal, mm See the...
Common parameters Type of brake fluid see chapter Settings and ongoing maintenance Gap between the sensor-switch of stoplights and an emphasis of a pedal, mm See the...

Replacement of the gauge switch of stoplights
Removing 1. The brake light switch is fixed to the foot brake pedal bracket with a lock nut. 2. Disconnect the negative cable from the battery. If the stereo system...
Removing 1. The brake light switch is fixed to the foot brake pedal bracket with a lock nut. 2. Disconnect the negative cable from the battery. If the stereo system...

Removal and installation of the main brake cylinder
GTZ installation details on Diamante models 1 - GTZ assembly; 2 - Vacuum hose (with built-in control valve); 3 - Pin for fastening the split finger of the pusher rod; 4...
GTZ installation details on Diamante models 1 - GTZ assembly; 2 - Vacuum hose (with built-in control valve); 3 - Pin for fastening the split finger of the pusher rod; 4...

Foot brake pedal adjustment
Pedal Height Adjustment 1.Measure the height of the pedal shoe position relative to the floor panel (excluding carpeting). If the measurement result is out of range...
Pedal Height Adjustment 1.Measure the height of the pedal shoe position relative to the floor panel (excluding carpeting). If the measurement result is out of range...

Check of serviceability and tightness, removal and installation of the vacuum amplifier of brakes
Details of installation of assembly of the vacuum amplifier of brakes 1 - Mounting block for the relay of the air conditioning system; 2 - Solenoid valve; 3 - Contact...
Details of installation of assembly of the vacuum amplifier of brakes 1 - Mounting block for the relay of the air conditioning system; 2 - Solenoid valve; 3 - Contact...
Removal and installation of the valve regulator
Brake fluid is one of the aggressive chemical compounds and, in contact with body panels, destroys the paintwork. Before proceeding with the procedure, cover the wings...
Brake fluid is one of the aggressive chemical compounds and, in contact with body panels, destroys the paintwork. Before proceeding with the procedure, cover the wings...

Removal and installation of brake lines
Attention! Remember that the brake fluid drained from the tract cannot be reused! Rules for servicing the lines of the hydraulic path 1. Checking the condition of metal...
Attention! Remember that the brake fluid drained from the tract cannot be reused! Rules for servicing the lines of the hydraulic path 1. Checking the condition of metal...
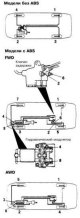
Bleeding the brake system
Attention! Bleed the brake system while wearing goggles. If brake fluid accidentally gets into your eyes, rinse immediately with plenty of water and seek medical...
Attention! Bleed the brake system while wearing goggles. If brake fluid accidentally gets into your eyes, rinse immediately with plenty of water and seek medical...
Disc brakes — general information
The principle of operation of disc brake mechanisms is extremely simple: when the foot brake pedal is depressed, the brake disc, rigidly articulated with the wheel...
The principle of operation of disc brake mechanisms is extremely simple: when the foot brake pedal is depressed, the brake disc, rigidly articulated with the wheel...

Assessment of the condition of the brake pads
Warning! Remember that the dust produced during the operation of the brake mechanisms may contain asbestos, which is extremely harmful to human health. Never blow off...
Warning! Remember that the dust produced during the operation of the brake mechanisms may contain asbestos, which is extremely harmful to human health. Never blow off...

Replacing disc brake pads
The design of the front wheel disc brake of Mirage models (for Galant models up to 1993 vol. there is a similar picture) 1 - Brake hose; 2 - Sealing washers; 3 -...
The design of the front wheel disc brake of Mirage models (for Galant models up to 1993 vol. there is a similar picture) 1 - Brake hose; 2 - Sealing washers; 3 -...

Removal and installation of brake calipers
Warning! Remember that the dust produced during the operation of the brake mechanisms may contain asbestos, which is extremely harmful to human health. Never blow off...
Warning! Remember that the dust produced during the operation of the brake mechanisms may contain asbestos, which is extremely harmful to human health. Never blow off...

Reconditioning of disc brake caliper
Note. Some models use twin-cylinder disc brake calipers. The refurbishment of such calipers is carried out in the same way as described below for single-cylinder...
Note. Some models use twin-cylinder disc brake calipers. The refurbishment of such calipers is carried out in the same way as described below for single-cylinder...

Removal, condition check and installation of a brake disk
Warning! Remember that the dust produced during the operation of the brake mechanisms may contain asbestos, which is extremely harmful to human health. Never blow off...
Warning! Remember that the dust produced during the operation of the brake mechanisms may contain asbestos, which is extremely harmful to human health. Never blow off...

Drum brakes — general information
Typical drum brake design 1 - Spring fastening the shoe to the regulator lever; 2 - Upper coupling spring; 3 - Assembling the regulator; 4 - Wheel cylinder; 5 -...
Typical drum brake design 1 - Spring fastening the shoe to the regulator lever; 2 - Upper coupling spring; 3 - Assembling the regulator; 4 - Wheel cylinder; 5 -...

Removal, installation and check of a condition of a brake drum
The design of the drum brake mechanism used on Mirage models up to 1992, no. 1 - Hub nut cover; 2 - Hub nut; 3 - Inner race of the outer bearing; 4 - Brake drum; 5 -...
The design of the drum brake mechanism used on Mirage models up to 1992, no. 1 - Hub nut cover; 2 - Hub nut; 3 - Inner race of the outer bearing; 4 - Brake drum; 5 -...

Checking the condition of the brake shoes
Warning! Remember that the dust produced during the operation of the brake mechanisms may contain asbestos, which is extremely harmful to human health. Never blow off...
Warning! Remember that the dust produced during the operation of the brake mechanisms may contain asbestos, which is extremely harmful to human health. Never blow off...

Removal and installation of brake shoes
Warning! Remember that the dust produced during the operation of the brake mechanisms may contain asbestos, which is extremely harmful to human health. Never blow off...
Warning! Remember that the dust produced during the operation of the brake mechanisms may contain asbestos, which is extremely harmful to human health. Never blow off...

Adjustment of drum brakes
1. Drum brakes are adjusted automatically during vehicle operation. In addition, manual adjustment should also be made every time the brake shoes or brake assembly...
1. Drum brakes are adjusted automatically during vehicle operation. In addition, manual adjustment should also be made every time the brake shoes or brake assembly...

Removal, refurbishment and installation of wheel cylinders
Details of installation of the wheel cylinder of the drum brake mechanism (Galant models) 1 - Brake drum; 2 - Spring fastening the shoe to the adjusting lever; 3 - Upper...
Details of installation of the wheel cylinder of the drum brake mechanism (Galant models) 1 - Brake drum; 2 - Spring fastening the shoe to the adjusting lever; 3 - Upper...

Removing and installing the parking brake cable (s)
The design of the parking brake drive on Galant models manufactured in 1994÷1995, equipped with rear wheel disc brakes 1 - Assembly of the brake mechanism; 2 - Brake...
The design of the parking brake drive on Galant models manufactured in 1994÷1995, equipped with rear wheel disc brakes 1 - Assembly of the brake mechanism; 2 - Brake...

Parking brake adjustment
Mirage Models Attention! On models equipped with rear wheel drum brakes, the brake shoes of the main brake must first be adjusted. 1. Check up freedom of a course of a...
Mirage Models Attention! On models equipped with rear wheel drum brakes, the brake shoes of the main brake must first be adjusted. 1. Check up freedom of a course of a...

Removing and installing parking brake friction shoes (with disc brakes)
Parking brake actuator components on Galant models since 1994 vol. with rear wheel disc brakes 1 - Brake caliper; 2 - Brake disc; 3 - Anchor spring of the rear shoe; 4 -...
Parking brake actuator components on Galant models since 1994 vol. with rear wheel disc brakes 1 - Brake caliper; 2 - Brake disc; 3 - Anchor spring of the rear shoe; 4 -...

Anti-Lock Brake System (ABS) — Information, Diagnostics and Fault Codes
General information When the vehicle is equipped with a conventional brake system, depressing the foot brake pedal suddenly causes the wheels to lock. In this case, the...
General information When the vehicle is equipped with a conventional brake system, depressing the foot brake pedal suddenly causes the wheels to lock. In this case, the...

Removal and installation of the hydraulic modulator
Installation details of hydraulic modulator assembly on Diamante models 1 - Electrical wiring connectors; 2 - Support bracket for wiring harness; 3 - Bandage; 4 -...
Installation details of hydraulic modulator assembly on Diamante models 1 - Electrical wiring connectors; 2 - Support bracket for wiring harness; 3 - Bandage; 4 -...

Removal and installation of the ABS control unit
ABS ECU location and installation details on Galant and Diamante models 1 - ECU wiring connector; 2 - ECU; 3 - Support bracket ABS ECU location and installation details...
ABS ECU location and installation details on Galant and Diamante models 1 - ECU wiring connector; 2 - ECU; 3 - Support bracket ABS ECU location and installation details...

Removal and installation of wheel sensors
Installation details of the front and rear wheel speed sensors on Mirage models 1 - Retainer; 2 - Front wheel speed sensor; 3 - Sensor rotor; 4 - Rear wheel speed...
Installation details of the front and rear wheel speed sensors on Mirage models 1 - Retainer; 2 - Front wheel speed sensor; 3 - Sensor rotor; 4 - Rear wheel speed...

Removal and installation of acceleration sensors (G-sensors)
Installation details for G-sensors on 4WD Galant models through 1993 vol. Front G-sensor : 1 - Electrical wiring connector; 2 - Front acceleration sensor; 3 - Sensor...
Installation details for G-sensors on 4WD Galant models through 1993 vol. Front G-sensor : 1 - Electrical wiring connector; 2 - Front acceleration sensor; 3 - Sensor...
Replacing wheel sensor rotors
Front sensor rotors Removing 1. Jack up the car and put it on stands. 2. Remove the corresponding wheel. 3. Remove the wheel sensor and, without disconnecting the wiring...
Front sensor rotors Removing 1. Jack up the car and put it on stands. 2. Remove the corresponding wheel. 3. Remove the wheel sensor and, without disconnecting the wiring...
This section is available on: russian, bulgarian, belarusian, ukrainian, serbian, croatian, romanian, polish, slovak, hungarian
Similar materials for other Mitsubishi models
➤ Chassis and running gear: Brake system Mitsubishi Colt 4 and 5 (1991-2003)
➤ Chassis and running gear: Brake system Mitsubishi Lancer 3 and 5 (1984-1992)
➤ Chassis and running gear: Brake system Mitsubishi L200 4 (2005-2014, diesel)
➤ Chassis and running gear: Brake system Mitsubishi Outlander 1 (2003-2008)
➤ Chassis and running gear: Brake system Mitsubishi Pajero 1 and 2 (1982-1999)
➤ Chassis and running gear: Brake system Mitsubishi Carisma (1995-2004)
Link in different formats to this section
TEXTHTMLBB Code
- General information
- Introduction to guide
- User manual
- Driving and operation
- Maintenance
- Power unit
- Dismantling the engine
- Engine overhaul
- Cooling and heating
- Power and exhaust systems
- Engine electrical equipment
- Engine management systems
- Transmission
- Mechanical gearbox
- Automatic gearbox
- Clutch
- Drive shafts and transfer case
- Chassis and running gear
- Brake system
- Car suspension
- Steering
- Body and interior
- Exterior (external elements)
- Interior (internal elements)
- Doors, locks and windows
- Electrical equipment
- Equipment and devices
- Wiring diagrams Galant
- Wiring diagrams Mirage
- Wiring diagrams Diamante
MitsubishiMan.ru © 2018–2024 • Mobile version • Articles about Mitsubishi • Contacts • Sitemap: EN BG BY UA RS HR RO PL SK HU • Site search • Bookmark
Colt 2 and 3 (1983-1993) · Colt 4 and 5 (1991-2003) · Colt 5 (1995-2003) · Lancer 3 and 5 (1984-1992) · Lancer 9 (2000-2007) · Galant 6 and 7 (1987-1998) · L200 4 (2005-2014) · Outlander 1 (2003-2008) · Pajero 1 and 2 (1982-1999) · Carisma (1995-2004) · Space Star (1998-2005) ·
Colt 2 and 3 (1983-1993) · Colt 4 and 5 (1991-2003) · Colt 5 (1995-2003) · Lancer 3 and 5 (1984-1992) · Lancer 9 (2000-2007) · Galant 6 and 7 (1987-1998) · L200 4 (2005-2014) · Outlander 1 (2003-2008) · Pajero 1 and 2 (1982-1999) · Carisma (1995-2004) · Space Star (1998-2005) ·