



Contents: Removal ⤓ Installation ⤓
Removal
To remove, follow these steps.
1. Remove the rear floor console assembly.
Caution: When removing and installing the rear floor console assembly for vehicles equipped with the SRS system, do not allow impact to the SRS control unit.
2. Using a screwdriver blade as a lever, remove the heated seat switch (on vehicles equipped with heated seats).
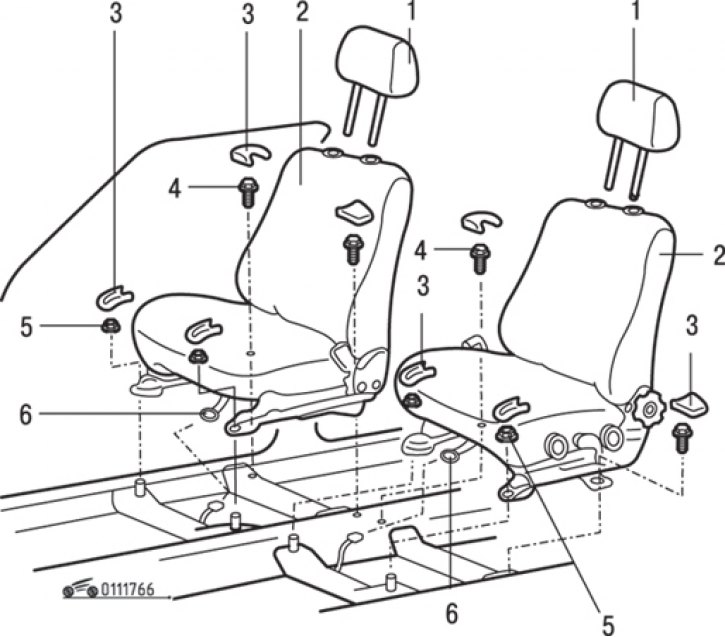
Fig. 17.66. Front seats: 1 – headrest; 2 – front seat assembly; 3 – protective cover of the fastening element; 4 – bolt (49 Nm); 5 – nut (49 Nm); 6 – wiring connector (on vehicles equipped with a seat heating system)
3. Remove headrests 1 (Fig. 17.66)
4. Disconnect connectors 6 (on vehicles equipped with a seat heating system).
5. Remove the protective covers of the 3 fastening elements.
6. Unscrew nuts 5 and bolts 4 and remove the front seats 2 as an assembly.
Installation
Installation is carried out in the reverse order of removal.
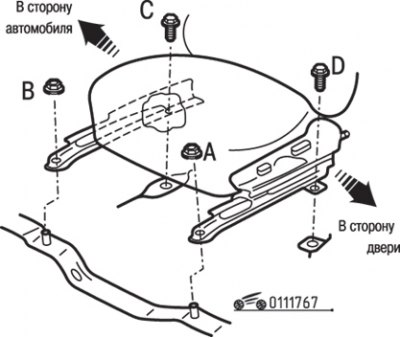
Fig. 17.67. Sequence (A, B, C and D) of tightening the bolts and nuts securing the front seat
1. Tighten the front seat mounting bolts in the sequence A, B, C and D shown in Fig. 17.67.
2. After preliminary tightening of the seat fastening elements (bolts and nuts), after installing them in place, finally tighten the nuts to a torque of 25 N·m, the bolts to a torque of 49 N·m.