



Share with friends:
Front suspension and shafts of the car Mitsubishi Carisma


General information about the front suspension
Fig. 15.1. Front suspension The suspension is the link between the body and the wheels (Fig. 15.1). It transmits forces acting on the wheels to the body. The suspension...
Fig. 15.1. Front suspension The suspension is the link between the body and the wheels (Fig. 15.1). It transmits forces acting on the wheels to the body. The suspension...

Front Wheel Hub — Removal, Inspection and Installation
Removal To remove the front wheel hub, perform the following operations in sequence. 1. Loosen the front wheel mounting bolts. Apply the parking brake, then raise the...
Removal To remove the front wheel hub, perform the following operations in sequence. 1. Loosen the front wheel mounting bolts. Apply the parking brake, then raise the...

Drive shaft — removal and installation
Removal To remove the drive shaft, perform the following operations. 1. Remove the brake hose retainer, wheel speed sensor wire connector (vehicles with ABS) and...
Removal To remove the drive shaft, perform the following operations. 1. Remove the brake hose retainer, wheel speed sensor wire connector (vehicles with ABS) and...

Repair of drive shafts
Attention! Do not disassemble the Birfeld CV joint (BJ), except in cases of replacing the protective cover (supplied in the repair kit) of the Birfeld CV joint (BJ)....
Attention! Do not disassemble the Birfeld CV joint (BJ), except in cases of replacing the protective cover (supplied in the repair kit) of the Birfeld CV joint (BJ)....

Checking and adjusting the front wheel alignment angles
Wheel alignment angles have a significant impact on vehicle stability, tire wear and fuel consumption. Before measuring the front wheel alignment angles, park the...
Wheel alignment angles have a significant impact on vehicle stability, tire wear and fuel consumption. Before measuring the front wheel alignment angles, park the...
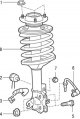
Front strut assembly — removal, inspection and installation
Removal To remove the front strut, perform the following operations. 1. Loosen the front wheel mounting bolts. Apply the parking brake, then raise the front of the...
Removal To remove the front strut, perform the following operations. 1. Loosen the front wheel mounting bolts. Apply the parking brake, then raise the front of the...
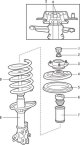
Front suspension strut repair
Caution! To remove and disassemble the front suspension strut, you must use a ball joint puller and a spring compressor. Disassembly Fig. 15.25. Elements of the front...
Caution! To remove and disassemble the front suspension strut, you must use a ball joint puller and a spring compressor. Disassembly Fig. 15.25. Elements of the front...

Lower Front Suspension Arm — Removal, Inspection and Installation
Removal To remove the lower arm, perform the following operations. Use a ball joint puller to disconnect the lower control arm ball joint pin from the steering knuckle....
Removal To remove the lower arm, perform the following operations. Use a ball joint puller to disconnect the lower control arm ball joint pin from the steering knuckle....

Replacing the rear lower control arm bushing on vehicles with SOHC engines
1. Wet the connection between the lever axle and the old bushing with soapy water, then use a screwdriver to remove the old bushing. Fig. 15.32. Installing the rear...
1. Wet the connection between the lever axle and the old bushing with soapy water, then use a screwdriver to remove the old bushing. Fig. 15.32. Installing the rear...
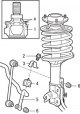
Anti-roll bar — removal and installation
Removal 1. Remove the cross beam. Fig. 15.33. Anti-roll bar on models produced since 1995: a - places of lubrication application; 1 – stabilizer bar for lateral...
Removal 1. Remove the cross beam. Fig. 15.33. Anti-roll bar on models produced since 1995: a - places of lubrication application; 1 – stabilizer bar for lateral...

Replacing the protective cover of the ball joint of the stabilizer bar
1. Remove the anti-roll bar. Fig. 15.36. Using a screwdriver to remove the round retainer (1) of the protective cover 2. Remove the round retainer and protective cover...
1. Remove the anti-roll bar. Fig. 15.36. Using a screwdriver to remove the round retainer (1) of the protective cover 2. Remove the round retainer and protective cover...
This section is available on: russian, bulgarian, belarusian, ukrainian, serbian, croatian, romanian, polish, slovak, hungarian
Similar materials for other Mitsubishi models
➤ Chassis and running gear: Front suspension Mitsubishi Colt 4 and 5 (1991-2003)
➤ Chassis and running gear: Front suspension Mitsubishi Lancer 3 and 5 (1984-1992)
➤ Chassis and running gear: Front suspension Mitsubishi Outlander 1 (2003-2008)
➤ Chassis and running gear: Front suspension Mitsubishi Pajero 4 (2006-2021)
Link in different formats to this section
TEXTHTMLBB Code
- General information
- User manual
- Maintenance
- Power unit
- Petrol engines 4G9
- Diesel engines FBQT
- Diesel engines F9Q
- Cooling system
- Injection system (MPI)
- Injection system (GDI)
- Engine electrical equipment
- Transmission
- Clutch
- Mechanical gearbox
- Automatic gearbox
- Chassis and running gear
- Steering
- Brake system
- Front suspension and shafts
- Rear suspension
- Body and interior
- Exterior (external elements)
- Interior (internal elements)
- Doors, locks and windows
- Air conditioner
- Electrical equipment
- Equipment and devices
- Headlights and lighting
- Electrical circuits
- General information
- User manual
- Maintenance
- Power unit
- Petrol engines 4G9
- Petrol engines 4G1
- Diesel engines F9Q1
- Cooling system
- Fuel injection system GDI
- Fuel injection system MPI
- Diesel supply system F9Q1
- Ignition system
- Diesel preheating
- Transmission
- Clutch
- Mechanical gearbox
- Automatic gearbox
- Chassis and running gear
- Suspension and drive shafts
- Brake system
- Steering
- Body and interior
- Exterior (external elements)
- Interior (internal elements)
- Doors, locks and windows
- Heating and air conditioning
- Electrical equipment
- Power devices
- Equipment and devices