Contents: Table. Fuses in the passenger…⤓ Replacing headlight bulbs ⤓ Table. Fuses in the engine…⤓ Table. Lamp power. ⤓ Fog Light Bulb Replacement…⤓ Replacing the turn signal repeater…⤓ Replacing the additional brake light…⤓ Replacing the license plate light…⤓
When replacing a bulb, make sure the ignition and all lights are off. Use only bulbs with the rated power specified in the table.
Attention:
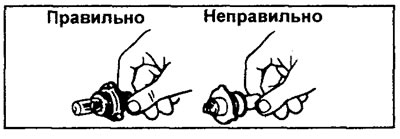
- New halogen bulbs require special handling due to the increased pressure inside. They may rupture or break if scratched or dropped.
- Hold the lamp only by its plastic or metal body. Do not touch the glass part of the lamp with bare hands, dirty gloves, etc. If the glass surface of the lamp is dirty, it must be cleaned with alcohol, dried thoroughly, and only then installed.
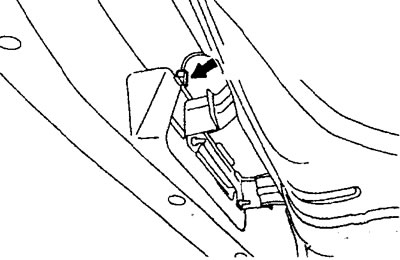
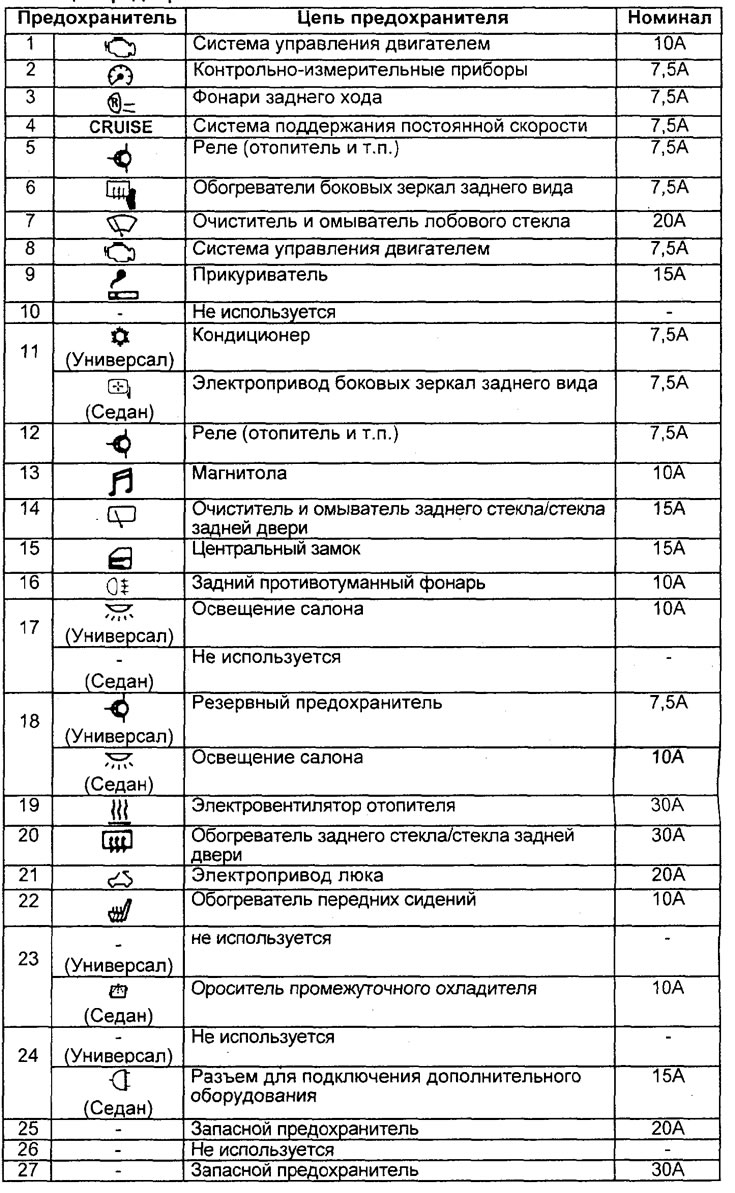
Table. Fuses in the passenger compartment block.
- Installing a lamp with a power higher than the rated power will damage the diffuser.
Replacing headlight bulbs
Models with separate low and high beam headlights
1. Replacing the low beam headlight bulb.
a) Disconnect the cable from the positive terminal of the battery.
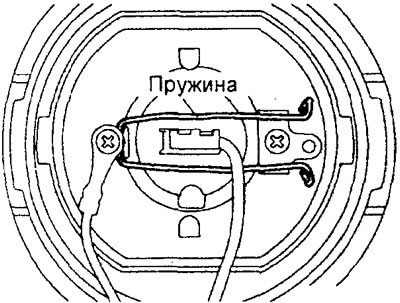
b) Disconnect the lamp connector, remove the lamp holder cover, then unfasten the lamp retaining spring and remove the lamp from the headlight.
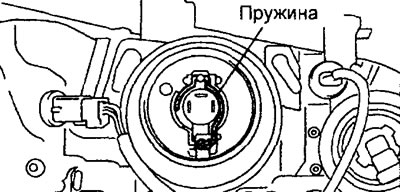
c) After replacing the lamp, make sure the lamp connector is securely connected.
2. Replacing the high beam headlight bulb.
a) Disconnect the cable from the positive terminal of the battery.
b) Disconnect the lamp connector.
c) Remove the lamp holder by turning it counterclockwise, then remove the lamp from the holder.
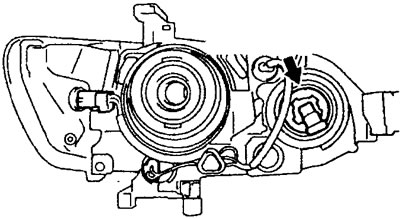
d) After replacing the lamp, make sure that the lamp connector is securely connected.
3. Replacing the additional side light bulb.
Remove the lamp holder and take the lamp out of the holder.
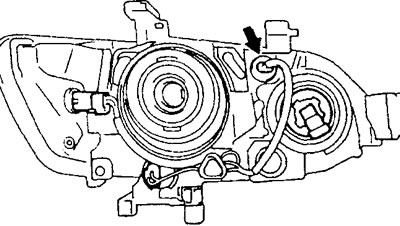
4. Replacing the front parking light bulb. Disconnect the front parking light bulb connector, remove the bulb holder by turning it counterclockwise, then remove the bulb from the holder.
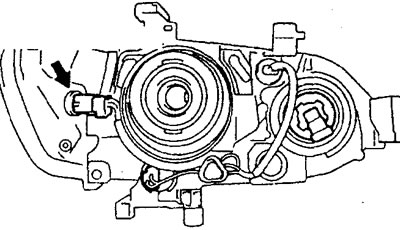
5. Replacing the front turn signal lamp.
Disconnect the front turn signal lamp connector, remove the lamp holder by turning it counterclockwise, then remove the lamp from the holder.
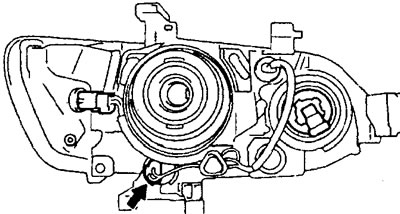
Models with single low and high beam headlights
1. Replacing a single low beam and high beam headlight bulb.
a) Disconnect the cable from the positive terminal of the battery.
Table. Fuses in the engine compartment block.
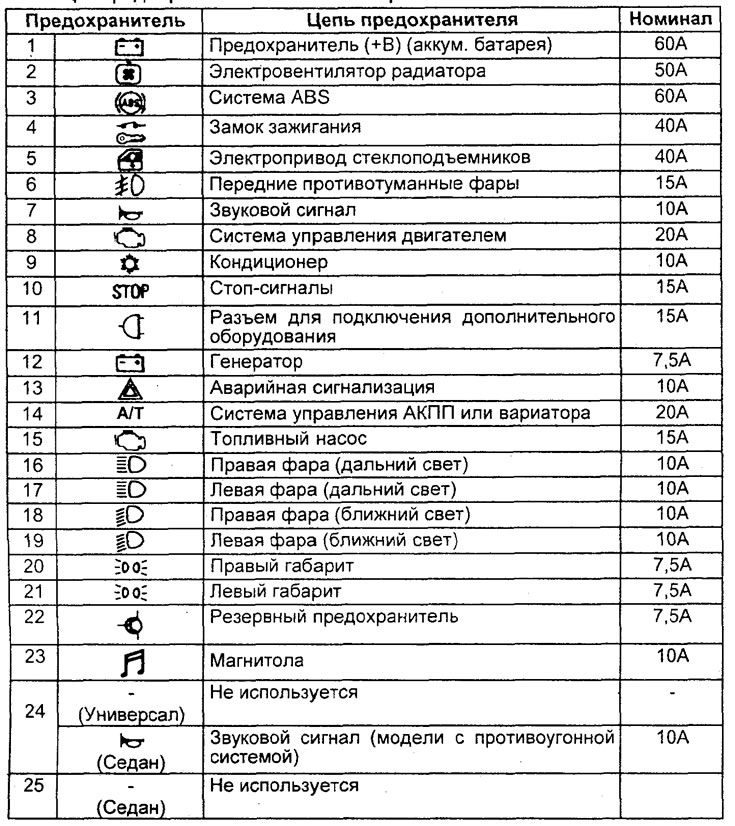
Table. Lamp power.
| Purpose of lamps | Tue |
| High beam lamp | 60 |
| Low beam lamp | 55 |
| Parking light bulbs | 5 |
| Front direction indicator lamps | 21 |
| Turn signal repeater lamps | 5 - |
| License plate lights | 5 |
| Rear side light bulbs | 5 |
| Brake and tail light bulbs | 21/5 |
| Rear turn signal lamps | 21 |
| Reversing light bulbs | 16 |
| Interior lighting lamp | 8 |
| Local lighting lamps | 7,5 |
| Luggage compartment light | 5 |
| Additional brake light bulb | 21 |
b) Disconnect the lamp connector, remove the lamp holder cover, then unfasten the lamp retaining spring and remove the lamp from the headlight.
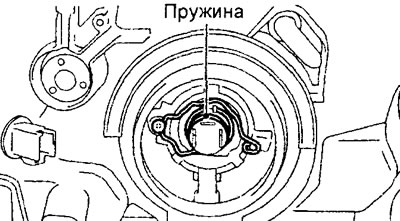
c) After replacing the lamp, make sure the lamp connector is securely connected.
2. Replacing the front side light bulb,
a) Disconnect the lamp connector.
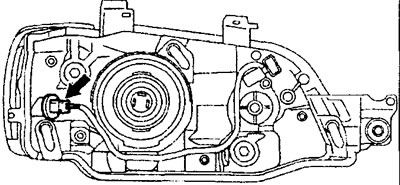
b) Remove the lamp holder by turning it counterclockwise, then remove the lamp from the holder.
3. Replacing the turn signal lamp,
a) Disconnect the lamp connector.
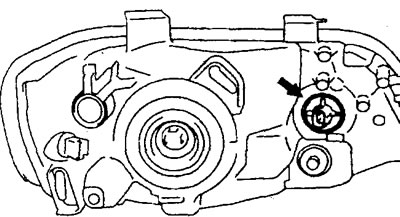
b) Remove the lamp holder by turning it counterclockwise, then remove the lamp from the holder.
Fog Light Bulb Replacement (modifications)
Unclip the bulb retaining spring, then remove the bulb from the headlight and replace it.
Replacing the turn signal repeater bulb
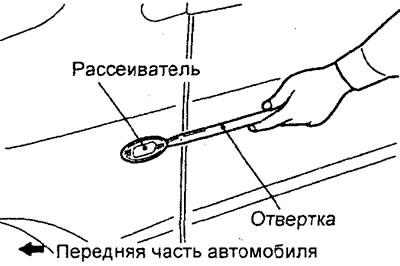
1. Insert a flat-head screwdriver under the edge of the turn signal lens, then carefully pry the lens out.
Note: Before use, please wrap the screwdriver with protective tape.
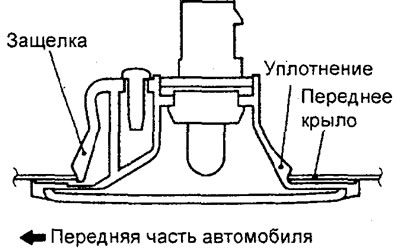
2. Disconnect the bulb connector and remove the side turn signal assembly.
3. Remove the lamp holder assembly by turning it counterclockwise, then remove the lamp from the holder.
Replacing the additional brake light bulb
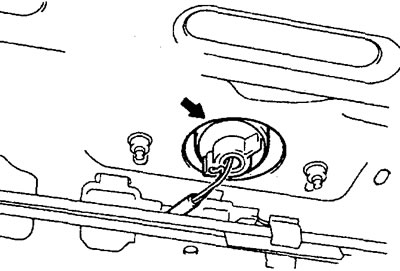
Remove the lamp holder and bulb assembly from the vehicle's luggage compartment and replace the additional brake light bulb.
Replacing the license plate light bulb
Remove the license plate light bulb socket from the inside of the rear bumper and replace the bulb.