




Share with friends:
Electrical equipment and appliances Mitsubishi Lancer 3 and 5

Search for electrical equipment failures
When troubleshooting electrical equipment, the first step is to check the fuse if the electrical unit is protected by one. The location of the fuses is shown on the fuse...
When troubleshooting electrical equipment, the first step is to check the fuse if the electrical unit is protected by one. The location of the fuses is shown on the fuse...
Checking switches
Most electrical consumers are switched on and off by switches that are operated manually. In addition, there are switches that operate automatically. These include, for...
Most electrical consumers are switched on and off by switches that are operated manually. In addition, there are switches that operate automatically. These include, for...
Checking the relay
Relays operate in many current circuits. A turn-on relay operates like a switch. Example: When the manual switch is turned on, the relay receives the command to connect...
Relays operate in many current circuits. A turn-on relay operates like a switch. Example: When the manual switch is turned on, the relay receives the command to connect...

Checking the windshield wiper motor
The windshield wiper motor is located in the water collection compartment under the windshield, the rear window wiper is in the tailgate. To check, remove the...
The windshield wiper motor is located in the water collection compartment under the windshield, the rear window wiper is in the tailgate. To check, remove the...

Checking the turn signal switch
On vehicles produced before 8.88, the hazard warning lights and direction indicators are protected by different fuses. If the blinking rhythm on one side is faster than...
On vehicles produced before 8.88, the hazard warning lights and direction indicators are protected by different fuses. If the blinking rhythm on one side is faster than...
Checking the brake light
If the brake light does not light, first of all check the fuse in the fuse box. If the fuse is OK, check and replace the brake light bulb if necessary. If the brake...
If the brake light does not light, first of all check the fuse in the fuse box. If the fuse is OK, check and replace the brake light bulb if necessary. If the brake...
Checking the rear window defroster
When the rear window heating is turned on, after some time the field of visible conductive paths on the glass should be free of fogging or ice. If there is a...
When the rear window heating is turned on, after some time the field of visible conductive paths on the glass should be free of fogging or ice. If there is a...

Disconnecting and connecting connectors in MITSUBISHI
When disconnecting connectors from the fuse box or from electrical consumers, pull on the connector, not the cable. Note: The connectors have different locks. Press the...
When disconnecting connectors from the fuse box or from electrical consumers, pull on the connector, not the cable. Note: The connectors have different locks. Press the...
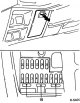
Replacing fuses
To prevent consumers from failing due to short circuits and overloads, individual circuits are protected by fuses. Depending on the year of manufacture of the model,...
To prevent consumers from failing due to short circuits and overloads, individual circuits are protected by fuses. Depending on the year of manufacture of the model,...
Lighting system — general information
The lighting system includes: headlights, taillights, brake lights, reversing lights, direction indicators, fog lights and rear fog lights, license plate lighting,...
The lighting system includes: headlights, taillights, brake lights, reversing lights, direction indicators, fog lights and rear fog lights, license plate lighting,...

Table of lamps
In order to be able to immediately replace a burnt-out lamp, you should carry a box with a set of spare lamps in the car. Such boxes are available for sale in the...
In order to be able to immediately replace a burnt-out lamp, you should carry a box with a set of spare lamps in the car. Such boxes are available for sale in the...

Replacement of outdoor lighting lamps
Turn off the corresponding switch. Headlights Open the engine compartment hood. Only in cars produced since 9.88. Remove the battery retaining bar next to the right...
Turn off the corresponding switch. Headlights Open the engine compartment hood. Only in cars produced since 9.88. Remove the battery retaining bar next to the right...

Replacing interior lighting bulbs
Turn off the switch of the corresponding lamp. Interior light Insert the tip of a screwdriver and remove the lamp glass. Luggage compartment light: On cars up to 8.88,...
Turn off the switch of the corresponding lamp. Interior light Insert the tip of a screwdriver and remove the lamp glass. Luggage compartment light: On cars up to 8.88,...

Removal and installation headlights
Removal Cars produced before 8.88 Cars produced since 9.88 Turn off the headlight switch. Open the engine compartment hood. Remove the headlight bulb connector from the...
Removal Cars produced before 8.88 Cars produced since 9.88 Turn off the headlight switch. Open the engine compartment hood. Remove the headlight bulb connector from the...

Headlight adjustment
Headlight adjustment is of great importance for traffic safety. Accurate headlight adjustment can only be performed using special equipment. Therefore, here we only show...
Headlight adjustment is of great importance for traffic safety. Accurate headlight adjustment can only be performed using special equipment. Therefore, here we only show...

Removal and installation the rear light
Removal Remove the incandescent lamps, item 24.2. Loosen the 4 nuts securing the light from the inside and, using a screwdriver, pull the light back. This may require...
Removal Remove the incandescent lamps, item 24.2. Loosen the 4 nuts securing the light from the inside and, using a screwdriver, pull the light back. This may require...
Devices — General information
The instruments on the COLT/LANCER are assembled in a dashboard kit. The dashboard must be removed, for example, when you need to replace the instrument lighting lamp....
The instruments on the COLT/LANCER are assembled in a dashboard kit. The dashboard must be removed, for example, when you need to replace the instrument lighting lamp....

Removal and installation the instrument panel / Replacing the bulbs
Removal the instrument panel kit Disconnect the ground cable from the battery. Caution: This erases data in the electronic memory, such as the engine fault memory or the...
Removal the instrument panel kit Disconnect the ground cable from the battery. Caution: This erases data in the electronic memory, such as the engine fault memory or the...

Removal and installation / disassembly of the turn signal / windshield wiper switch
The turn signal/light switch and windshield wiper switch are so-called steering column switches and are removed together. Removal Disconnect the ground cable from the...
The turn signal/light switch and windshield wiper switch are so-called steering column switches and are removed together. Removal Disconnect the ground cable from the...

Removal and installation the ignition switch / steering wheel lock
Removal Remove the fastening of the left lower trim panel of the switches "1", as well as the trim panel of the steering column "2", see Fig. K-5806. Remove clamp "3"...
Removal Remove the fastening of the left lower trim panel of the switches "1", as well as the trim panel of the steering column "2", see Fig. K-5806. Remove clamp "3"...

Removal and installation the hazard warning light switch/rear fog light switch
Removal Remove the corresponding switch from the switch panel using a wide screwdriver. The figure shows the version with 9.88. If present, disconnect the connection...
Removal Remove the corresponding switch from the switch panel using a wide screwdriver. The figure shows the version with 9.88. If present, disconnect the connection...

Removal and installation speakers/radio
Removal the front speaker Remove the speaker cover from the switch panel, see item. 20.17 / 20.18 . Release the speaker mount and disconnect the wire. Removal the radio...
Removal the front speaker Remove the speaker cover from the switch panel, see item. 20.17 / 20.18 . Release the speaker mount and disconnect the wire. Removal the radio...

Removal and installation a pin antenna
For radio reception, conventional whip antennas or roof antennas with an electronic amplifier can be used. Removal Remove the radio and disconnect the antenna cable. To...
For radio reception, conventional whip antennas or roof antennas with an electronic amplifier can be used. Removal Remove the radio and disconnect the antenna cable. To...

Replacing the wiper blade rubber
The wiper blades are replaced when the glass is not cleaned properly. Both complete wiper blades (wiper blade with a blade) and separate blades are available for sale....
The wiper blades are replaced when the glass is not cleaned properly. Both complete wiper blades (wiper blade with a blade) and separate blades are available for sale....

Removal and installation / adjustment of windshield washer nozzles
Removal Open the engine hood. Remove the underwater hose from the nozzle and remove the nozzle upwards from the hood. Installation Insert the nozzle from above and press...
Removal Open the engine hood. Remove the underwater hose from the nozzle and remove the nozzle upwards from the hood. Installation Insert the nozzle from above and press...

Removal and installation the windshield wiper motor
Removal Disconnect the ground cable from the battery. Caution: This will erase data in the electronic memory, such as the engine fault memory or the radio code. Before...
Removal Disconnect the ground cable from the battery. Caution: This will erase data in the electronic memory, such as the engine fault memory or the radio code. Before...

Windscreen washer
Cars produced since 9.88 Note: Remove parts in numerical order. 1 - battery mount, 2 - battery and base, 3 - windshield washer reservoir, 4 - tank mount, 5 - nozzles, 6...
Cars produced since 9.88 Note: Remove parts in numerical order. 1 - battery mount, 2 - battery and base, 3 - windshield washer reservoir, 4 - tank mount, 5 - nozzles, 6...
This section is available on: russian, bulgarian, belarusian, ukrainian, serbian, croatian, romanian, polish, slovak, hungarian
Similar materials for other Mitsubishi models
➤ Electrical equipment: Equipment and devices Mitsubishi Colt 2 and 3 (1983-1993)
➤ Electrical equipment: Equipment and devices Mitsubishi Galant 5 (1983-1989, petrol)
➤ Electrical equipment: Equipment and devices Mitsubishi L200 4 (2005-2014, diesel)
➤ General information: Salon equipment Mitsubishi Outlander 1 (2003-2008)
➤ Electrical equipment: Equipment and devices Mitsubishi Pajero 1 and 2 (1982-1999)
➤ Electrical equipment: Equipment and devices Mitsubishi Carisma (1995-2004)
Link in different formats to this section
TEXTHTMLBB Code
- General information
- User manual
- Maintenance
- Power unit
- Repair of MPI engines
- Repair of GDI engines
- Engine overhaul
- Cooling and lubrication system
- MPI fuel injection system
- GDI fuel injection system
- Intake and exhaust system
- Starting and charging system
- Transmission
- Automatic gearbox
- Variator (CVT)
- Drive shafts and gearbox
- Chassis and running gear
- Front suspension
- Rear suspension
- Steering
- Brake system
- Body and interior
- Doors, locks and windows
- Exterior (external elements)
- Interior (internal elements)
- Electrical equipment
- Heater and air conditioner
- Security system SRS
- Equipment and devices
- Wiring diagrams (saloon)
- Wiring diagrams (wagon)
- General information
- Maintenance
- Power unit
- Engine repair
- Lubrication system
- Cooling system
- Ignition system
- Fuel system
- Carburetor
- Fuel injection
- Diesel power system
- Exhaust system
- Transmission
- Clutch
- Car gearbox
- Chassis and running gear
- Front suspension
- Rear suspension
- Steering
- Brake system
- Wheels and tires
- Body and interior
- Exterior (external elements)
- Interior (internal elements)
- Heating system
- Electrical equipment
- Equipment and devices
- Power devices
- Electrical circuits