



Share with friends:
Brake system of the car Mitsubishi Lancer 9

Checking and adjusting the brake pedal
Note: The procedure for checking the brake fluid level is given in the chapter " Maintenance and general check and adjustment procedures ". Adjusting the brake pedal...
Note: The procedure for checking the brake fluid level is given in the chapter " Maintenance and general check and adjustment procedures ". Adjusting the brake pedal...

Checking the operation of the brake booster
1. Start the engine, let it run for one or two minutes, and then turn it off. If the first time you press the brake pedal, it presses all the way down, and its travel...
1. Start the engine, let it run for one or two minutes, and then turn it off. If the first time you press the brake pedal, it presses all the way down, and its travel...

Checking the operation of the brake booster check valve
Caution: When testing the check valve, it must be connected to a vacuum hose. 1. Remove the vacuum hose. Note: When removing the vacuum hose, do not disconnect the check...
Caution: When testing the check valve, it must be connected to a vacuum hose. 1. Remove the vacuum hose. Note: When removing the vacuum hose, do not disconnect the check...

Bleeding the brake system
Caution: Use only the recommended brake fluid. Avoid mixing the recommended fluid with other types of brake fluid. Brake fluid SAE J1703 or FMVSS 116 DOT3 or DOT4...
Caution: Use only the recommended brake fluid. Avoid mixing the recommended fluid with other types of brake fluid. Brake fluid SAE J1703 or FMVSS 116 DOT3 or DOT4...

Checking the brake fluid level sensor
By pressing the brake fluid level sensor float, check the condition of the circuit between the sensor terminals. The sensor is in good condition if the circuit is open...
By pressing the brake fluid level sensor float, check the condition of the circuit between the sensor terminals. The sensor is in good condition if the circuit is open...

Checking disc brakes
Checking and replacing brake pads Note: When the brake pad lining thickness decreases to 2, the wear indicator comes into contact with the brake disc and makes a...
Checking and replacing brake pads Note: When the brake pad lining thickness decreases to 2, the wear indicator comes into contact with the brake disc and makes a...
Checking the rear drum brakes
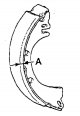
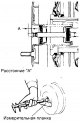
Checking the thickness of the drum brake shoe linings 1. Remove the brake drum. 2. Measure the thickness of the parking brake shoe lining at the point of greatest wear....
Checking the thickness of the drum brake shoe linings 1. Remove the brake drum. 2. Measure the thickness of the parking brake shoe lining at the point of greatest wear....

Brake pedal
Removal and installation − The parts are removed in the order of numbers shown in the figure "Removing the brake pedal". Removal the brake pedal. 1 - brake light switch...
Removal and installation − The parts are removed in the order of numbers shown in the figure "Removing the brake pedal". Removal the brake pedal. 1 - brake light switch...
Master cylinder and brake booster
Removal and installation Note: The engine control unit monitors the signal from the brake booster vacuum sensor and sets a diagnostic code if it is faulty. For checking...
Removal and installation Note: The engine control unit monitors the signal from the brake booster vacuum sensor and sets a diagnostic code if it is faulty. For checking...

Front disc brakes
Removal and installation - Before removing parts, drain the brake fluid. − The parts are removed in the order of numbers shown in the figure "Removing the front disc...
Removal and installation - Before removing parts, drain the brake fluid. − The parts are removed in the order of numbers shown in the figure "Removing the front disc...

Rear drum brakes
Removal and installation − Before you begin removing parts, perform the following operations. a) Loosen the parking brake cable adjusting nut. b) Drain the brake fluid....
Removal and installation − Before you begin removing parts, perform the following operations. a) Loosen the parking brake cable adjusting nut. b) Drain the brake fluid....

General information about anti-lock braking system (ABS)
Note: The specifics of starting the engine on models with an ABS system when the battery is completely discharged are given in the subsection " Jump starting with an...
Note: The specifics of starting the engine on models with an ABS system when the battery is completely discharged are given in the subsection " Jump starting with an...

ABS system diagnostics
Certain phenomena during operation of the anti-lock braking system (ABS) On models equipped with the ABS system, deviations may occur from time to time that do not...
Certain phenomena during operation of the anti-lock braking system (ABS) On models equipped with the ABS system, deviations may occur from time to time that do not...

Checking the operation of the ABS system
Checking the ABS hydraulic unit using a tester 1. Raise the vehicle with a jack and install safety stands in specially designated places under it, or install the wheels...
Checking the ABS hydraulic unit using a tester 1. Raise the vehicle with a jack and install safety stands in specially designated places under it, or install the wheels...

ABS control unit assembly
Removal − Before you begin removing parts, perform the following operations: a) Drain the brake fluid. b) Remove the engine cover. − The parts are removed in the order...
Removal − Before you begin removing parts, perform the following operations: a) Drain the brake fluid. b) Remove the engine cover. − The parts are removed in the order...

Wheel speed sensor
Removal and installation − The parts are removed in the order of numbers shown in the figure "Removing the wheel speed sensor". Removal the wheel speed sensor. 1 - front...
Removal and installation − The parts are removed in the order of numbers shown in the figure "Removing the wheel speed sensor". Removal the wheel speed sensor. 1 - front...

Slowdown sensor
Removal and installation − Before starting to remove parts, remove the lower part of the center console (see chapter " Body "). - Removal of parts is carried out as...
Removal and installation − Before starting to remove parts, remove the lower part of the center console (see chapter " Body "). - Removal of parts is carried out as...

Parking brake cable
Removal and installation − Before starting to remove parts, remove the lower part of the center console and, if necessary, the front driver's seat (see chapter " Body...
Removal and installation − Before starting to remove parts, remove the lower part of the center console and, if necessary, the front driver's seat (see chapter " Body...

Parking brake
Note: On vehicles with rear drum brakes, the drum brake performs the parking brake function. Checks and adjustments Checking the travel of the parking brake lever 1....
Note: On vehicles with rear drum brakes, the drum brake performs the parking brake function. Checks and adjustments Checking the travel of the parking brake lever 1....

Parking brake lever
Removal and installation − Before starting to remove parts, remove the lower part of the center console (see chapter " Body "). − The parts are removed in the order of...
Removal and installation − Before starting to remove parts, remove the lower part of the center console (see chapter " Body "). − The parts are removed in the order of...
This section is available on: russian, bulgarian, belarusian, ukrainian, serbian, croatian, romanian, polish, slovak, hungarian
Similar materials for other Mitsubishi models
➤ Chassis and running gear: Brake system Mitsubishi Colt 4 and 5 (1991-2003)
➤ Chassis and running gear: Brake system Mitsubishi Galant 6 and 7 (1987-1998)
➤ Chassis and running gear: Brake system Mitsubishi L200 4 (2005-2014, diesel)
➤ Chassis and running gear: Brake system Mitsubishi Outlander 1 (2003-2008)
➤ Chassis and running gear: Brake system Mitsubishi Pajero 4 (2006-2021)
➤ Chassis and running gear: Brake system Mitsubishi Carisma (1995-2004)
Link in different formats to this section
TEXTHTMLBB Code
- General information
- User manual
- Maintenance
- Power unit
- Repair of MPI engines
- Repair of GDI engines
- Engine overhaul
- Cooling and lubrication system
- MPI fuel injection system
- GDI fuel injection system
- Intake and exhaust system
- Starting and charging system
- Transmission
- Automatic gearbox
- Variator (CVT)
- Drive shafts and gearbox
- Chassis and running gear
- Front suspension
- Rear suspension
- Steering
- Brake system
- Body and interior
- Doors, locks and windows
- Exterior (external elements)
- Interior (internal elements)
- Electrical equipment
- Heater and air conditioner
- Security system SRS
- Equipment and devices
- Wiring diagrams (saloon)
- Wiring diagrams (wagon)
- General information
- Maintenance
- Power unit
- Engine repair
- Lubrication system
- Cooling system
- Ignition system
- Fuel system
- Carburetor
- Fuel injection
- Diesel power system
- Exhaust system
- Transmission
- Clutch
- Car gearbox
- Chassis and running gear
- Front suspension
- Rear suspension
- Steering
- Brake system
- Wheels and tires
- Body and interior
- Exterior (external elements)
- Interior (internal elements)
- Heating system
- Electrical equipment
- Equipment and devices
- Power devices
- Electrical circuits