
English Русский
Български
Беларускі
Український
Српски
Hrvatski
Română
Polski
Slovenský
Magyar
Articles Bookmark Contacts Sitemap   
Company Audi Company Ford Company Hyundai Company Kia Company Mazda Company Mercedes-Benz Company Nissan
MitsubishiMan.ru


Home Colt Lancer Galant L200 Outlander Pajero Others
Outlander 1 (2003-2008)

Preliminary operations for checking electrical equipment (Mitsubishi Outlander 1)

  • Home
  • Outlander
  • 1 (2003-2008)
  • Electrical equipment
  • Equipment and devices
  • Preliminary operations for checking electrical equipment
0
Contents: The condition of the battery and its…⤓ Checking the wiring harnesses ⤓ Before road testing ⤓ Instrument panel controls ⤓ Windscreen wiper and washer ⤓ Radio ⤓ Cassette player ⤓ Headlight beam adjustment ⤓
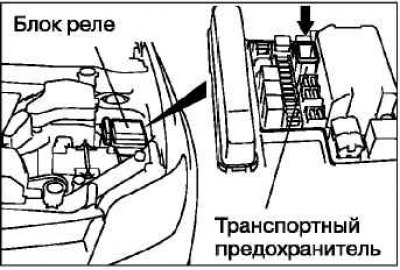

Connecting the dark electrical connector


Press the transport lock.

The condition of the battery and its terminals
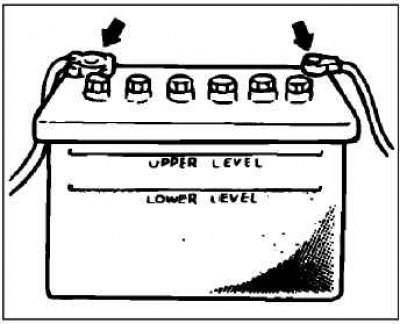


Check the condition of the battery terminals. Make sure they are securely fastened.

Note: Do not remove grease from battery terminals or wire fasteners.


Checking the wiring harnesses
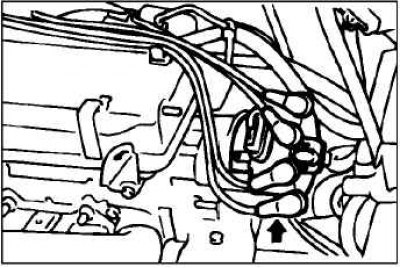


Make sure each wire harness is routed correctly and secured.


Check the tightness of the connectors.

Make sure that the high-voltage wires are securely attached to the spark plugs, distributor cap (or crankshaft position sensor) and ignition coil.

Before road testing


Check that the measuring instruments are working correctly.

Check the operation of each indicator and control lamp.

Instrument panel controls
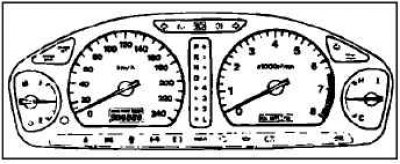


Check the operation of the following elements.
  • 1. Sound signal.
  • 2. Headlights.
  • 3. Side lights and interior lighting
  • 4. Instrument panel illumination lamps.
  • 5. Backlight brightness regulator.

Windscreen wiper and washer
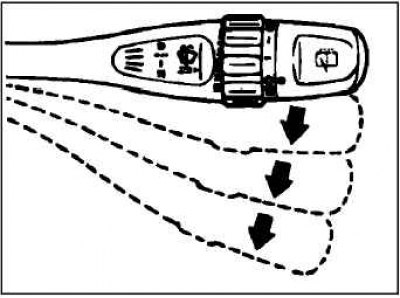


Check the operation of the windshield wipers in all modes.

Check the direction of the washer fluid jet onto the windshield.

Check the position of the wiper blade after turning it off.


Check the change in the wiper operation interval at different positions of the wiper control lever.

Make sure that the windshield wiper works even when the windshield washer is turned on.

Check the operation of the rear window wiper.

Check the direction of the rear window washer fluid jet.

Check the position of the wiper blade after turning it off.

Radio
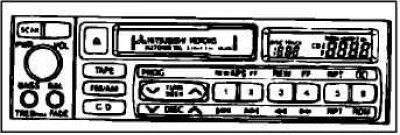


Tune your radio to one of your local stations and check the following parameters.

Check volume, tone, balance, etc.

Pull out the tuning button, tune another station, and, similarly, tune other stations using the other buttons.

Check the AM/FM band switch.

Cassette player


Insert the cassette into the player and perform the following checks.

Check the operation of the tape transport mechanism and rewinding.

Check the cassette eject function.

Check volume, tone, balance, etc.

Headlight beam adjustment
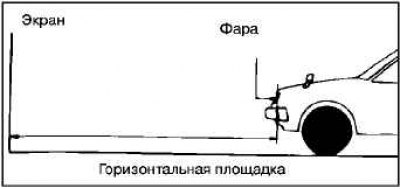


Check the direction of the light beam from the headlights.

Note: The method for adjusting the headlight beam is specified in the "Operating Manual" of the corresponding model.
This article is available at: russian, bulgarian, belarusian, ukrainian, serbian, croatian, romanian, polish, slovak, hungarian
This article was reviewed by: Arseny Pavlov
Share with friends:
◀ Previous
Outlander 1: Equipment and devices
Next ▶

General information about on-board electrical equipment
Checking the wiring harnesses
Periodic maintenance of electrical equipment
Technical operations for servicing the heater and air conditioner
Adding refrigerant to the system using a charging cylinder
Filling the air conditioning system with oil
Methodology for eliminating refrigerant leaks
Similar materials for other Mitsubishi models

➤ Removal spark plugs, checking electrical connections Mitsubishi Colt 4 and 5 (1991-2003)
➤ Replacing spark plugs / checking electrical connections Mitsubishi Lancer 3 and 5 (1984-1992)
➤ On-board electrical equipment specifications Mitsubishi Galant 6 and 7 (1987-1998)
➤ Explanations for electrical equipment diagrams Mitsubishi L200 4 (2005-2014, diesel)
➤ Engine Electrical Equipment (1983) Mitsubishi Pajero 1 and 2 (1982-1999)
➤ Checking the electrical wiring Mitsubishi Carisma (1995-2004)
Link in different formats to this article
Comments and feedback from visitors
No comments yet


Add up two numbers 14 + 36


Outlander 1 (2003-2008) 
  • General information
  • User manual
  • Governing bodies
  • Salon equipment
  • Driving and maintenance
  • Power unit
  • Engine repair
  • Cooling and lubrication system
  • Fuel injection system (MPI)
  • Transmission
  • Clutch
  • Mechanical gearbox
  • Automatic gearbox
  • Drive shafts and cardan
  • Chassis and running gear
  • Wheels and tires
  • Front suspension
  • Rear suspension
  • Steering
  • Brake system
  • Body and interior
  • Exterior (external elements)
  • Doors, locks and windows
  • Electrical equipment
  • Equipment and devices
  • Headlights and lighting
  • Power devices
  • Ignition system
  • Electrical circuits
MitsubishiMan.ru © 2018–2026 • Mobile version • Articles about Mitsubishi • Contacts • Sitemap: EN BG BY UA RS HR RO PL SK HU • Site search • Bookmark
Colt 2 and 3 (1983-1993) · Colt 4 and 5 (1991-2003) · Colt 5 (1995-2003) · Lancer 3 and 5 (1984-1992) · Lancer 9 (2000-2007) · Galant 5 (1983-1989) · Galant 6 and 7 (1987-1998) · L200 4 (2005-2014) · Outlander 1 (2003-2008) · Pajero 1 and 2 (1982-1999) · Pajero 4 (2006-2021) · Carisma (1995-2004) · Space Star (1998-2005) ·
This resource sets cookies 🍪 to avoid bothering you with repeated data entry.