



Contents: Lamp power ⤓ Headlight bulb replacement ⤓ Replacing parking light bulbs ⤓ Replacing front turn signal bulbs ⤓ Replacing side turn signal bulbs ⤓ Replacing the front fog light bulb ⤓ Replacing the rear light cluster…⤓ Replacing the rear fog light bulb ⤓ Replacing license plate light bulbs ⤓ Replacing interior lighting bulbs ⤓ Replacing the local lighting lamp ⤓
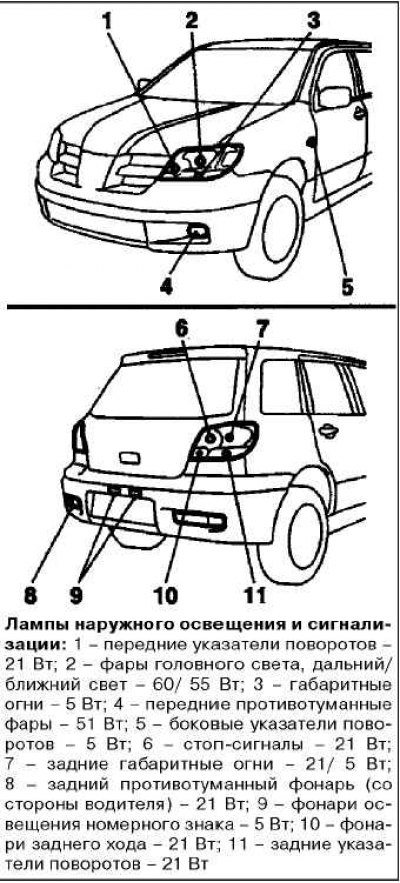 | 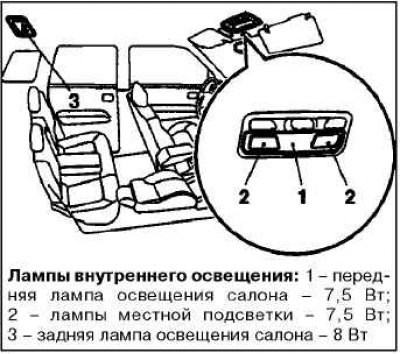 |
Before replacing the bulb, make sure it is turned off. Do not touch the bulb of the new bulb with bare hands. The fat from the skin remaining on the glass will evaporate after the bulb heats up, its vapors will settle on the headlight reflector and make the surface of the latter dull.
Lamp power
Burnt-out lamps must be replaced with new lamps of the same power and type only. The lamp specifications are indicated on its base.
Headlight bulb replacement
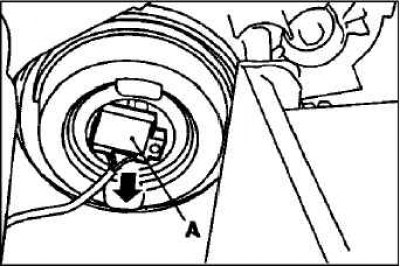
Disconnect connection A.
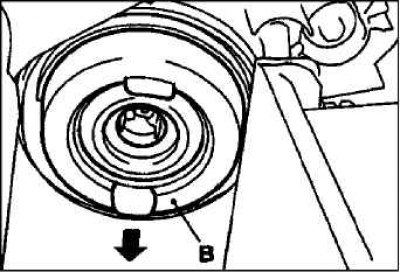
Remove protective cover B.
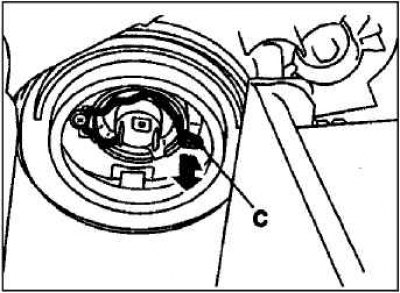
Unhook the lamp retaining spring and then remove the lamp.
Attention! Do not touch the halogen lamp bulb with bare hands, dirty gloves, etc. If the surface of the lamp bulb is dirty, it must be cleaned with alcohol, paint thinner, etc., and installed only after the lamp has dried.
Replacing parking light bulbs
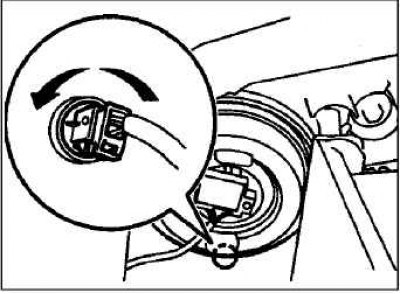
Remove the lamp holder assembly by turning it counterclockwise.
Pull the bulb out of the socket.
Replacing front turn signal bulbs
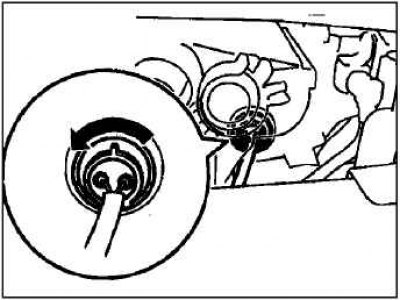
Remove each lampholder assembly by turning them counterclockwise. Pull the lamp out of the holder.
Replacing side turn signal bulbs
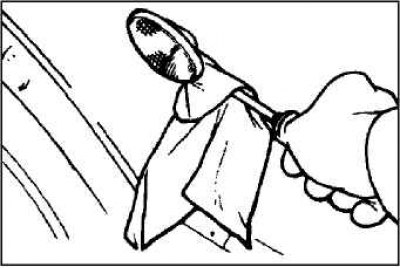
To remove the side turn signal bulbs, insert the tip of a screwdriver under the edge of the lens and press it slightly.
Note: Wrap the tip of the screwdriver with a cloth to avoid scratching the lens and body.
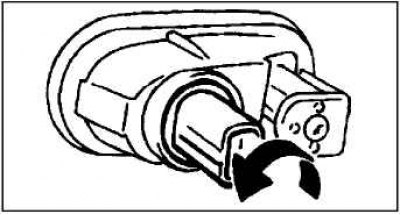
Remove the diffuser assembly with the lamp by turning it counterclockwise. Then take out the lamp.
Replacing the front fog light bulb
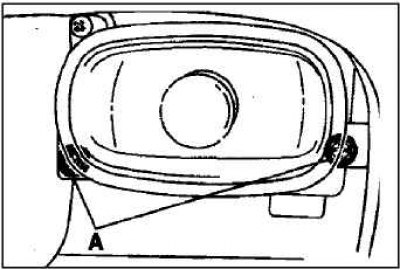
Remove the screws A securing the diffuser and remove the lamp housing.
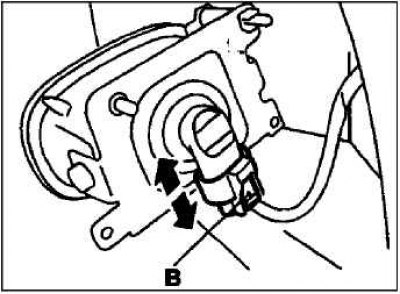
Press the connector B to disconnect and remove the fog lamp.
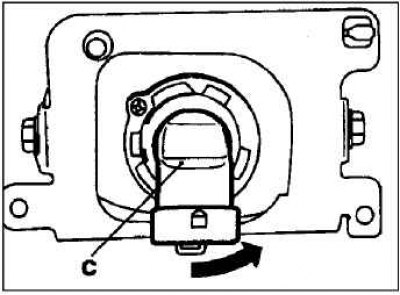
Remove the socket and lamp assembly C by turning them counterclockwise.
[Original source of information: MitsubishiMan.ru]
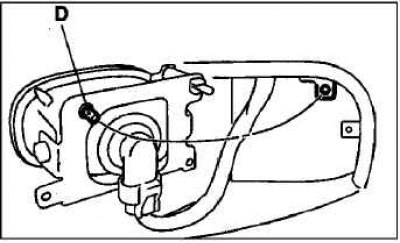
Note: When installing the lamp unit, insert the lamp plug D into the hole on the housing.
Replacing the rear light cluster bulbs
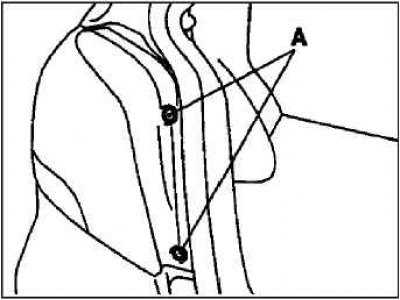
Remove the screws A securing the rear light from the lamp housing.
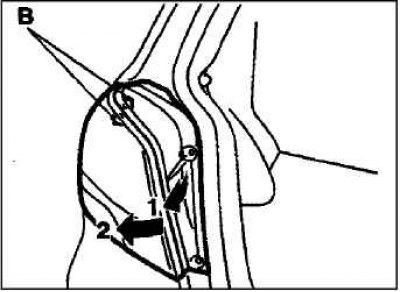
Move lamp unit 1 towards the outside of the vehicle and loosen fasteners B.
Move the lamp unit towards the rear of the vehicle 2 and remove fasteners B.
Remove each lampholder assembly by turning them counterclockwise. Pull the lamp out of the holder.
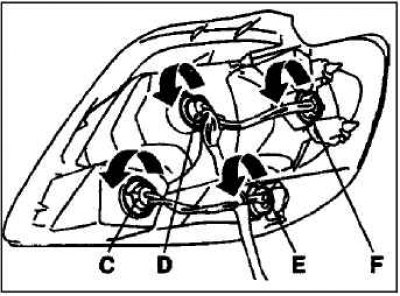
C – reversing light.
D – brake light.
E – rear fog light.
F – rear position light.
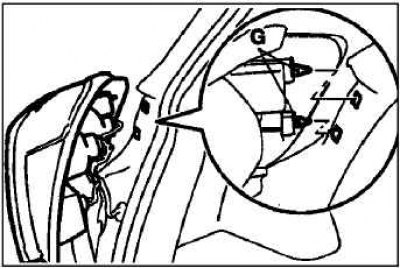
Note: When installing the lamp unit, align the G fasteners on the lamp unit with the holes on the body.
Replacing the rear fog light bulb
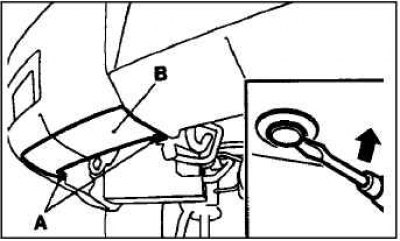
Loosen each of the pins A. To do this, insert the tip of a flat-head screwdriver into the groove of the pin and carefully pry the pin out.
Remove the lower bumper cover B.
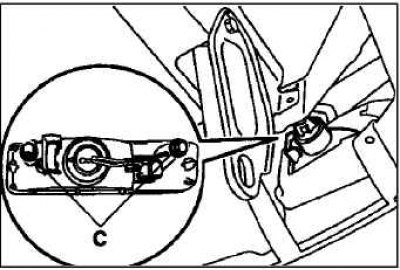
Remove bolts C.
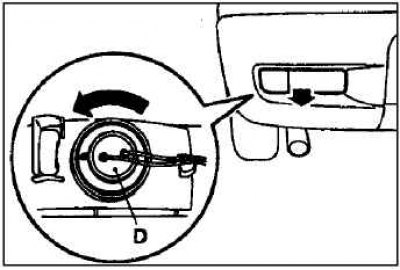
Remove the socket and lamp assembly D together by turning them counterclockwise.
Pull out the lamp.
Replacing license plate light bulbs
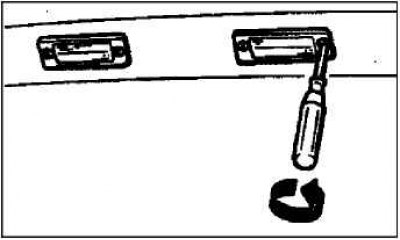
Loosen the screws securing the headlight diffuser and remove the diffuser and socket assembly by turning it counterclockwise.
Remove the pump by pulling it out of the chuck.
Replacing interior lighting bulbs
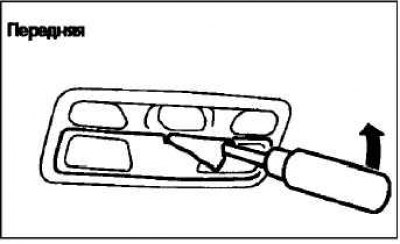 | 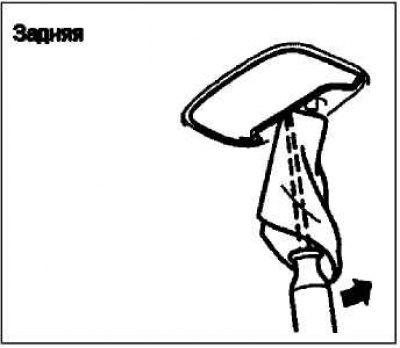 |
Insert the tip of a flat-head screwdriver into the slot of the lamp and, carefully prying up the diffuser, remove it. Remove the lamp from the socket.
Note: To avoid scratching the diffuser, wrap the tip of the screwdriver with a piece of cloth.
Replacing the local lighting lamp
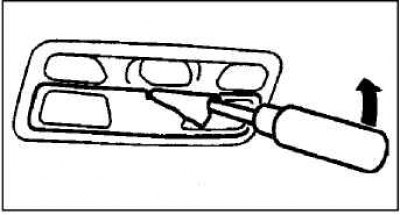
Insert a screwdriver into the groove of the lampshade and, carefully prying up the diffuser, remove it.
Remove the lamp from the socket.
Note: To avoid scratching the diffuser, wrap the tip of the screwdriver with a piece of cloth.