
Front fender (1983-91)
(on the inserts - places of lubrication with EC-870 glue (up), applying sealant 8531 to the upper edge of the wing (section A–A), gluing the edge of the protective panel to the wing (section in plane В–В))
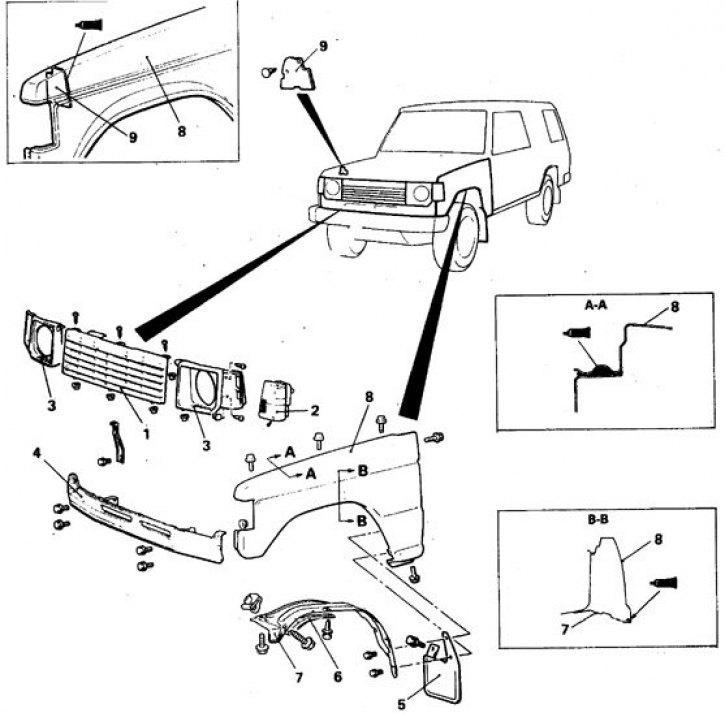
1. Lattice; 2. Front lamp combination; 3. Headlight trim; 4. Lower front panel; 5. Dirt deflector; 6. Sealable edge of the protective panel; 7. Protective niche panel; 8. Wing; 9. Sealing pad wing corner
Front fender (1992-98) (on the inserts - places for applying sealant)

1. Dirt deflector; 2. Front direction indicator; 3. Protective panel
Cars 1983-91
1. Remove 6 screws and remove the front grille.
2. Remove the front lamp combination (see subsection 13.17.4) and headlight covers.
3. Turn away 4 screws and remove the bottom cross panel of a bulkhead.
4. Remove the dirt deflectors and the protective panel of the wheel arch.
5. Remove the bolts and remove the wing, making sure that the sealing pad to protect the front corner of the wing is intact.
6. Installation is carried out in the reverse order.
7. Mount the sealing pad with 3M Adhesive EC-870. Bond the edge of the protective panel with 3M ATD 8625.
Cars 1992-98
1. Remove the socket of the wheel arch trim (if provided), for which do the following.
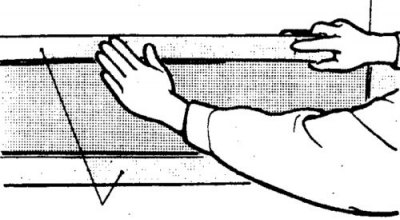
2. Apply masking tape along the entire length of the side trim.
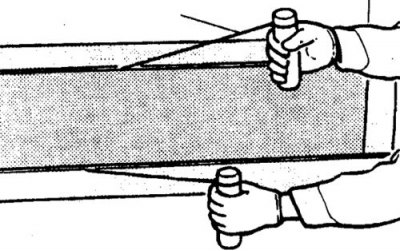
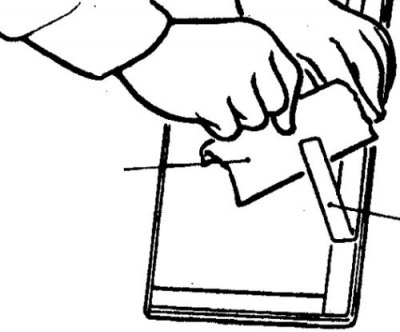
3. Cut the cladding along the adhesive layer with a 0.8 mm thick fishing line.
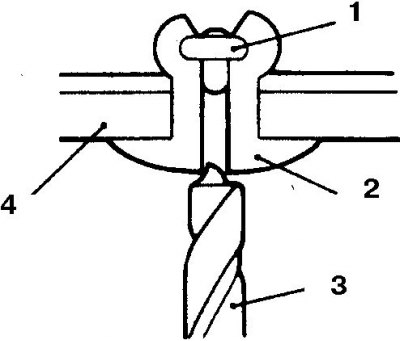
4. Drill out the facing rivets with a 4–5.5 mm drill. Drive out rivet rods (1 - insert rivet, 2 - rivet, 3 - drill, 4 - cladding panel).
5. Remove the latches by pushing the cladding towards you.
Attention! If the cladding is to be reinstalled, use a fishing line to cut off the adhesive layer on the body so as not to break the edge of the cladding panel. If the adhesive cannot be cut, heat it up to 40°C.
6. Use a spatula to remove the adhesive tape.
7. Remove masking tape.
8. Wipe surface with 3M ATD 8906 Degreaser.
9. Remove the front lamp combination (see subsection 13.17.4).
10. Turn away screws and remove the protective panel of a wheel niche.
11. Turn away bolts and remove a wing.
12. Installation is carried out in the reverse order.
13. Establish facing of an aperture of a wheel niche in a following order.

14. Use a scraper to remove the adhesive tape from the side facing of the wing.
15. Wipe the surface of the wing lining with 3M ATD 8906 degreaser.
16. Apply new 2-sided adhesive tape 3M ATD 6382 to the facing socket.
17. Heat the surface of the tape to 40–60°C and remove the protective paper layer.
18. Install the lining on the fender so that the latches fit into the holes, press the lining firmly.
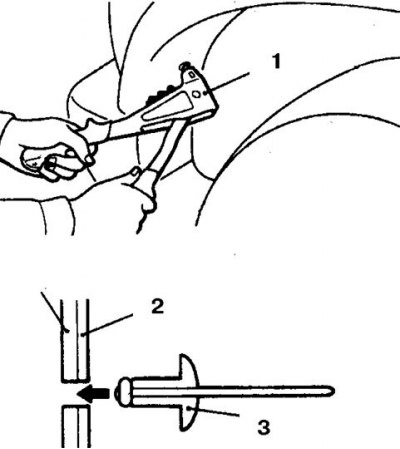
19. Rivet the cladding where the rivets have been removed (1 - fixture, 2 - body panel and cladding, 3 - blind rivet).