



Share with friends:
Gasoline car engines Mitsubishi Pajero 1 and 2
A full range of work on checking and adjusting the engine in accordance with the technical data is carried out after 48,000 km of run, or every 2 years (depending on what comes first)

Engine Maintenance and Repair Guidelines
General wear of engine components and assemblies is indicated by a decrease in power, as well as increased oil and fuel consumption. The cause is wear of pistons, piston...
General wear of engine components and assemblies is indicated by a decrease in power, as well as increased oil and fuel consumption. The cause is wear of pistons, piston...
Engine diagnostics using a vacuum gauge
Vacuum measurement is a reliable and relatively inexpensive way to diagnose an engine. The vacuum gauge readings can provide an idea of the condition of the piston...
Vacuum measurement is a reliable and relatively inexpensive way to diagnose an engine. The vacuum gauge readings can provide an idea of the condition of the piston...
Checking the compression in engine cylinders — general information
Caution: To obtain accurate test results, the engine must be warmed up to normal temperature and the battery must be fully charged. The results of the compression test...
Caution: To obtain accurate test results, the engine must be warmed up to normal temperature and the battery must be fully charged. The results of the compression test...
Dismantling the power unit
If a decision has been made to dismantle the engine for major repairs or repairs of the main components, then certain preparatory measures must be carried out. It is...
If a decision has been made to dismantle the engine for major repairs or repairs of the main components, then certain preparatory measures must be carried out. It is...
Engine Overhaul — Alternatives
When performing major repairs yourself, various options are possible. The decision to replace the cylinder block, connecting rod and piston group and crankshaft depends...
When performing major repairs yourself, various options are possible. The decision to replace the cylinder block, connecting rod and piston group and crankshaft depends...

Checking the compression in engine cylinders
Compression tester for gasoline engines Checking the compression in the cylinders of gasoline engines 1. Warm up the engine to normal operating temperature. 2. Remove...
Compression tester for gasoline engines Checking the compression in the cylinders of gasoline engines 1. Warm up the engine to normal operating temperature. 2. Remove...

Engine technical data
Cylinder diameter/stroke (mm) Oil pressure (atm/mode) Valves Pistons and rings Camshaft (all dimensions in mm) Diameter of bearing journals Size of cams Crankshaft and...
Cylinder diameter/stroke (mm) Oil pressure (atm/mode) Valves Pistons and rings Camshaft (all dimensions in mm) Diameter of bearing journals Size of cams Crankshaft and...

Removal and installation of 2.6L engine
Attention! To dismantle engines of all modifications, it is necessary to remove the transmission, transfer case and front propeller shaft (see subsection 9.3.6 ,...
Attention! To dismantle engines of all modifications, it is necessary to remove the transmission, transfer case and front propeller shaft (see subsection 9.3.6 ,...

Removal and installation of 12-valve 3.0L engine
Attention! To dismantle engines of all modifications, it is necessary to remove the transmission, transfer case and front propeller shaft (see subsection 9.3.6 ,...
Attention! To dismantle engines of all modifications, it is necessary to remove the transmission, transfer case and front propeller shaft (see subsection 9.3.6 ,...

Removal and installation of 24-valve 3.0L engine
Attention! To dismantle engines of all modifications, it is necessary to remove the transmission, transfer case and front propeller shaft (see subsection 9.3.6 ,...
Attention! To dismantle engines of all modifications, it is necessary to remove the transmission, transfer case and front propeller shaft (see subsection 9.3.6 ,...

Removal and installation of 3.5L engine
Attention! To dismantle engines of all modifications, it is necessary to remove the transmission, transfer case and front propeller shaft (see subsection 9.3.6 ,...
Attention! To dismantle engines of all modifications, it is necessary to remove the transmission, transfer case and front propeller shaft (see subsection 9.3.6 ,...
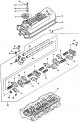
Cylinder Head Cover — Removal and Installation
2.0L Engine Valve Cover and Components (item numbers are given in the order of assembly of the specified parts) 1. Cork; 2. Compaction; 3. Washer; 4. Bolt; 5. Lid; 6....
2.0L Engine Valve Cover and Components (item numbers are given in the order of assembly of the specified parts) 1. Cork; 2. Compaction; 3. Washer; 4. Bolt; 5. Lid; 6....
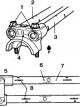
2.0L Engine Rollers and Rocker Arms — Removal and Installation
Correct positioning of rollers during assembly 1. Notch; 2, 8. Roller B; 3, 7. Roller A; 4. Number; 5. Type P; 6. Lubrication hole Removal 1. Disconnect the ground....
Correct positioning of rollers during assembly 1. Notch; 2, 8. Roller B; 3, 7. Roller A; 4. Number; 5. Type P; 6. Lubrication hole Removal 1. Disconnect the ground....
2.6L Engine Rollers and Rocker Arms — Removal and Installation
Removal 1. Remove the cylinder head cover. 2. Loosen the camshaft sprocket bolt. 3. Set the piston of the 1st cylinder to TDC by turning the crankshaft until the mark on...
Removal 1. Remove the cylinder head cover. 2. Loosen the camshaft sprocket bolt. 3. Set the piston of the 1st cylinder to TDC by turning the crankshaft until the mark on...

Shafts and rocker arms for 2.4L and 3.0L engines — removal and installation
Camshaft covers (3.0 engines) The arrows on the camshaft covers must match the arrow on the cylinder head. 1, 3. Arrows on the lids; 2. Places of sealant application; 4....
Camshaft covers (3.0 engines) The arrows on the camshaft covers must match the arrow on the cylinder head. 1, 3. Arrows on the lids; 2. Places of sealant application; 4....

Intake manifold — removal and installation
Engine 2.0 l Removal and installation 1. Disconnect the battery from ground. Drain the coolant and disconnect the radiator hose from the thermostat housing. 2. Remove...
Engine 2.0 l Removal and installation 1. Disconnect the battery from ground. Drain the coolant and disconnect the radiator hose from the thermostat housing. 2. Remove...

Exhaust manifold — removal and installation
Engines 2.0 and 2.6 l Exhaust manifold for 2.0 and 2.6 L engines 1. Filter; 2. Air vent; 3, 4. Branch pipe; 5. Bracket; 6. Lid; 7. Oxygen sensor; 8. Self-tightening nut;...
Engines 2.0 and 2.6 l Exhaust manifold for 2.0 and 2.6 L engines 1. Filter; 2. Air vent; 3, 4. Branch pipe; 5. Bracket; 6. Lid; 7. Oxygen sensor; 8. Self-tightening nut;...
Turbocharger — general information, removal and installation
The turbocharger is driven by exhaust gases and is designed to force air into the engine cylinders and increase power. The boost pressure is limited by a separate valve...
The turbocharger is driven by exhaust gases and is designed to force air into the engine cylinders and increase power. The boost pressure is limited by a separate valve...
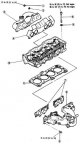
Cylinder head — removal and installation
Attention! The head is secured with bolts with internal hexagonal slots. Before removing the head, read the procedure for removing the timing belt and other units....
Attention! The head is secured with bolts with internal hexagonal slots. Before removing the head, read the procedure for removing the timing belt and other units....
Cylinder head — cleaning and inspection
Head cleaning involves removing sealant residue and carbon deposits from the combustion chambers and valve heads. When cleaning, use a scraper made of hard wood or...
Head cleaning involves removing sealant residue and carbon deposits from the combustion chambers and valve heads. When cleaning, use a scraper made of hard wood or...

Valves and springs — removal, inspection and installation
Compression of springs when installing the valve Additional valve on Mitsubishi engines Early Mitsubishi engines are equipped with an additional valve that closes the...
Compression of springs when installing the valve Additional valve on Mitsubishi engines Early Mitsubishi engines are equipped with an additional valve that closes the...
Valve seats
Worn saddles are replaced in a car service center or equipped workshop by experienced personnel. First, the saddle is removed by drilling to a material thickness of 0.5...
Worn saddles are replaced in a car service center or equipped workshop by experienced personnel. First, the saddle is removed by drilling to a material thickness of 0.5...
Replacing guide bushings
If the wear of the bushings is minimal, it is advisable to perform knurling on their inner surface. Bushing wear can be determined by the rocking motion of a new valve...
If the wear of the bushings is minimal, it is advisable to perform knurling on their inner surface. Bushing wear can be determined by the rocking motion of a new valve...

Hydraulic tappets — checking and bleeding air
The hydraulic tappets are manufactured with high precision, and dust and dirt are not allowed to get on them. Fixing the hydraulic tappet with a bracket during...
The hydraulic tappets are manufactured with high precision, and dust and dirt are not allowed to get on them. Fixing the hydraulic tappet with a bracket during...

2.0L Engine Timing Belt and Covers — Removal and Installation
Engine toothed belt 2.0 1. Sprocket of the right vibration damper roller; 2, 30. Bushing; 3. Key; 4. Crankshaft sprocket B; 5. Flange; 6. Tensioner roller B; 7. Washer;...
Engine toothed belt 2.0 1. Sprocket of the right vibration damper roller; 2, 30. Bushing; 3. Key; 4. Crankshaft sprocket B; 5. Flange; 6. Tensioner roller B; 7. Washer;...

2.4L Engine Timing Belt and Covers — Removal and Installation
2.4L Engine Toothed Belt 1. Upper radiator shroud; 2–5. Belts; 6. Fan; 7, 8, 9. Pulleys; 10, 11. Lids; 12. Tensioner; 13. Belt; 14. Belt tensioner B; 15. Asterisk; 16....
2.4L Engine Toothed Belt 1. Upper radiator shroud; 2–5. Belts; 6. Fan; 7, 8, 9. Pulleys; 10, 11. Lids; 12. Tensioner; 13. Belt; 14. Belt tensioner B; 15. Asterisk; 16....

Timing Belt and Engine Covers 3.0L and 3.5L — Removal and Installation
Toothed Belt and Related Parts 3.5L Engine 1. Fan; 2. Pulley; 3. Compressor; 4, 7. Brackets; 5. Lid; 6. Power steering pump Parts shown when removing the belt (3.5L) 1,...
Toothed Belt and Related Parts 3.5L Engine 1. Fan; 2. Pulley; 3. Compressor; 4, 7. Brackets; 5. Lid; 6. Power steering pump Parts shown when removing the belt (3.5L) 1,...

2.6L Engine Chain and Cover — Removal and Installation
Engine chain 2.6L 1. Washer; 2. Pulley; 3. Chain cover; 4, 6. Gasket; 5. Plug; 7. Seal; 8. Calmator B; 9. Calm A; 10. Calm C; 11. Small chain; 12. Asterisk B; 13. Oil...
Engine chain 2.6L 1. Washer; 2. Pulley; 3. Chain cover; 4, 6. Gasket; 5. Plug; 7. Seal; 8. Calmator B; 9. Calm A; 10. Calm C; 11. Small chain; 12. Asterisk B; 13. Oil...

Oil pan — removal and installation
Applying sealant to the V6 engine oil pan 1. Apply next to the bolt hole; 2. To the belt; 3. Sealant; 4. Groove Applying sealant to the oil pan surface of 4-cylinder...
Applying sealant to the V6 engine oil pan 1. Apply next to the bolt hole; 2. To the belt; 3. Sealant; 4. Groove Applying sealant to the oil pan surface of 4-cylinder...

Oil pump and silent rollers (vibration dampers)
Oil pump and vibration damper rollers (2.0 and 2.4 l) 1. Front bearing; 2. Rear bearing right; 3. Rear left bearing; 4. Left roller; 5, 14, 25. Gasket; 6. Mesh filter;...
Oil pump and vibration damper rollers (2.0 and 2.4 l) 1. Front bearing; 2. Rear bearing right; 3. Rear left bearing; 4. Left roller; 5, 14, 25. Gasket; 6. Mesh filter;...
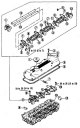
Camshafts and bearings — removal and installation
2.6L Engine Camshaft 1. Cork; 2, 8, 9, 10. Bolt; 3. Washer; 4. Seal; 5. Lid; 6. Gasket; 7. Spool; 11. Rollers and rockers; 12. Seal; 13. Camshaft Parts that are removed...
2.6L Engine Camshaft 1. Cork; 2, 8, 9, 10. Bolt; 3. Washer; 4. Seal; 5. Lid; 6. Gasket; 7. Spool; 11. Rollers and rockers; 12. Seal; 13. Camshaft Parts that are removed...
Checking the condition of the camshaft
Check the following dimensions: 1. Axial play 2. Clearances in bearing journals 3. cam size The axial clearance is checked either before removing the camshaft or during...
Check the following dimensions: 1. Axial play 2. Clearances in bearing journals 3. cam size The axial clearance is checked either before removing the camshaft or during...
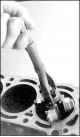
Pistons and connecting rods — removal, inspection and installation
Removal the flange at the top of the cylinder The order of installation of rings on a diesel engine 1. Installation procedure 2. Marking Piston orientation on diesel 1....
Removal the flange at the top of the cylinder The order of installation of rings on a diesel engine 1. Installation procedure 2. Marking Piston orientation on diesel 1....

Replacing the piston pin
Inserting the connecting rod holding device Adjusting the position of the connecting rod when pressing out the pin 1. Connecting rod Guide for the pin pressing device...
Inserting the connecting rod holding device Adjusting the position of the connecting rod when pressing out the pin 1. Connecting rod Guide for the pin pressing device...
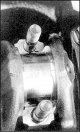
Replacing connecting rod bearings
A piece of wire for checking the clearance of the connecting rod bearing Reading the gap after removing the cover on the scale on the gauge packaging Replacement 1. If...
A piece of wire for checking the clearance of the connecting rod bearing Reading the gap after removing the cover on the scale on the gauge packaging Replacement 1. If...

Cylinder Block Channel Plugs
The plugs are changed during a major engine overhaul. in case of leakage, their expulsion from the sockets or severe corrosion. To replace the plugs, you need to remove...
The plugs are changed during a major engine overhaul. in case of leakage, their expulsion from the sockets or severe corrosion. To replace the plugs, you need to remove...

Rear crankshaft oil seal — removal and installation
Rear crankshaft oil seal 10. Clutch housing section; 11. Seal holder; 12. Gasket; 13. Oil deflector; 14. Seal Seal drain hole The drain hole of the gland must face...
Rear crankshaft oil seal 10. Clutch housing section; 11. Seal holder; 12. Gasket; 13. Oil deflector; 14. Seal Seal drain hole The drain hole of the gland must face...

Main bearings — removal, inspection and installation
Installing an indicator to check the crankshaft axial play Installing an indicator to check the runout of the crankshaft main journals Main bearings 1, 3. Groove...
Installing an indicator to check the crankshaft axial play Installing an indicator to check the runout of the crankshaft main journals Main bearings 1, 3. Groove...

Flywheel drive disk — removal and installation
Attention! The clutch housing is balanced together with the pressure plate. These parts are changed in pairs. Flywheel and drive disk 1. Flywheel; 2. Transition flange A...
Attention! The clutch housing is balanced together with the pressure plate. These parts are changed in pairs. Flywheel and drive disk 1. Flywheel; 2. Transition flange A...

Front Exhaust Pipe — Removal and Installation
Exhaust system of the 3.0L engine 1. Gasket; 2. Nut; 3. Front pipe left; 4. Front pipe right; 5. Oxygen sensor; 6. Spring; 7. Neutralizer; 8, 13. Bracket; 9. Suspension;...
Exhaust system of the 3.0L engine 1. Gasket; 2. Nut; 3. Front pipe left; 4. Front pipe right; 5. Oxygen sensor; 6. Spring; 7. Neutralizer; 8, 13. Bracket; 9. Suspension;...
Exhaust system neutralizer — removal and installation
Removal and installation 1. Remove the heat shield. 2. Disconnect the front and rear exhaust pipes and remove the neutralizer. 3. Installation is carried out in reverse...
Removal and installation 1. Remove the heat shield. 2. Disconnect the front and rear exhaust pipes and remove the neutralizer. 3. Installation is carried out in reverse...
This section is available on: russian, bulgarian, belarusian, ukrainian, serbian, croatian, romanian, polish, slovak, hungarian
Link in different formats to this section
TEXTHTMLBB Code
- General information
- User manual
- Troubleshooting
- Maintenance
- Technical specifications
- Power unit
- Engine repair
- Cooling system
- Lubrication system
- Fuel system
- Engine management system
- Intake and exhaust system
- Engine electrical equipment
- Transmission
- Clutch
- Manual gearbox
- Automatic gearbox
- Drive shafts
- Chassis and running gear
- Front suspension
- Rear suspension
- Brake system
- Steering
- Body and interior
- Exterior (external elements)
- Interior (internal elements)
- Doors, locks and windows
- Body dimensions
- Electrical equipment
- Safety system (SRS)
- Air conditioner
- Equipment and devices
- Electrical diagrams
- General information
- User manual
- Seats and seat belts
- Instruments and controls
- Driving and operation
- Maintenance
- Power unit
- Gasoline engines
- Diesel engines
- Ignition system
- Engine electrical equipment
- Cooling and lubrication system
- Power and exhaust system
- Fuel system (gasoline)
- Fuel system (diesel)
- Transmission
- Clutch
- Mechanical gearbox
- Automatic gearbox
- Drive shafts and axles
- Chassis and running gear
- Front suspension
- Rear suspension
- Steering
- Brake system
- Body and interior
- Exterior (external elements)
- Interior (internal elements)
- Doors, locks and windows
- Electrical equipment
- Equipment and devices
- Heater and air conditioner
- Cruise control
- Headlights and lighting
- Electrical circuits