



Rear crankshaft oil seal
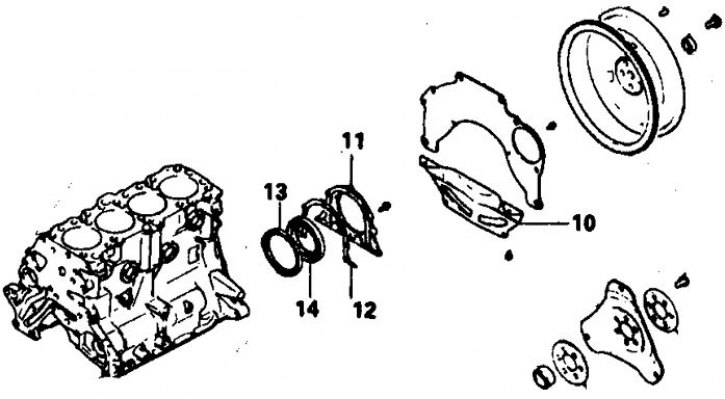
10. Clutch housing section; 11. Seal holder; 12. Gasket; 13. Oil deflector; 14. Seal
Seal drain hole
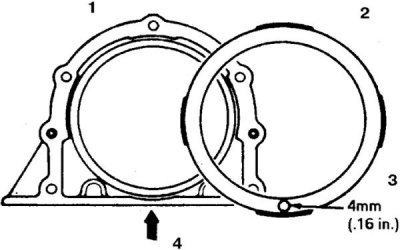
The drain hole of the gland must face downwards.
1. Holder; 2. Oil deflector; 3. Drainage hole 4 mm; 4. Split plane with tray
4-cylinder engines
Removal and installation
1. Remove the transmission, mark orientation and remove the clutch and flywheel.
2. Remove the rear reinforcement plate and the lower section of the clutch housing.
3. On diesel engines, carefully separate the gasket from the bottom of the seal retainer. If the gasket is damaged, remove the pan and replace the gasket.
4. On vehicles with a sealant oil pan seal, remove the oil pan and remove any remaining sealant.
5. Unscrew the bolts and remove the holder with the seal, remove the gasket.
6. Remove the oil deflector (on car parts) and remove the seal.
7. Check the wear of the crankshaft journal seal. If wear is severe, replace the crankshaft.
8. Installation is carried out in reverse order. Press the seal so that its surface is flush with the surface of the holder. Replace the gasket and tighten the holder bolts to 11 Nm.
6-cylinder engines
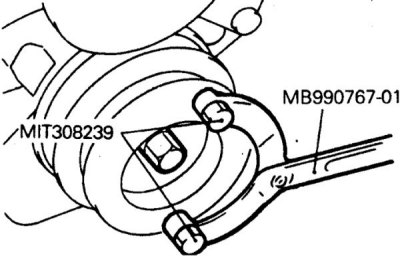
Fixing the crankshaft when removing the flywheel
Removal the rear oil seal on a 6-cylinder engine
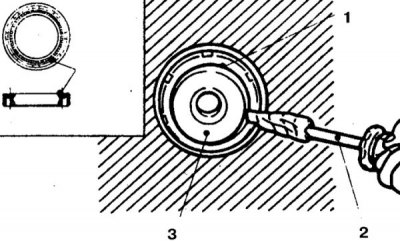
1. Seal; 2. Screwdriver; 3. Crankshaft
Pressing in the rear oil seal on a 6-cylinder engine
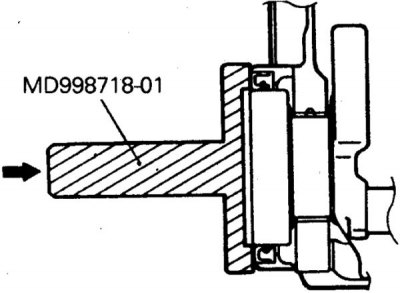
Arrow – lubrication point
Removal and installation
1. Remove the transmission. While holding the crankshaft or flywheel, loosen the bolts and remove the clutch and flywheel (or the leading disk of the torque converter).
(The article is reprinted from this source: www.mitsubishiman.ru)
2. Cut and remove the seal using pliers.
3. Check the wear of the crankshaft journal seal. If wear is severe, replace the crankshaft.
4. Installation is carried out in reverse order. Press the seal in using a mandrel, lubricating the working edges.