
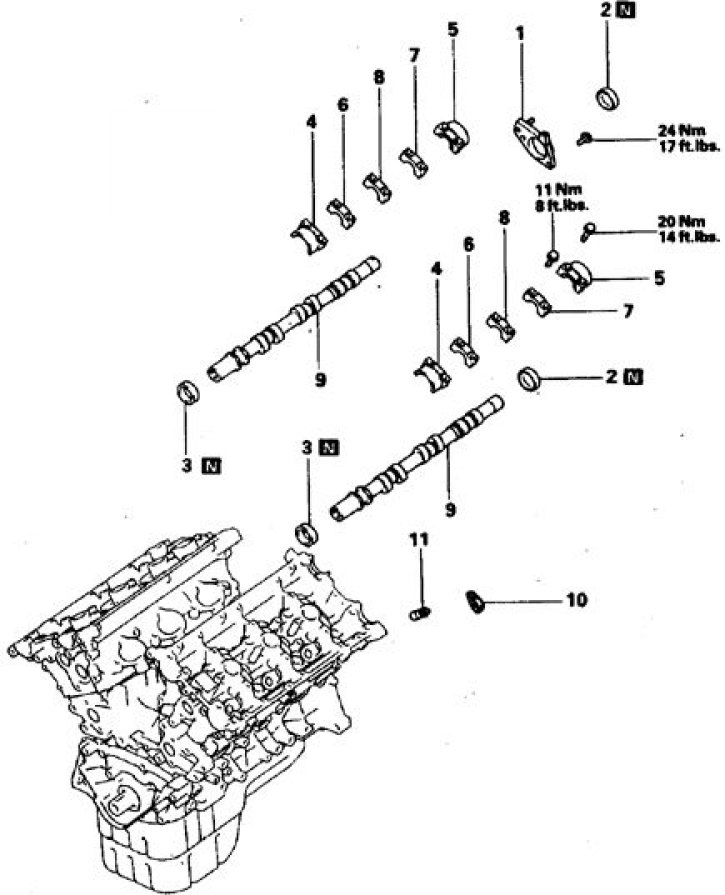
Engine Camshaft 2.6L
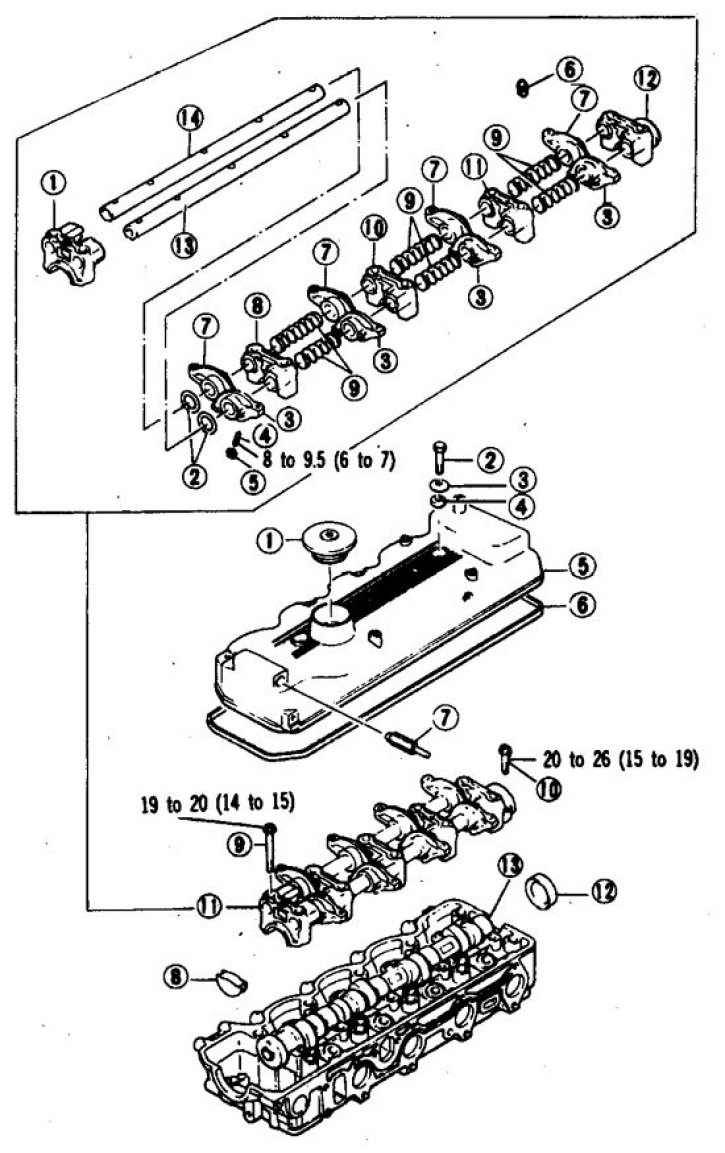
1. Cork; 2, 8, 9, 10. Bolt; 3. Washer; 4. Oil seal; 5. Lid; 6. Gasket; 7. Spool; 11. Rollers and rockers; 12. Oil seal; 13. Camshaft
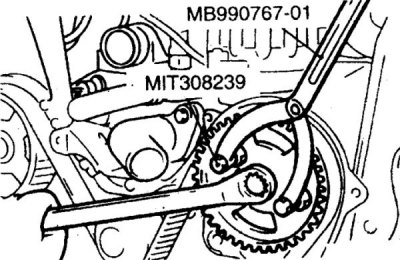
Parts that are removed when dismantling the camshaft at a preliminary stage
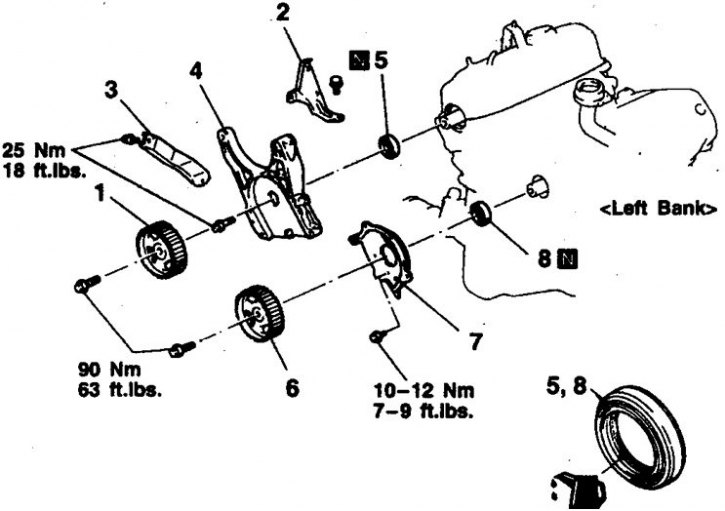
1. Asterisk; 2, 5. Rack; 3. Bracket; 4, 8. Oil seal; 6. Asterisk; 7. Back belt cover
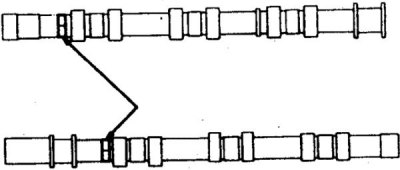
Camshaft (3,0)
1. Lid; 2. Gasket; 3. Transition section; 4, 8. Oil seal; 5. Ring; 6. Rollers with rockers; 7. Hydraulic pusher; 9. Rear oil seal; 10. Camshaft
When assembling, install the rollers with rocker arms in the direction of the arrow (engine 3.0 l.)
1, 3. Arrows on the camshaft journal covers; 2. Arrows on the cylinder head; 4. To the belt
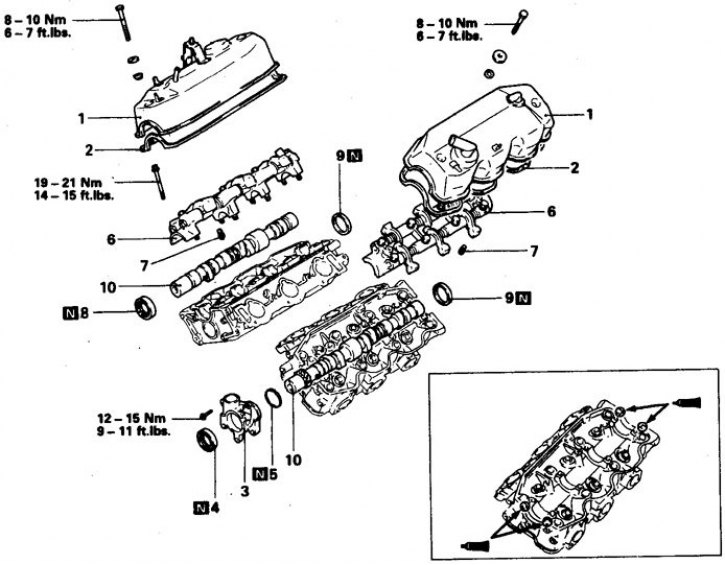
Camshaft (3.5 l.)

1. cover plate; 2. Ignition coil; 3. Candle wires; 4. Lid; 5. Asterisk; 6. Oil seals; 7. The edge of the stuffing box; 8. Gasket; 9. Places for applying sealant
Camshaft (3.5 l.)
1. Camshaft sensor holder; 2. Rear oil seal (since 1993); 3. Front oil seal; 4–8. neck covers; 9. Camshaft; 10. Rocker; 11. Hydraulic pusher
2.0 and 2.4L engines
Removing
1. Disconnect the battery from the ground.
2. Remove the ignition distributor.
3. Remove the cylinder head cover and toothed belt.
4. Remove rocker arms with rollers.
5. Remove the camshaft and check its condition.
Installation
1. Installation is carried out in the reverse order.
2. When assembling, lubricate the camshaft journals.
3. Tighten the cover bolts to 20 Nm.
2.6L engines
Removing
1. Disconnect the battery from the ground.
2. Remove the ignition distributor.
3. Remove the cylinder head cover.
4. Remove rocker arms with rollers.
5. Remove the camshaft sprocket with chain, secure the chain with wire to the sprocket and install on the lower racks.
6. Turn away bolts and remove a cover of a back basic neck.
7. Remove the camshaft and check its condition.
Installation
1. Installation is carried out in the reverse order.
2. When assembling, lubricate the camshaft journals.
3. Lubricate the outer surface of the rear oil seal before installation.
4. Tighten the cover bolts to 20 Nm.
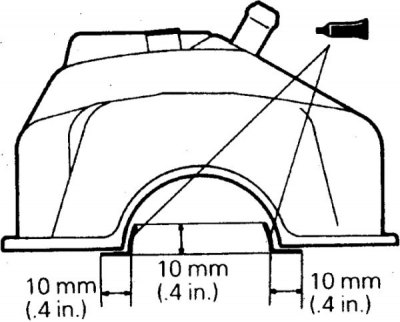
5. Install the semi-circular plug on the 3M 8001 sealant.
3.0L engines
Removing
1. Disconnect the battery from the ground.
2. Remove the toothed belt.
3. Remove the camshaft sprockets.
4. Remove racks and arms of the fan and the generator.
5. Remove cylinder head covers and gaskets.
6. Remove both camshaft seals.
7. Remove transitional section of the distributor of ignition and a ring.
8. Having pressed the pushers with the tool MD998443–01, remove the rocker arms with rollers (see subsection 3.4.13).
9. Remove the camshaft and check its condition.
Installation
1. Installation is carried out in the reverse order.
2. When assembling, lubricate the camshaft journals.
3. Lubricate the outer surface of the rear oil seal before installation.
4. Tighten the bolts and nuts to the specified torque.
5. At installation orient rollers and yokes on arrows.
6. When pressing the rear oil seal, place a washer 1.3–1.5 mm thick under the mandrel.
7. Lubricate the cylinder head cover with 3M ATD 8660 sealant in the indicated places.
3.5L engines
Removing
1. Remove the intake manifold.
2. Remove the toothed belt.
3. Remove the gas distribution covers, ignition coils and high voltage wires.
4. Remove 4 camshaft sprockets, holding the shaft with a wrench by the flats (not for an asterisk!).
5. Remove the bearing journal covers in the order front-rear-N2-N-N3.
6. Remove camshafts.
Installation
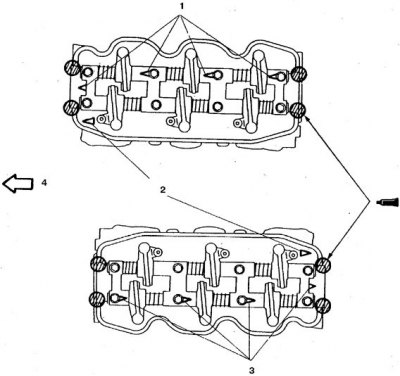
Camshaft orientation
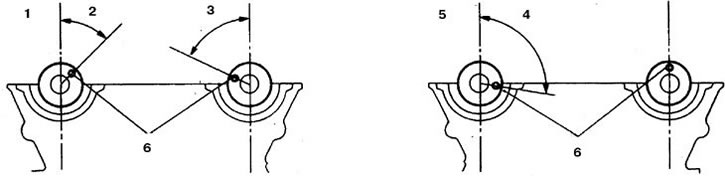
1. Right head; 2. About 45°; 3. About 65°; 4. About 100°; 5. Left head; 6. Pin
1. Installation is carried out in reverse order.
2. When assembling, install the camshafts according to the mark on the 6-sided neck, and arrange the pins according to the diagram shown.
3. Orient the neck covers according to the marks and arrange according to the numbers.
4. Install covers 2, 3, 4 so that the marks on them coincide with the marks on the cylinder head. Tighten the bolts in 2-3 steps.
5. Replace all gaskets and seals.
6. Lubricate the cylinder head cover with 3M ATD 8660 sealant in the indicated places.