



Contents: Oil pump and vibration damper…⤓ Engines 2.0 and 2.4 l ⤓ 2.6L Engine ⤓ Engines 3.0 and 3.5 l ⤓
Oil pump and vibration damper rollers (2.0 and 2.4 l)
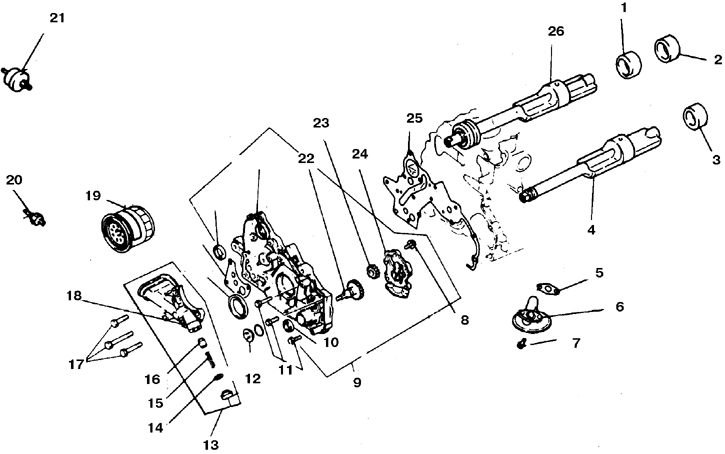
1. Front bearing; 2. Rear bearing right; 3. Rear left bearing; 4. Left roller; 5, 14, 25. Gasket; 6. Mesh filter; 7, 8, 11, 17. Bolts; 9. Front casing assembly; 10. Seal; 12. Plug; 13, 18. Oil filter bracket; 15. Spring; 16. Pressure reducing valve; 19. Oil filter; 20. Oil pressure sensor (Tredia); 21. Oil pressure indicator sensor (Corona); 22. Oil pump drive gear; 23. Driven gear; 24. Lid; 26. Right roller
Please note! Vibration damping rollers are not available on V6 engines.
Engines 2.0 and 2.4 l
Removal
1. Disconnect the battery from ground.
2. Remove the timing belts (see subsection 3.4.29).
3. Drain the oil and remove the oil filter.
4. Remove the pan and oil receiver.
5. Remove the plug and fix the left roller by inserting a screwdriver with a diameter of 8 mm and a length of at least 60 mm.
6. Loosen the right roller bolt and remove tensioner B. If necessary, remove the roller belt sprocket.
7. Loosen the bolts, paying attention to their location, and remove the front casing and gasket.
8. Remove the screwdriver and take out the rollers.
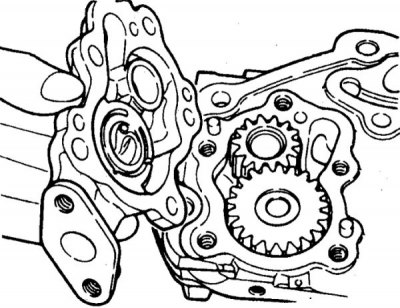
9. Remove the oil pump cover and take out the gears.
10. Check the condition of the pump gears and planes, replace worn parts.
Clean the oil passages. Carefully check the condition of the oil seals in the front cover and replace if necessary. Check the rollers for wear and traces of seizure.
Installation
1. Check the wear of the pressure reducing valve plunger. Install into the front cover, aligning the marks.
2. Lubricate and install the pump gears in place, aligning the marks.
3. Install the pump cover and tighten the bolts to 21 N·m.
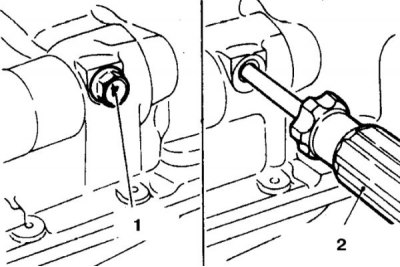
4. Carefully install the rollers without damaging the bearings (1 - plug; 2 – screwdriver).
5. Place the MD 998285-01 mandrel on the crankshaft.
6. Install a new gasket, install the front cover and tighten the bolts.
7. Fix the left roller with a screwdriver, tighten the bolt to a torque of 35 Nm.
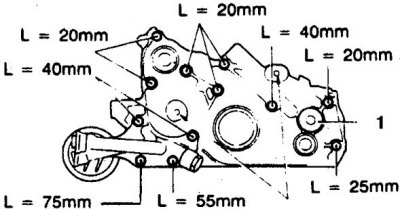
8. Install the filter bracket, tighten the cover and bracket bolts to 23 Nm 9 (1 – cap).
9. Place the cap on the left shaft.
10. Assemble the pressure reducing valve, tighten the plug to a torque of 45 Nm.
11. Install the oil receiver, pan and oil filter.
12. Install the sprockets, toothed belts and adjust their tension (see subsection 3.4.29).
2.6L Engine
Removal
1. Remove both chains and sprockets (see subsection 3.4.30).
2. Drain the oil and remove the filter.
3. Disconnect the bypass valve and oil cooler hoses at the bracket.
4. Unscrew the bolt and nut and remove the bracket and sealing rings.
5. Remove the pan and oil receiver, remove the gaskets.
6. Remove the pressure reducing valve parts, unscrew the bolts and remove the oil pump housing.
7. Remove the pump gears and remove the key from the vibration damper shaft.
8. Remove the pump cover with gasket.
9. If necessary, remove the left roller. To do this, screw 2 M8 bolts into the threaded holes of the flange and, by tightening the bolts, press out the stop. If necessary, remove the right roller.
Installation
1. Check the condition of the split surfaces of the pump cover and the front engine cover. Check the end clearance of the gears. If the gap exceeds 0.15 mm, replace the gears and (or) the housing. Clean the oil channels. Check the rollers for wear.
2. Replace all gaskets and seals.
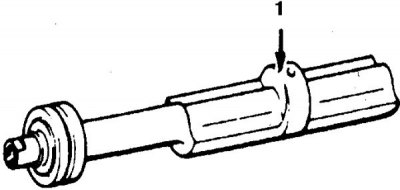
3. Before installation, lubricate the roller necks (1 – lubrication point).
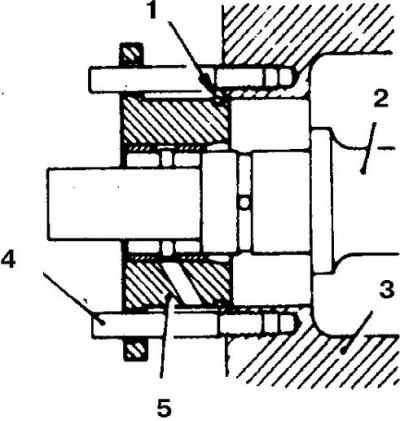
4. Install the roller stop on the M6 guide studs 50 mm long, then remove the studs and tighten the stop bolts with a torque of 11 N·m. (1– ring; 2 – left roller; 3 – cylinder block; 4 – stud M6; 5 – stop).
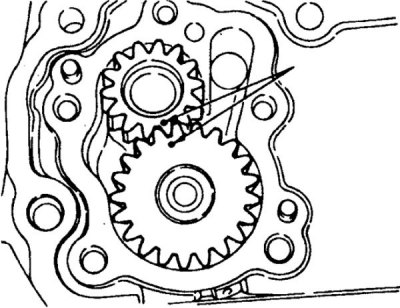
5. When assembling the pump, align the gear marks and fill in about 10 cc of oil.
6. Tighten the pump cover bolts to 11 N·m, the large pump housing bolts to 65 N·m, the small bolts and screws to 10 N·m, and the pressure relief valve plug to 10 N·m.
Engines 3.0 and 3.5 l
Removal
1. Disconnect the battery from ground.
2. Remove the oil level indicator.
3. Raise the front of the vehicle.
4. Remove the toothed belt (see subsection 3.4.29).
5. Drain the oil, remove the pan and oil receiver.
(The original was published on the website mitsubishiman)
6. Loosen the bolts and remove the oil pump, paying attention to the location of the bolts.
Installation
1. Installation is carried out in reverse order
2. Replace the gaskets and crankshaft oil seal.
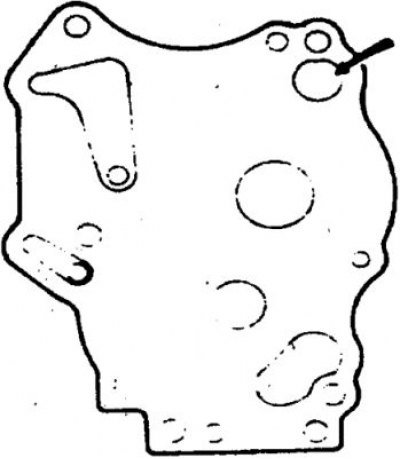
3. Before assembly, fill the pump with technical petroleum jelly or add oil. Tighten the pump bolts to 15 Nm.