
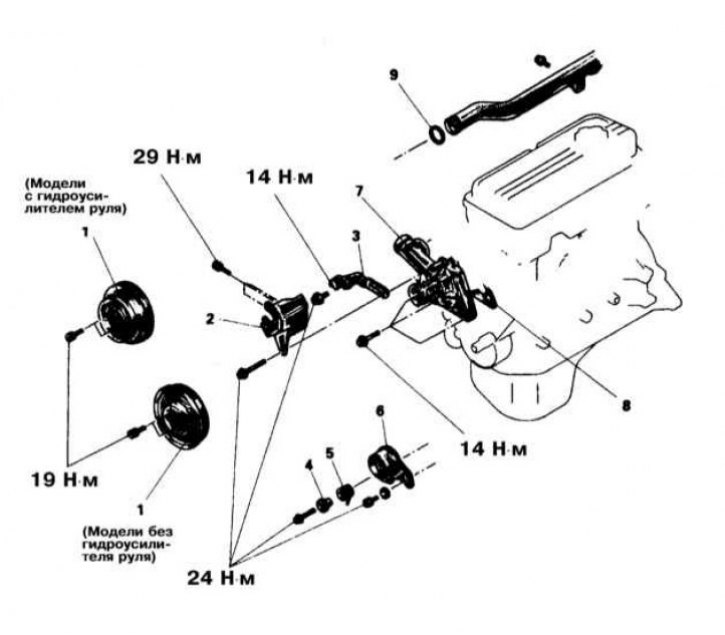
Water pump installation details on Mirage models equipped with a 1.5L engine (4G15)
1 - Water pump pulley; 2 - Steering pump support bracket (models with power steering); 3 - Generator support bracket; 4 - Remote tensioner bushing; 5 - Tensioner spring; 6 - Timing belt tensioner; 7 - Water pump; 8 - Sealing gasket; 9 - O-ring
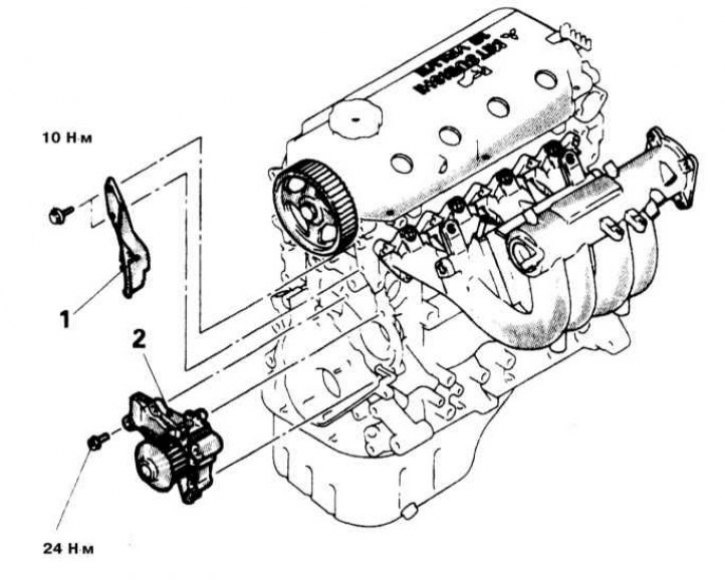
Water pump installation details on Mirage models equipped with a 1.8L engine (4G93)
1 - Rear timing cover
2 - Water pump
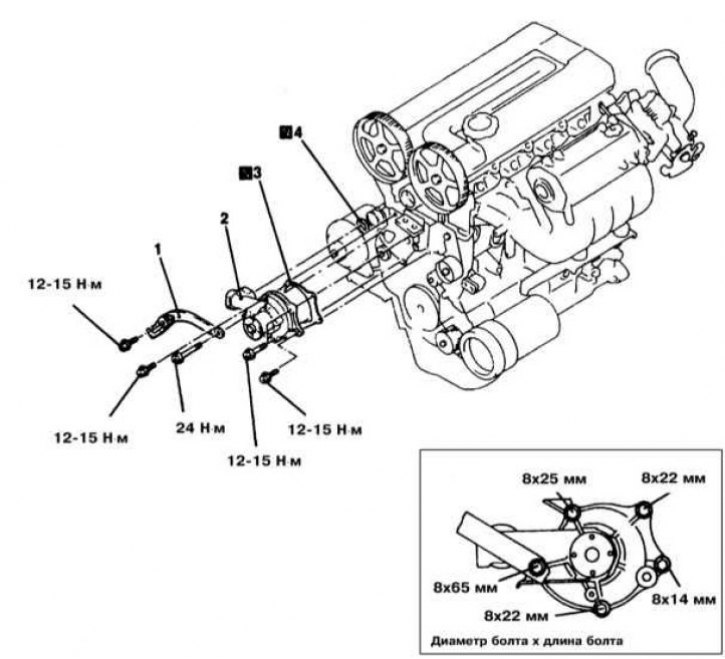
Details of installing a water pump on a 2.0L DOHC engine
1 - Generator support bracket; 2 - Water pump; 3 - Sealing gasket; 4 - O-ring
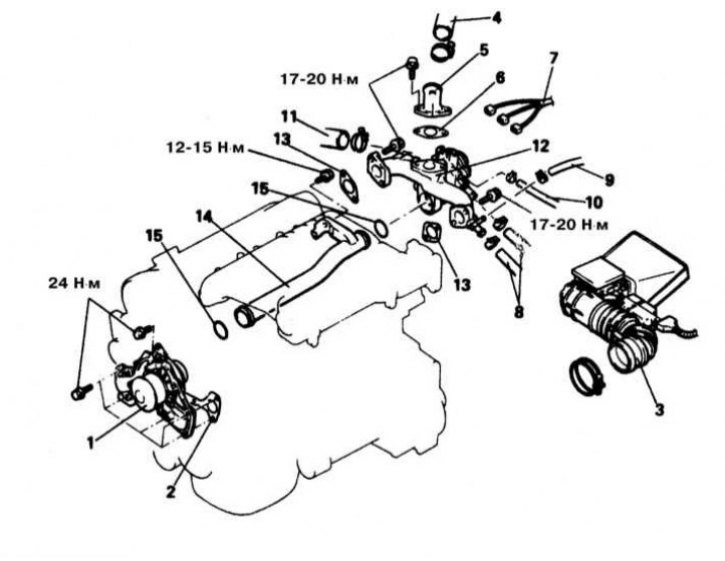
Water Pump Installation Details on 3.0L DOHC Models
1 - Water pump; 2 - Sealing gasket; 3 - Inlet air duct; 4 - Branch pipe for connecting the upper radiator hose; 5 - Water outlet pipe; 6 - Sealing gasket; 7 - Contact connectors of the wiring harness; 8 - Branch pipe for connecting the heating system hose; 9 - Branch pipe for connecting the water path hose A; 10 - Branch pipe for connecting the water path hose; 11 - Branch pipe for connecting the lower radiator hose; 12 - Thermostat casing; 13 - Sealing gasket; 14 - Water inlet pipe; 15 - O-ring
Engines 1.5 l and 1.8 l
Removing
1. The details of installing the water pump on 1.5L and 1.8L engines are shown in the illustrations.
2. Disconnect the negative cable from the battery.
If the stereo system installed in the car is equipped with a security code, before disconnecting the battery, make sure that you have the correct combination to activate the audio system!
3. Empty the cooling system.
To avoid burns, proceed with the above work only after the system has completely cooled down! Do not allow antifreeze to come into contact with exposed areas of the body and painted surfaces of the car. Accidental splashes should be washed off immediately with plenty of water. Remember that antifreeze is a highly toxic liquid and getting it into the body, even in small quantities, is fraught with the most serious consequences (up to death). Never leave antifreeze stored in a loosely sealed container and clean up spilled coolant on the floor without delay. Remember that the sweet smell of antifreeze can attract the attention of children and animals. Consult any car service station about ways to dispose of used coolant. In many regions of the world, special points have been set up to receive various types of detention. Never drain old coolant down the drain and onto the ground!
4. Remove the crankcase protection elements.
5. Release a bolt of a collar of fastening of a hose of system of hydrostrengthening of a wheel.
6. Remove the accessory drive belts.
7. Support the engine with a trolley jack and remove the powertrain mount bracket.
8. Remove the timing belt (see Section Removing and installing timing cover and timing belt).
9. Remove the steering pump support bracket.
10. Remove the alternator support bracket.
11. Turn out fixing bolts and remove assembly of the water pump, its sealing lining, and also a sealing ring of the union socket (ov) water inlet pipe.
The water pump mounting bolts have different lengths - try to remember the exact location of each of the fasteners.
Installation
1. Thoroughly clean the mating surfaces of the water pump assembly and engine block, then wipe them with a rag soaked in acetone.
2. On 1.5L models, install a new O-ring into the groove on the front of the water inlet.
The ring is installed dry, without the use of any oils or greases! It is only allowed to slightly moisten the ring before planting with water.
3. On 1.8 l models, apply a continuous pad of sealant 2.5÷3.0 mm thick to the mating surface of the pump, then press the pump assembly to the engine, screw in and tighten the mounting bolts with the required force (24 Nm).
The installation of the pump must be carried out within no more than 15 minutes after applying the sealant! Filling the cooling system and starting the engine can be carried out at least an hour after the installation of the pump!
4. On 1.5L models, install the water pump assembly to the engine (don't forget to replace the gasket), screw in the mounting bolts and tighten them with the required force (25 Nm), - try to prevent displacement of the pump assembly in the process of tightening the fasteners.
5. Install the remaining components in the reverse order of their dismantling.
6. Fill the system with fresh coolant.
7. Connect the battery, start the engine, warm it up to normal operating temperature and correct the coolant level in the radiator. Check the cooling system for signs of leak development.
8. After the engine has cooled down, check the coolant level again.
Engines 1.6 l and 2.0 l (SOHC and DOHC)
Removing
1. The details of installing the water pump on 2.0L DOHC engines are shown in the illustration, on other engines the picture looks similar.
2. Disconnect the negative cable from the battery.
If the stereo system installed in the car is equipped with a security code, before disconnecting the battery, make sure that you have the correct combination to activate the audio system!
3. Empty the cooling system.
To avoid burns, proceed with the above work only after the system has completely cooled down! Do not allow antifreeze to come into contact with exposed areas of the body and painted surfaces of the car. Accidental splashes should be washed off immediately with plenty of water. Remember that antifreeze is a highly toxic liquid and getting it into the body, even in small quantities, is fraught with the most serious consequences (up to death). Never leave antifreeze stored in a loosely sealed container and clean up spilled coolant on the floor without delay. Remember that the sweet smell of antifreeze can attract the attention of children and animals. Consult any car service station about ways to dispose of used coolant. In many regions of the world, special points have been set up to receive various types of detention. Never drain old coolant down the drain and onto the ground!
4. Remove the timing belt (see Section Removing and installing timing cover and timing belt).
5. If necessary, remove the generator support bracket from the pump assembly.
6. If necessary, remove the rear timing cover.
7. Turn out fixing bolts and remove assembly of the water pump and its sealing lining. Remove the sealing ring.
Installation
1. Thoroughly clean the mating surfaces of the water pump assembly and engine block, then wipe them with a rag soaked in acetone.
2. Install a new O-ring into the groove on the front of the water inlet.
The ring is installed dry, without the use of any oils or greases! It is only allowed to slightly moisten the ring before planting with water.
3. Install the water pump assembly to the engine (don't forget to replace the gasket), screw in the mounting bolts and tighten them with the required force (12÷25 Nm), - try to prevent displacement of the pump assembly in the process of tightening the fasteners. Install the generator support bracket on the pump assembly, screw in the mounting bolt and tighten it to the required torque (24 Nm).
4. If removed, reinstall the timing belt rear cover.
5. Install the timing belt (see Section Removing and installing timing cover and timing belt).
6. Install the remaining components in the reverse order of their dismantling.
7. Fill the system with fresh coolant.
8. Connect the battery, start the engine, warm it up to normal operating temperature and correct the coolant level in the radiator. Check the cooling system for signs of leak development.
9. After the engine has cooled down, check the coolant level again.
Engines 2.4 l
Removing
1. Disconnect the negative cable from the battery.
If the stereo system installed in the car is equipped with a security code, before disconnecting the battery, make sure that you have the correct combination to activate the audio system!
2. Empty the cooling system.
To avoid burns, proceed with the above work only after the system has completely cooled down! Do not allow antifreeze to come into contact with exposed areas of the body and painted surfaces of the car. Accidental splashes should be washed off immediately with plenty of water. Remember that antifreeze is a highly toxic liquid and getting it into the body, even in small quantities, is fraught with the most serious consequences (up to death). Never leave antifreeze stored in a loosely sealed container and clean up spilled coolant on the floor without delay. Remember that the sweet smell of antifreeze can attract the attention of children and animals. Consult any car service station about ways to dispose of used coolant. In many regions of the world, special points have been set up to receive various types of detention. Never drain old coolant down the drain and onto the ground!
3. Remove the crankcase protection elements.
4. Release a bolt of a collar of fastening of a hose of system of hydrostrengthening of a wheel.
5. Remove the accessory drive belts.
6. Support the engine with a trolley jack and remove the powertrain mount bracket.
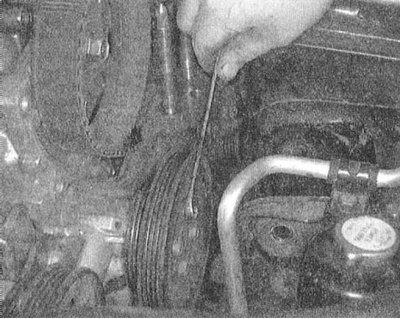
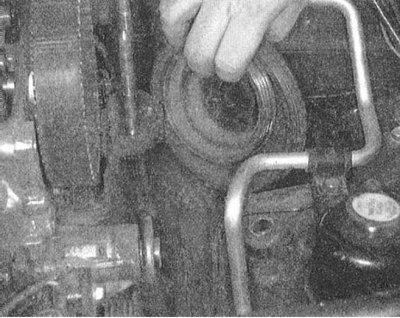
7. Remove the accessory drive belts. Turn out fixing bolts and remove a pulley of the water pump.
 |  |
8. Remove the A/C compressor drive belt tensioner support bracket.
9. Remove the front timing covers.
10. Remove the timing belts and balance shaft (see Section Removing and installing timing cover and timing belt).
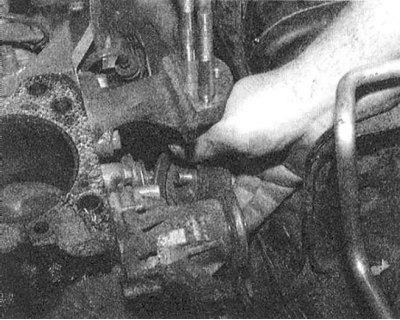
11. Remove the intermediate roller of the K / V compressor drive belt and its (roller) support bracket.
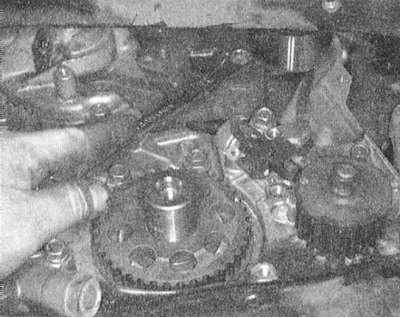 | 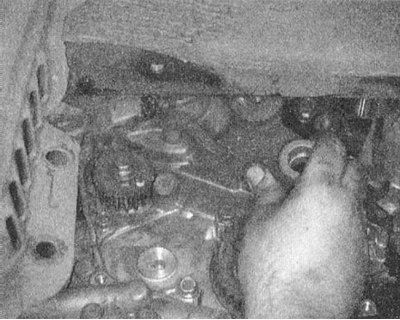 |
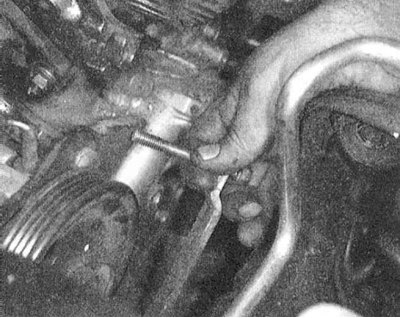
12. Remove the alternator support bracket.
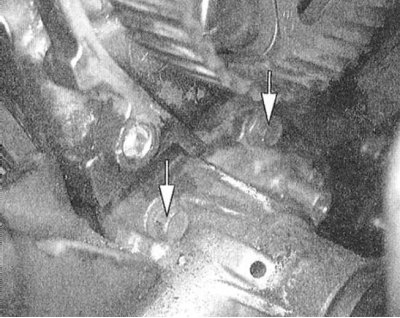
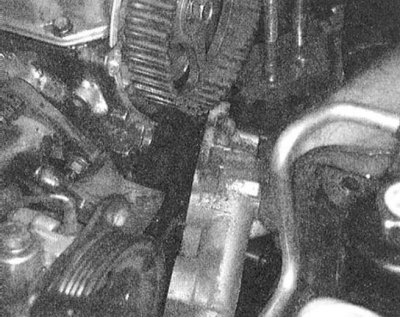
13. Turn out fixing bolts and remove assembly of the water pump, its sealing lining, and also a sealing ring of the union socket (ov) water inlet pipe.
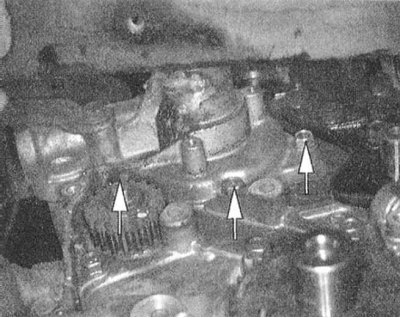 |  |
Installation
1. Thoroughly clean the mating surfaces of the water pump assembly and engine block, then wipe them with a rag soaked in acetone.
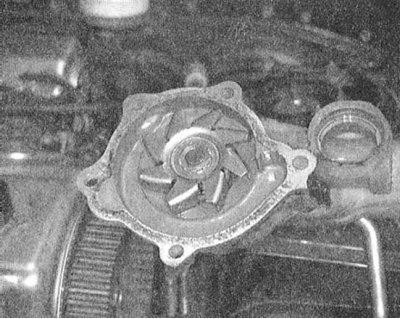
2. Assess the condition of the water pump rotor blades, if any signs of wear or damage are found, replace the pump assembly.
3. Install a new O-ring into the groove on the front of the water inlet.
The ring is installed dry, without the use of any oils or greases! It is only allowed to slightly moisten the ring before planting with water.
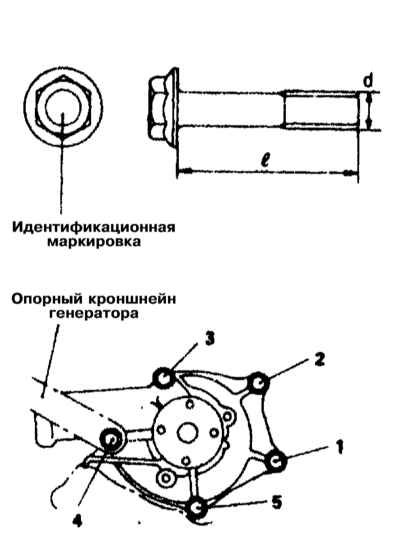
4. Install the water pump assembly to the engine (don't forget to replace the gasket), screw in the mounting bolts and tighten them with the required force (bolts marked 4 on the head - with a force of 14 Nm, bolts marked 7 - with a force of 24 Nm), - try to prevent displacement of the pump assembly in the process of tightening the fasteners.
5. Install the bracket for the intermediate roller of the K / V compressor drive belt and the roller itself.
6. Install timing belts and balance shaft (see Section Removing and installing timing cover and timing belt).
7. Install accessory drive belts.
8. Install the powertrain mount bracket.
9. Install the crankcase protection elements.
10. Install the remaining components in the reverse order of their dismantling.
11. Fill the engine with fresh coolant.
12. Connect the battery, start the engine, warm it up to normal operating temperature and correct the coolant level in the radiator. Check the cooling system for signs of leak development.
13. After the engine has cooled down, check the coolant level again.
Engines 3.0 l and 3.5 l
Removing
1. The details of installing the water pump on 3.0L DOHC engines are shown in the accompanying illustration, on other engines the picture looks similar.
2. Disconnect the negative cable from the battery.
If the stereo system installed in the car is equipped with a security code, before disconnecting the battery, make sure that you have the correct combination to activate the audio system!
3. Empty the cooling system.
To avoid burns, proceed with the above work only after the system has completely cooled down! Do not allow antifreeze to come into contact with exposed areas of the body and painted surfaces of the car. Accidental splashes should be washed off immediately with plenty of water. Remember that antifreeze is a highly toxic liquid and getting it into the body, even in small quantities, is fraught with the most serious consequences (up to death). Never leave antifreeze stored in a loosely sealed container and clean up spilled coolant on the floor without delay. Remember that the sweet smell of antifreeze can attract the attention of children and animals. Consult any car service station about ways to dispose of used coolant. In many regions of the world, special points have been set up to receive various types of detention. Never drain old coolant down the drain and onto the ground!
4. Remove the crankcase protection elements.
5. Support the engine with a trolley jack and remove the powertrain mount bracket.
6. Remove the timing belt (see Section Removing and installing timing cover and timing belt).
7. Disconnect the cooling path hoses connected to the pump assembly.
8. Remove the alternator support bracket.
9. Turn out fixing bolts and remove assembly of the water pump, its sealing lining, and also sealing rings of the union socket of a branch pipe of an inlet of water.
The water pump mounting bolts have different lengths - try to remember the exact location of each of the fasteners.
Installation
1. Thoroughly clean the mating surfaces of the water pump assembly and engine block, then wipe them with a rag soaked in acetone.
2. Install a new O-ring into the groove on the front of the water inlet.
The ring is installed dry, without the use of any oils or greases! It is only allowed to slightly moisten the ring before planting with water.
3. Install the water pump assembly to the engine (don't forget to replace the gasket), screw in the mounting bolts and tighten them with the required force (24 Nm), - try to prevent displacement of the pump assembly in the process of tightening the fasteners.
4. Connect the coolant hoses to the pump.
5. Install the timing belt (see Section Removing and installing timing cover and timing belt).
6. Install accessory drive belts.
7. Fill the system with fresh coolant.
8. Connect the battery, start the engine, warm it up to normal operating temperature and correct the coolant level in the radiator. Check the cooling system for signs of leak development.
9. After the engine has cooled down, check the coolant level again.