

Details of installation of fan assemblies on Diamante models
1 - Drain valve; 2 - Radiator cover; 3 - overflow tube; 4 - Expansion tank; 5 - Upper radiator hose; 6 - Lower radiator hose; 7 - Union connection of the ATF cooling line; 8 - Union connection of the ATF cooling line; 9 - Cushion of the upper support; 10 - Radiator assembly; 11 - Cushion of the lower support; 12 - Assembling the condenser fan of the air conditioning system; 13 - Drive electric motor; 14 - Impeller; 15 - Drive electric motor; 16 - Casing
Except Diamante models
Removing
1. Disconnect the negative cable from the battery.
If the stereo system installed in the car is equipped with a security code, before disconnecting the battery, make sure that you have the correct combination to activate the audio system!
2. Empty the cooling system.
To avoid burns, proceed with the above work only after the system has completely cooled down! Do not allow antifreeze to come into contact with exposed areas of the body and painted surfaces of the car. Accidental splashes should be washed off immediately with plenty of water. Remember that antifreeze is a highly toxic liquid and getting it into the body, even in small quantities, is fraught with the most serious consequences (up to death). Never leave antifreeze stored in a loosely sealed container and clean up spilled coolant on the floor without delay. Remember that the sweet smell of antifreeze can attract the attention of children and animals. Consult any car service station about ways to dispose of used coolant. In many regions of the world, special points have been set up to receive various types of detention. Never drain old coolant down the drain and onto the ground!
3. Disconnect the overflow pipe and the upper radiator hose.
4. On models with AT, disconnect the ATF cooling lines (plug the open ends of hoses and fittings immediately).
5. Disconnect the electrical wiring from the engine cooling fan.
6. Turn out fixing bolts and remove the fan in gathering with a protective casing from the car.
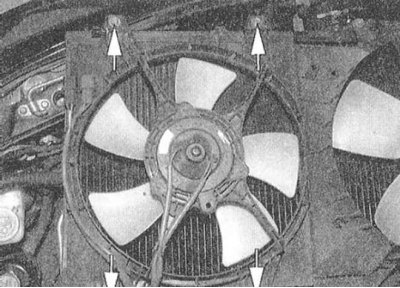 |  |
7. Loosen the impeller mounting nut and remove the impeller from the drive motor shaft.
8. Turn out fixing screws and remove the electric motor from an assembly casing.
Installation
1. Install the electric motor on the assembly casing, screw in and tighten the mounting bolts.
2. Proceed in reverse order to remove the components.
3. Finally, fill the cooling system with the required amount of fresh mixture (see chapter Settings and ongoing maintenance), connect the negative cable to the battery and check that the fan is working properly (ov).
Diamante Models
Removing
1. The installation details of the fan assembly on Diamante models are shown in the illustration.
2. Disconnect the negative cable from the battery.
If the stereo system installed in the car is equipped with a security code, before disconnecting the battery, make sure that you have the correct combination to activate the audio system!
3. Empty the cooling system.
To avoid burns, proceed with the above work only after the system has completely cooled down! Do not allow antifreeze to come into contact with exposed areas of the body and painted surfaces of the car. Accidental splashes should be washed off immediately with plenty of water. Remember that antifreeze is a highly toxic liquid and getting it into the body, even in small quantities, is fraught with the most serious consequences (up to death). Never leave antifreeze stored in a loosely sealed container and clean up spilled coolant on the floor without delay. Remember that the sweet smell of antifreeze can attract the attention of children and animals. Consult any car service station about ways to dispose of used coolant. In many regions of the world, special points have been set up to receive various types of detention. Never drain old coolant down the drain and onto the ground!
4. Disconnect the wiring from the fan and radiator sensor.
Usually the electrical connectors of these components are sealed - try not to damage the details of the assembly design.
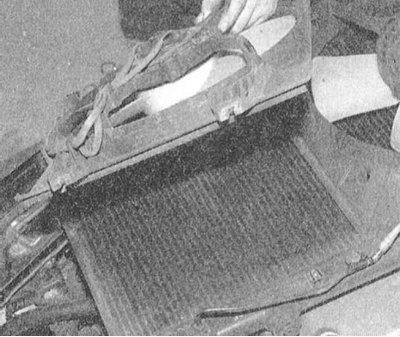
5. Disconnect the upper hose from the radiator and remove the expansion tank.
6. Turn out fixing screws and remove fan assembly.
On these models, it is possible to remove the cooling and air conditioning fans separately.
7. If necessary, remove the impeller and drive motor.
Installation
1. Installation is in the reverse order to the removal of the components.
2. Finally, fill the cooling system with the required amount of fresh mixture (see chapter Settings and ongoing maintenance), connect the negative cable to the battery and check that the fan is working properly (ov).