
The following replacement parts must be purchased:
- Petrol engines with fuel injection: Gaskets for hollow bolts.
- Fuel filter for the respective engine. Please state year and model when purchasing.
Water removal / fuel filter replacement
A vessel is required to collect water sediment. Caution: Wipe up any escaping diesel fuel on the rubber parts immediately (e.g. cooling system hoses), Otherwise, over time, they will collapse.
Water removal
Water should be removed when the fuel filter warning lamp on the instrument panel lights up.
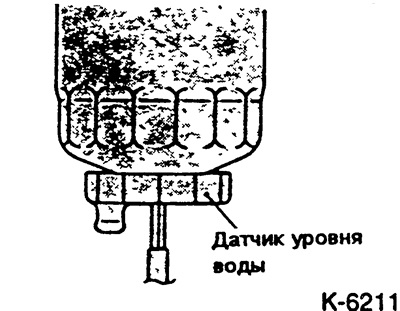
- Place a suitable container under the drain plug.
- Remove the drain plug (water level sensor) 2-2½ turns.
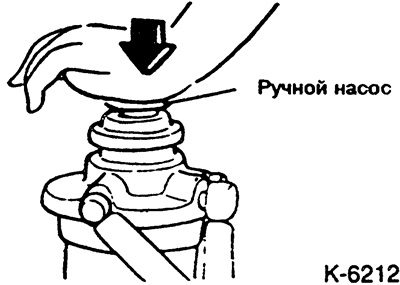
- F Pump with a hand pump until clean diesel fuel comes out (6-7 times).
- F Tighten the water drain valve by hand.
- F Purge air from the fuel system.
Filter replacement
- Briefly open the fuel tank cap to release the pressure in the tank.
- Drain all fluid from the fuel filter as described in the previous paragraph.
- If equipped, disconnect the water alarm connector.
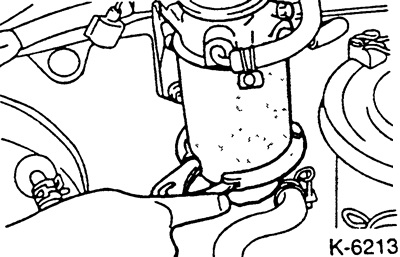
- Unscrew and remove the fuel filter cartridge from the filter housing using the fuel filter wrench.
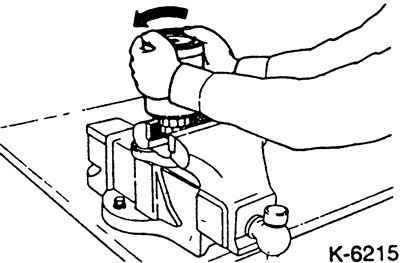
- If present, unscrew the water indicator, check and insert into a new filter. Install the water level sensor in a vise and remove by turning the filter housing. At the same time, do not clamp strongly in a vice, so as not to damage the sensor.
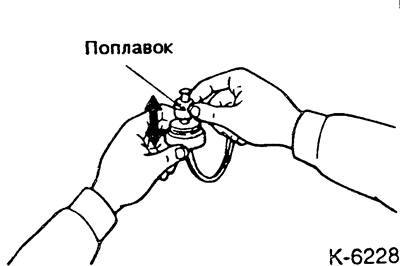
- Check the water level sensor. To do this, connect an ohmmeter to the connector, hold the sensor as shown in the figure, and move it down. With the float raised, the ohmmeter should show 0 ohms, with the float lowered - ∞.
- Fill the fuel filter up to the brim with diesel fuel and fasten, moisten the gasket with diesel fuel first.
- Remove air from the fuel system.
- After a test drive, check the fuel system for leaks.
Bleeding air from the fuel system
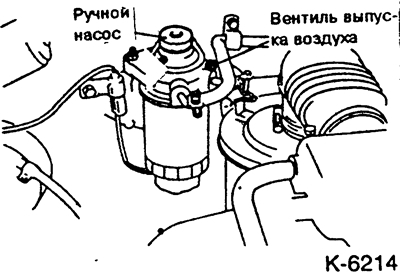
- Open the air release screw.
- Pump with a hand pump until no more air bubbles come out of the hole. Lay a cloth around the bleeder screw.
- Close the air release screw.
- Operate the hand pump until you feel resistance.
- It is normal to preheat the engine and then start it.
- If the engine does not start, repeat the bleeding process.
- Inspect the fuel system for leaks, especially at the fuel filter connection.
Carburetor engines
The fuel filter is located in the engine compartment on the fuel supply pipeline. After disconnecting the inlet and outlet hoses, 2 clamps are required to secure the hoses; clamps with screw clamps can be used.
Withdrawal
Caution: Do not make open flames, fire hazard!
- Disconnect the earth cable from the battery. Attention: This erases data in the electronic memory, such as the engine fault memory or the radio code. Disconnect the battery only when the ignition is off, otherwise the control unit of the fuel injection device may fail. Before disconnecting the battery, read the instructions in section "Removing and installing the battery".
- Disconnect the tubes with clamps from the fuel pump hoses.
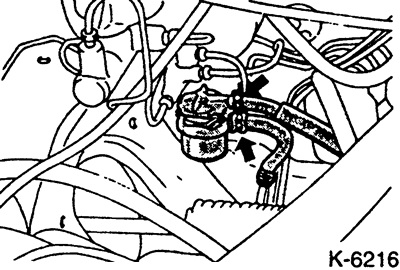
- Loosen the clamps and remove the hoses from the fuel pump.
Installation
- Connect the hoses to the new fuel filter and secure them with clamps. The top hose connects the filter to the carburetor.
- Fasten the joints of hoses with tubes with clamps.
- Connect the ground cable to the battery.
- If available, set the time on the clock and enter the security code into the radio.
- After running the engine, check the tightness of the fuel system connections.
Engines with fuel injection
The fuel filter is located in the engine compartment. When removing the fuel filter, fuel may spill, so a container must be placed to collect it. An appropriate rubber plug will then be required to close the fuel line.
Withdrawal
Attention: do not make open flames, fire hazard!
- Disconnect the earth cable from the battery. Attention: This erases data in the electronic memory, such as the engine fault memory or the radio code. Disconnect the battery only when the ignition is off, otherwise the control unit of the fuel injection device may fail. Before disconnecting the battery, read the instructions in section "Removing and installing the battery".
- Place a container under the fuel filter.
- Remove the air filter see point 6.6.
- Relieve pressure in the fuel system, see point 8.3.
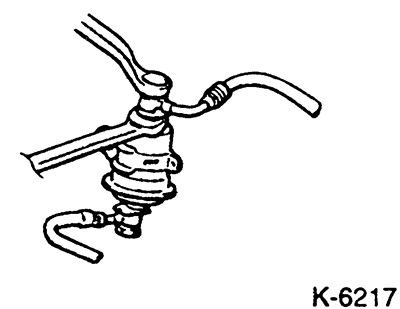
- While holding the fuel filter mounting nut, unscrew the hollow bolt.
Caution: Cover the fuel filter with a rag to collect splashed fuel.
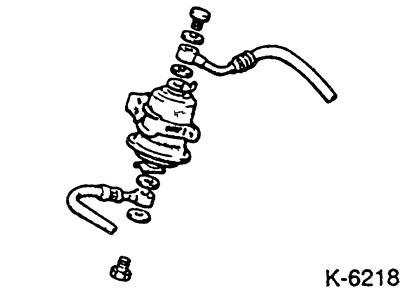
Unscrew the lower fuel pipe from the filter and remove the fuel filter.
Installation
- Screw on the new fuel filter with new gaskets. Tighten the hollow bolt to 35 Nm.
- Using the auxiliary wire, apply battery voltage to the fuel pump terminal to make it work.
- After pressurizing the fuel system, check the tightness of the connections.
- Disconnect auxiliary wire.
- Connect the ground cable to the battery.
- If available, set the time on the clock and enter the security code into the radio.