
Fuel tank on cars 1989-90 with injection engines
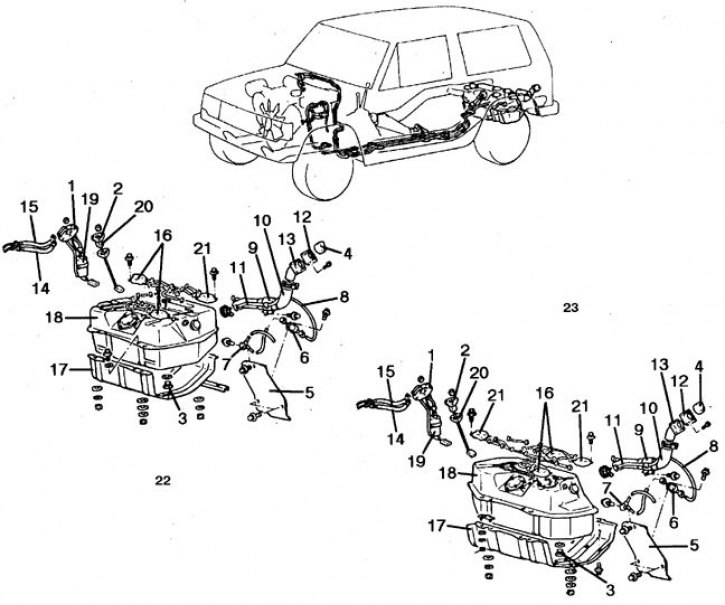
1. Pump connector; 2. Sensor connector; 3. Drain plug; 4. Filter; 5. Shield; 6. Limiting valve; 7. Control valve; 8. Vapor hose;; 9. Collar; 10. Filler pipe; 11. Ventilation tube; 12. Seal; 13. Filler neck; 14. High pressure hose; 15. Return line; 16, 21. Buck; 19. Fuel pump; 20. Fuel level sensor; 22. In the 4-door version; 23. In 2-door version
Fuel tank on cars 1991-94
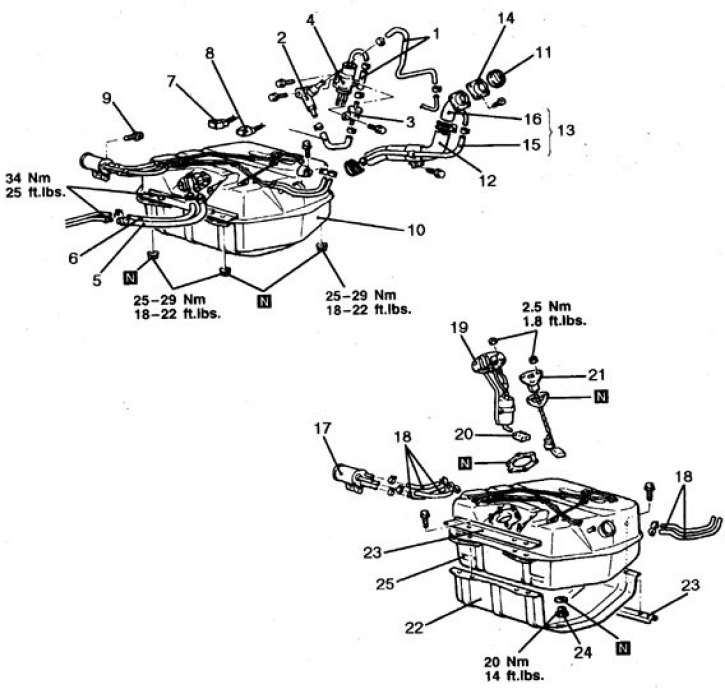
1, 15, 18. Vapor removal hose; 2. Check valve; 3. Pressure reducing valve; 4, 17. Trap; 5. High pressure hose; 6. Fuel return hose; 7 Pump connector; 8. Fuel level sensor connector; 9. Bolts; 10. Buck; 11. Filler cap; 12, 16. Filler pipe; 13. Pipe assembly; 14. Seal; 19. Pump; 20. Filter; 21. Fuel level sensor; 22. Shield; 23. Plate; 24. Drain plug; 25. Buck
Fuel tank on cars 1995-1998
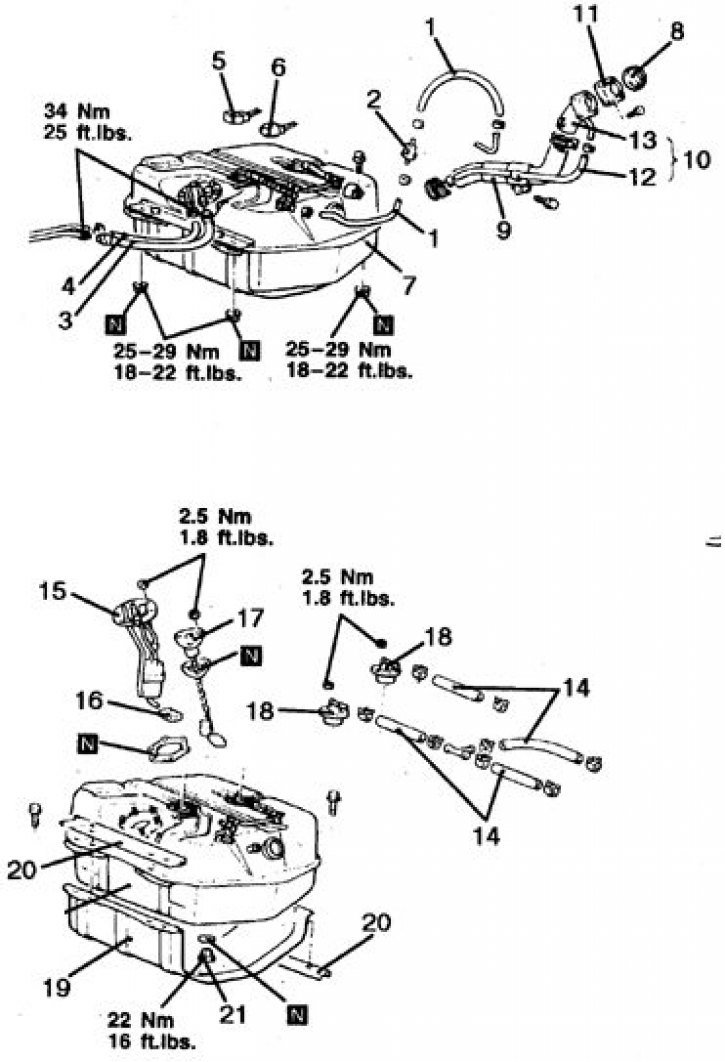
1, 12, 14. Vapor removal hose; 2. Pressure reducing valve; 3. High pressure hose; 4. Fuel return hose; 5. Pump connector; 6. Fuel level sensor connector; 7. Buck; 8. Filler cap; 9. Filler pipe; 10, 13. Throat tube assembly; 11. Seal; 15. Tank assembly; 16. Filter; 17. Fuel level sensor; 18. Check valve; 19. Shield; 20. Drain plug; 21. Buck
Cars 1983-90 (with carbureted engines)
Removing
1. Disconnect the battery from the ground.
2. Raise the rear of the vehicle. remove the wheels. Turn off a mouth of a tank, a drain stopper and merge gasoline.
3. Remove the throat shield.
4. Clearly label and disconnect all hoses from the tank.
5. Disconnect the fuel level sensor connector.
Installation
1. Place a trolley with a jack under the tank, unscrew the fastening nuts and lower the tank.
2. Install the tank in reverse order. Tighten the fastening nuts with a torque of 27 Nm, the drain plug with a torque of 16 Nm.
3. Connect the hoses according to the marked marks.
4. After assembly, check for leaks.
Cars 1989-90 (with injection engines)
Removing
1. Decompress the fuel system (see subsection 8.2.1).
2. Disconnect the battery from the ground. Raise the rear of the car. remove the wheels. Turn off a mouth of a tank, a drain stopper and merge gasoline.
3. Remove the throat shield.
4. Clearly label and disconnect all hoses and valves from the tank. Loosen the screws and remove the tank filler pipe. Disconnect the wires from the fuel pump and sensor.
5. Disconnect from the fuel pump hoses. Remove the cushions at the top of the tank.
Installation
1. Place a trolley with a jack under the tank, unscrew the fastening nuts and lower the tank.
2. Install the tank in reverse order.
3. Tighten the fastening nuts with a torque of 27 Nm, the drain plug with a torque of 18 Nm.
4. Attach the hoses to the tank and pump according to the marked marks. After assembly, check for leaks.
Cars 1991-98
Removing
1. Disconnect the battery from the ground. Disconnect the wires from the tank.
2. Raise the rear of the vehicle. remove the wheels. Turn off a mouth of a tank, a drain stopper and merge gasoline.
3. Remove the side shield bracket.
4. Clearly label and disconnect all hoses from the tank.
5. Place a trolley with a jack under the tank, unscrew the fastening nuts and lower the tank.
6. Remove the fuel pump, pressure reducing valve, fuel level sensor.
Installation
1. Install the tank in reverse order.
2. Tighten the fastening nuts with a torque of 25–30 N·m,
3. Dress the hoses so that they go onto the tubes by 25–30 mm.
4. Screw the hose of the main line first by hand, and then tighten with a torque of 30-40 Nm, avoiding twisting.
5. Pour 1 liter of gasoline into the tank and connect the battery to ground.
6. Start the engine and check for leaks.