



Removal and installation
− The parts are removed in the order of the numbers indicated in the figure "Removing the instrument cluster".
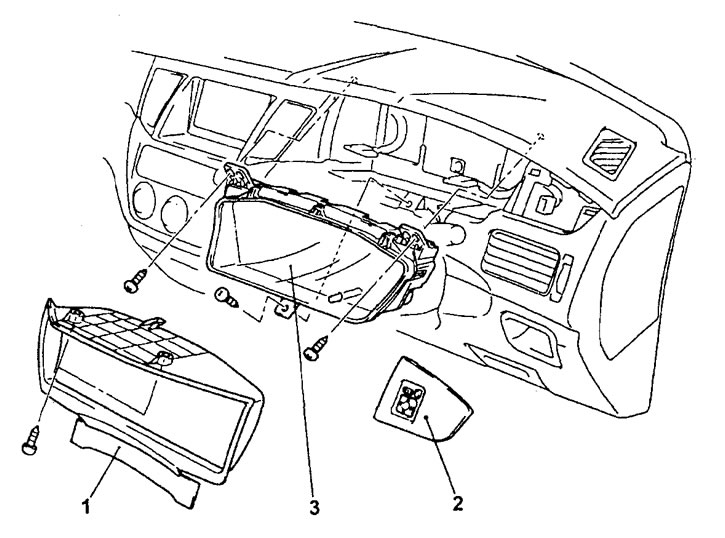
Removal the instrument cluster. 1 - instrument cluster trim, 2 - instrument panel side trim (driver side), 3 - instrument cluster assembly.
− Installation is carried out in the reverse order of removal.
Checking the resistance at the instrument cluster terminals
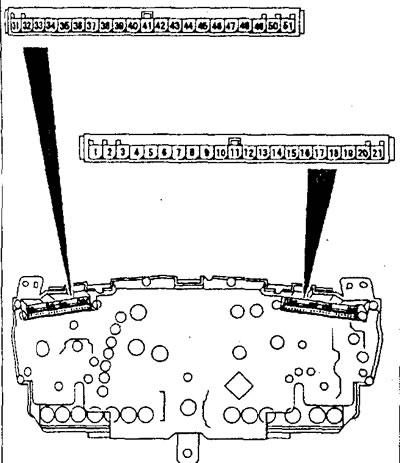
Using an ohmmeter, measure the resistance between the indicated terminals of the instrument cluster and make sure that it corresponds to the nominal value.
Nominal value:
- "50" (coolant temperature gauge) and "1" ("mass") - 233±З0m
Disassembly and assembly
− The parts are removed in the order of the numbers indicated in the figure "Disassembling the instrument cluster".
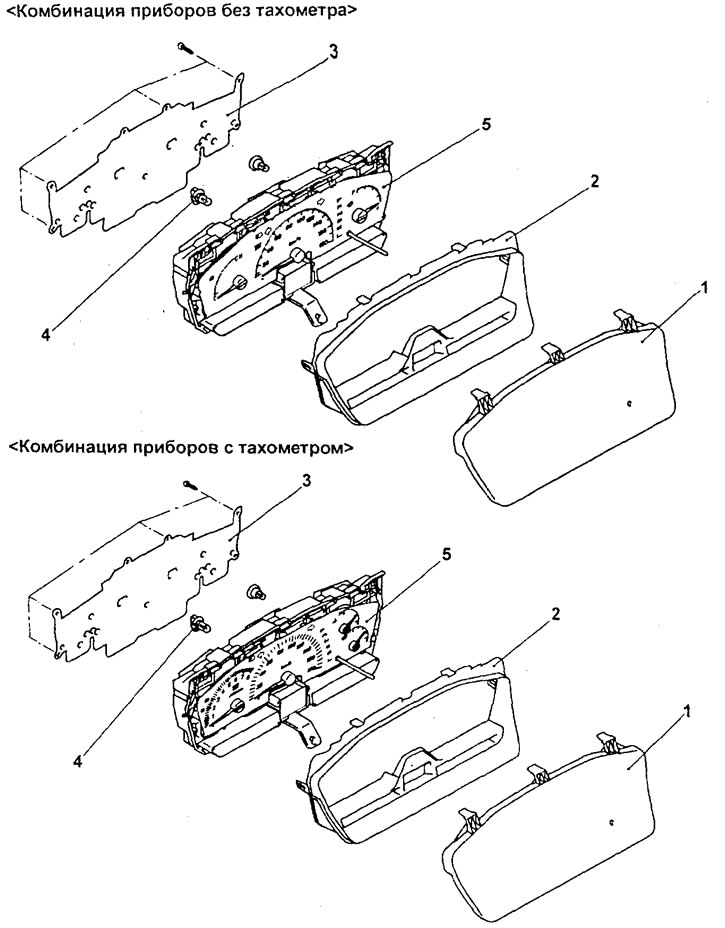
Disassembling the instrument cluster (standard instrument cluster). 1 - instrument cluster glass, 2 - glass mounting frame, 3 - rear cover, 4 - backlight lamp, 5 - instrument cluster assembly.
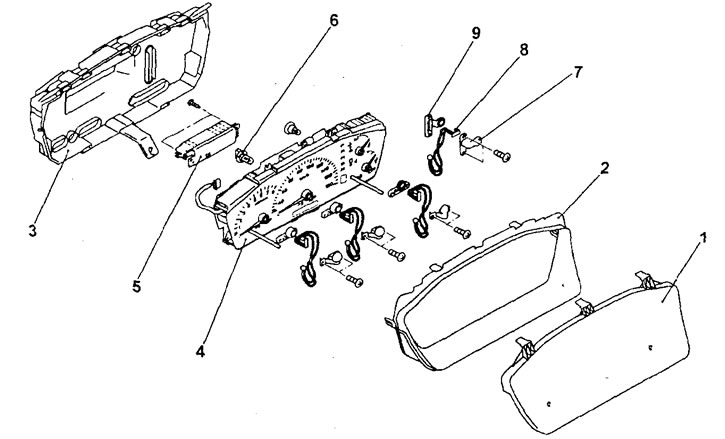
Disassembling the instrument cluster (instrument cluster with high contrast backlighting). 1 - Instrument cluster glass, 2 - Glass mounting frame, 3 - Rear cover, 4 - Instrument cluster assembly, 5 - Inverter, 6 - Backlight lamp, 7 - Upper mounting bracket for high-contrast backlight lamp, 8 - High-contrast backlight lamp, 9 - Lower mounting bracket for high-contrast lamp
− Installation is carried out in the reverse order of removal.