



Contents: Removal and installation the air…⤓ Removal the intake manifold ⤓ Checking components ⤓ Checking the intake manifold ⤓ Installing the intake manifold ⤓ Removal the exhaust manifold ⤓ Checking components ⤓ Checking the exhaust manifold ⤓ Catalytic converter ⤓ Removal and installation ⤓
Removal and installation the air cleaner
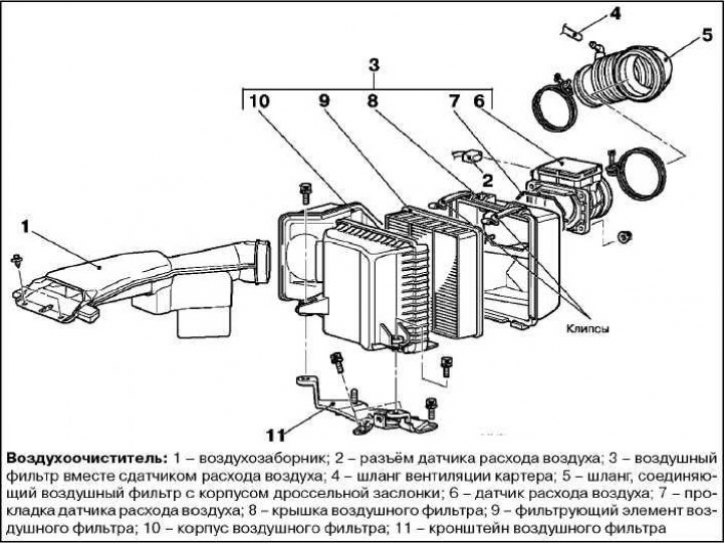
Remove the air intake.
Remove the air flow sensor connector.
Remove the air filter together with the air flow sensor.
Disconnect the crankcase ventilation hose.
Remove the hose connecting the air filter to the throttle body.
Remove the air flow sensor.
Remove the air flow sensor gasket.
Remove the air filter cover.
Remove the air filter element.
Remove the air filter housing.
Remove the air filter bracket.
Installation is carried out in the reverse order of removal.
Removal the intake manifold
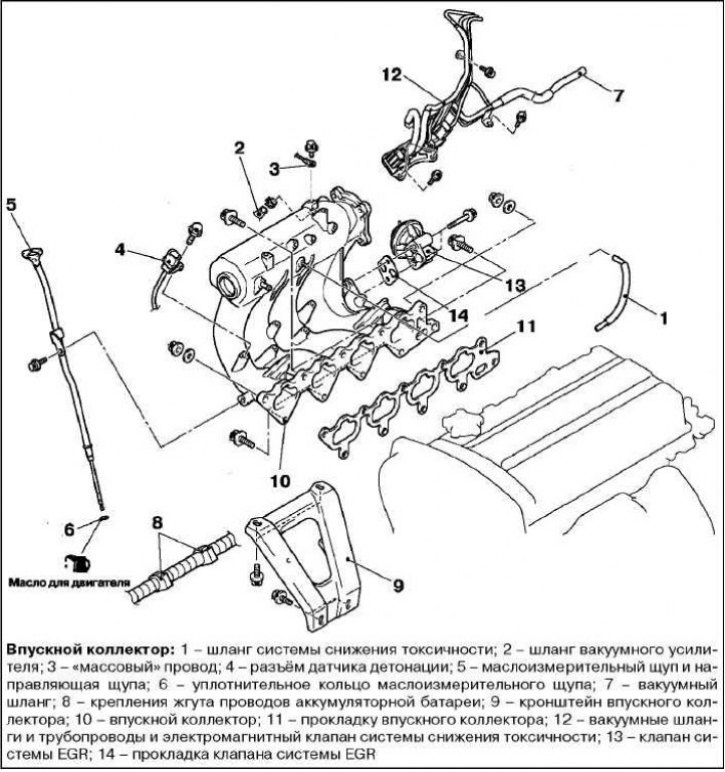
Operations to be performed before removing the manifold.
Relieve pressure in the fuel system.
Drain the coolant from the engine.
Remove the front suspension strut cross member.
Remove the throttle body.
Remove the fuel rail with injectors.
Disconnect the emission control system hose.
Disconnect the vacuum booster hose.
Disconnect the ground wire.
Disconnect the knock sensor connector.
Remove the dipstick and dipstick guide.
Remove the oil dipstick sealing ring.
Disconnect the vacuum hose.
Disconnect the battery wiring harness fasteners.
(The original article is on: mitsubishiman.ru)
Remove the intake manifold bracket.
Remove the intake manifold
Remove the intake manifold gasket.
Remove the vacuum hoses and lines and the emission control solenoid valve.
Remove the EGR valve.
Remove the EGR valve gasket.
Checking components
The check is carried out in accordance with the given check points. In case of detection of defects, the faulty component must be replaced.
Checking the intake manifold
Check the intake manifold for cracks or damage.
Check for clogged vacuum fittings and EGR passages.
Using a ruler or a special template, check the non-flatness of the joint mating with the cylinder head.
- Nominal value: 0.15mm or less.
- Maximum permissible value: 0.20 mm.
Installing the intake manifold
Installation of components is carried out in reverse order.
Install the fuel rail with injectors.
Install the throttle body.
Install the front suspension strut cross member.
Fill the engine with coolant.
Adjust the throttle cable.
Check the fuel system for leaks.
Removal the exhaust manifold
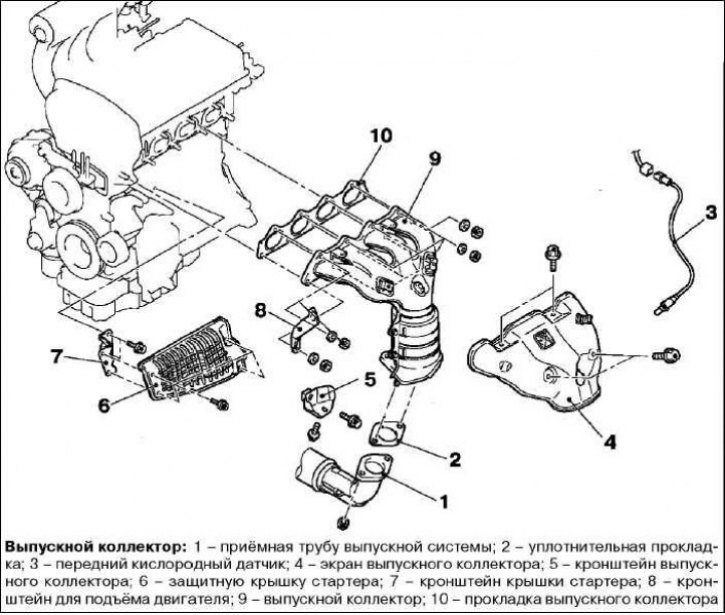
Operations to be performed before removal and after installation of the manifold.
Remove (install) the protective cover.
Disconnect the exhaust pipe.
Remove the sealing gasket.
Disconnect the front oxygen sensor.
Remove the exhaust manifold screen.
Remove the exhaust manifold bracket.
Remove the starter protective cover.
Remove the starter cover bracket.
Remove the engine lift bracket.
Remove the exhaust manifold.
Remove the exhaust manifold gasket.
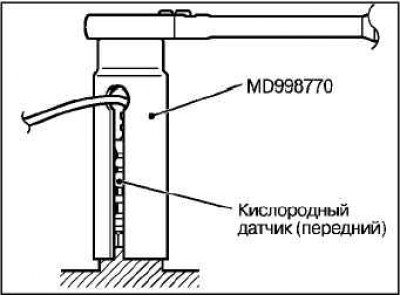
Note: Use a special key to remove and install the front oxygen sensor (MD998770).
Checking components
The check is carried out in accordance with the given check points. In case of detection of defects, the faulty component must be replaced.
Checking the exhaust manifold
Check the exhaust manifold for cracks or damage.
Using a ruler or a special template, check the non-flatness of the manifold joint mating with the cylinder head.
- Nominal value: 0.15mm or less.
- Maximum permissible value: 0.20 mm.
Catalytic converter
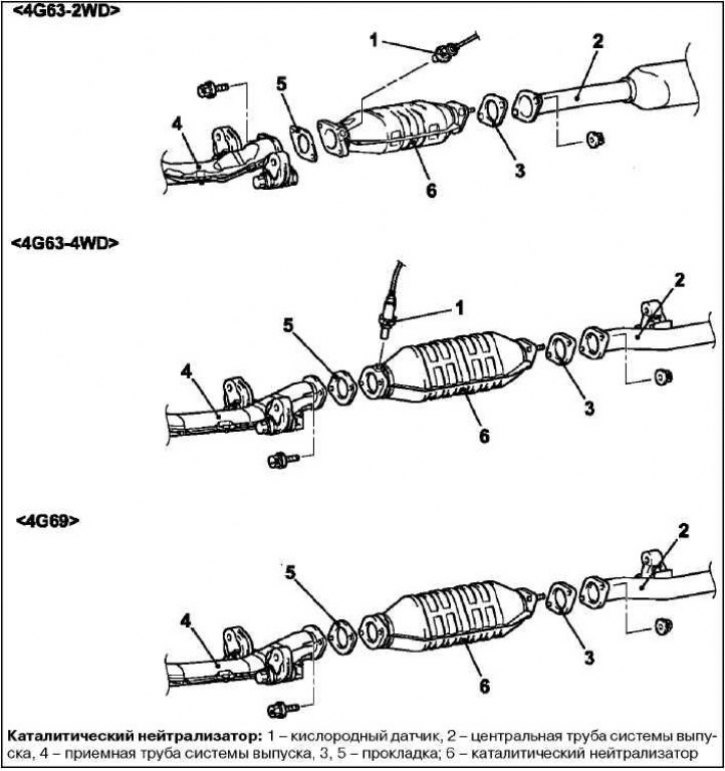
The three-way catalytic converter works in conjunction with the oxygen sensor feedback control system to oxidize carbon monoxide (CO) and hydrocarbons (CH) and reduce nitrogen oxide (NOx) emissions. When the stoichiometric air-fuel ratio is maintained, the three-way converter provides the highest cleaning efficiency for three groups of substances, namely CO, CH and NOx.
Removal and installation
The parts are removed in the order of numbers shown in the figure.
When removing parts, pay attention to the operation of removing the oxygen sensor.
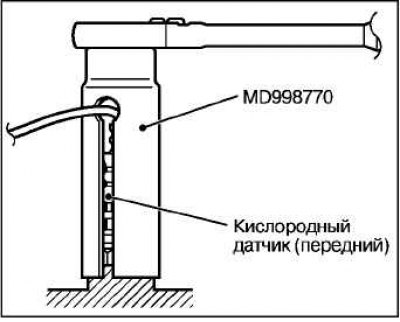
To remove and install the oxygen sensor, use a special key (MD998770).
Installation of parts is carried out in the reverse order of removal.