



Contents: Removal ⤓ Installation ⤓
Control rods and cables are replaced if the control levers move heavily and unevenly.
Removal
Remove the heater control panel frame from the instrument panel, see item. 20.17/20.18.
Cars produced before 8.88
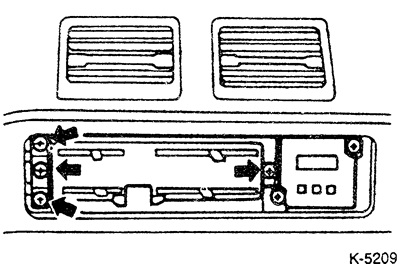
Cars produced since 9.88
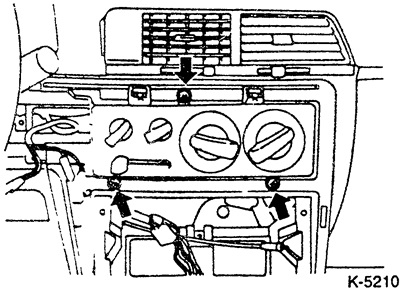
Unscrew the screws and pull out the heater control panel a little.
Disconnect the control cables from the heater housing and pull out the heater control panel. To disconnect, use a screwdriver to pry up the spring clips on the cable sheaths and remove the cables. To access the fastening, disconnect the glove compartment fastening and the lower instrument panel trims, see item. 20.17/20.18.
Installation
Cars produced before 8.88: Lubricate the control lever at the junction with the hinge.
First connect the heater cables to the heater control panel, then place the stops, press the clamps with pliers and snap them into place.
Install the remote control.
Connect the cables to the heater without securing the casings.
Adjustment on cars with output up to 8.88
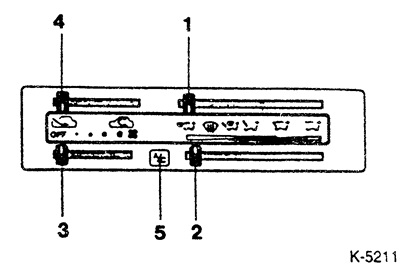
Move the air flow flap control lever "1" all the way to the left, see figure.
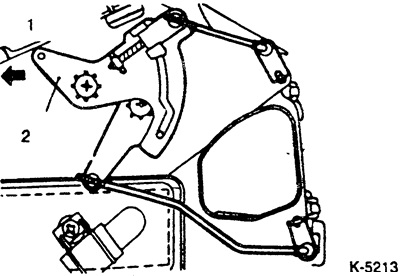
1 - front side of the car,
2 - air flow flap control lever.
Press the actuator lever on the heater away from the cable mount until it stops, then connect the cable to the lever and snap the cable casing into the spring clamp.
Set the temperature setting lever (-2- in Fig. K-5211) to the extreme left position, the "cold" position.
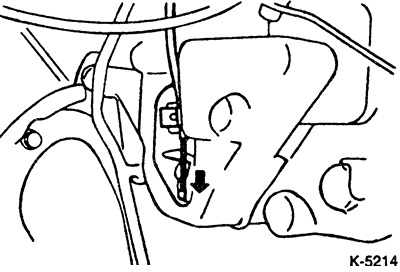
Press the heating valve down until it stops (valve closed) and secure the cable.
Set the air mixture regulator (-4- in Fig. K-5211) to the extreme right position, to the "air flow" position.
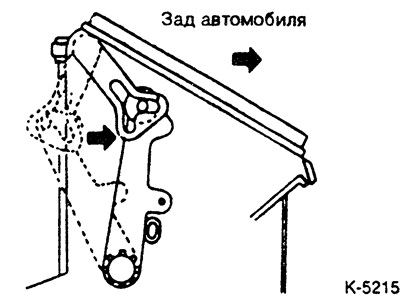
Press the air distribution lever all the way back and secure the cable.
Check the adjustment: The control levers should move easily, without rubbing, throughout the entire range, otherwise, repeat the adjustment of the corresponding cable.
Adjustment on cars produced since 9.88
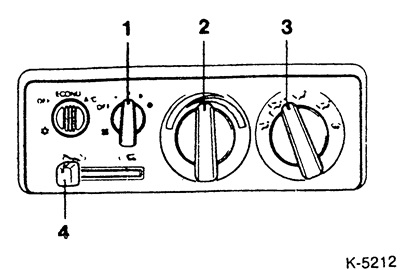
Set the air flow flap control handle "3" to the extreme left position.
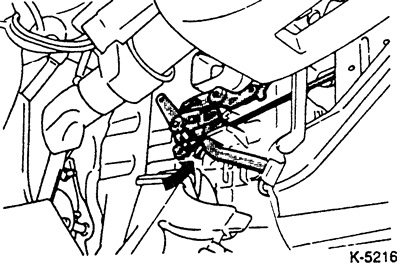
Press the actuator lever on the heater outward in the direction of the arrow, then connect the cable to the lever and snap the cable casing into the spring clamp.
Turn the temperature control knob "2", see Fig. K-5212, all the way to the left to the "cold" position.
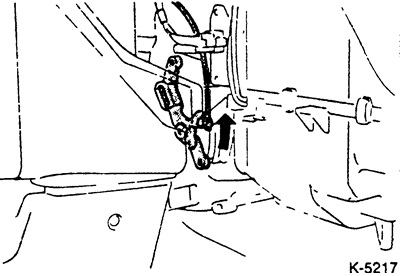
Press the temperature control flap lever all the way down (against the direction of the arrow, see fig.) and secure the cable sheath.
Set the air mixture regulator "4", see Fig. K-5212, to the extreme position "air flow".
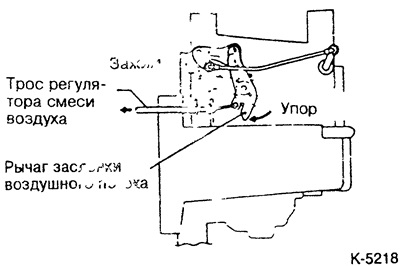
Turn the air distribution flap lever all the way in the direction of the arrow and secure the cable sheath. Before securing it in the clamp, slightly tighten the cable sheath, i.e. move it in the direction of the heater regulator.
Check the adjustment: the control levers should move easily without rubbing throughout the entire range, otherwise, repeat the adjustment of the corresponding cable.