
Attention:
- − Never attempt to disassemble or repair a pretensioner seat belt. In case of malfunction, replace it.
- − The pretensioner seat belt must be handled with great care. Do not subject the pretensioner to impact, drop it, expose the pretensioner to strong magnetic fields, and keep it away from water, oil, and fuel. If dents, cracks, or deformation are found, replace the pretensioner seat belt assembly.
- − When storing the seat belt pretensioner, do not place any objects on top of it.
- − Do not allow the seat belt pretensioner to reach temperatures above 90°C.
- − After the pretensioner has been deployed, it must be replaced with a new one.
- − Always wear protective goggles and gloves when working on a deployed seat belt pretensioner.
Removing
− Before starting to remove parts, carry out the following operations:
- A) Set the ignition key to position "LOCK".
- b) Disconnect the wire from the negative battery terminal and insulate the wire connector.
- V) Remove the lower part of finishing of the central rack.
Attention: after disconnecting the cable from the battery, wait at least 60 seconds before proceeding with further work.
- G) Remove the lower part of finishing of the central rack.
- Parts are removed in the order of the numbers shown in the figure "Removing the pretensioner seat belt".
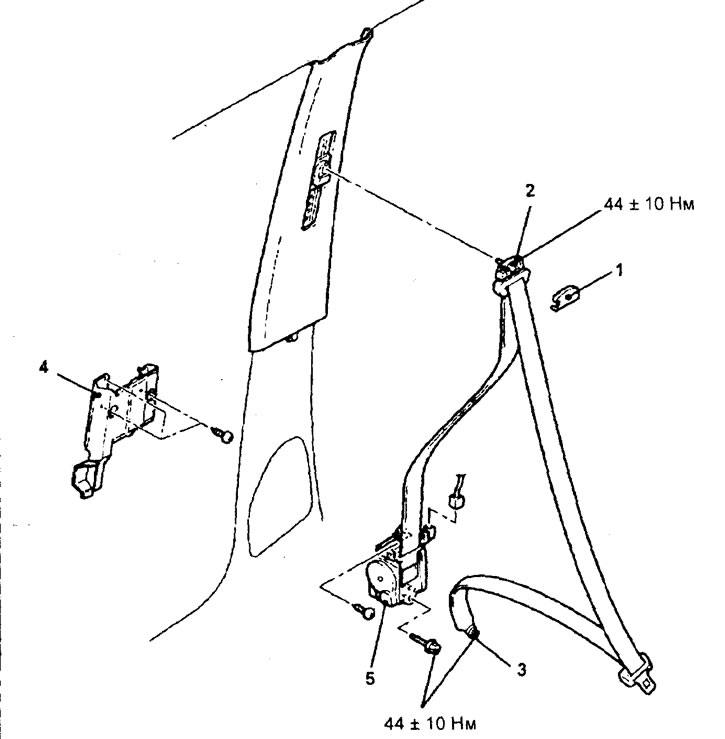
Removing the pretensioner seat belt (Right side). 1 - belt guide cover, 2 - upper belt mounting plate bolt, 3 - lower belt mounting plate bolt, 4 - pretensioner mounting bracket, 5 - seat belt with pretensioner.
− When removing parts, pay attention to the operation to disconnect the pretensioner connector.
A) Use a flathead screwdriver to unlock the pretensioner connector lock on the wiring side.
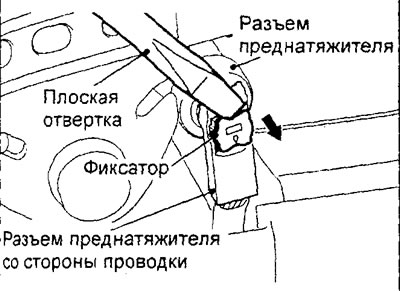
b) Disconnect the seat belt pretensioner connector.
Installation
− Before installing parts:
- A) Check the seat belt pretensioner for dents, cracks or deformations.
Attention: If you find dents, cracks or deformation, replace the pretensioner seat belt with a new one.
- b) Temporarily connect the wire to the negative battery terminal.
- V) Connect the tester to the diagnostic socket.
Attention: when connecting or disconnecting the tester, the ignition key must be in the position "OFF" (OFF).
- G) Turn the ignition on and check that the SRS system is functioning properly (except for the fault code for the removed airbag module).
- d) Turn the ignition key to position "LOCK", disconnect the wire from the negative battery terminal and insulate the wire connector.
Attention: after disconnecting the cable from the battery, wait at least 60 seconds before proceeding with further work.
− Installation of parts is carried out in the reverse order of removal.
− When installing the parts, pay attention to the connection operation of the pretensioner connector.
Connect the seat belt pretensioner harness connector and secure it with the retainer.
− After installing the parts, perform the following operations:
- A) Install the bottom of the B-pillar trim.
- b) Connect the wire to the negative battery terminal.
- V) Check the operation of the SRS indicator.