
Attention! Proceed with the procedure only after the engine has completely cooled down! See also the warnings at the beginning of the Section Antifreeze - general information. Remember that when the ignition is on, the cooling fan may operate even when the engine is turned off.
Checking the Meter
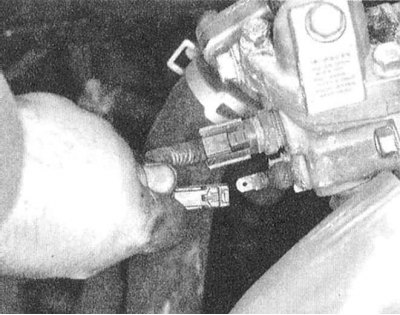
1. Disconnect the wiring harness from the meter sensor assembly.
2. Connect a suitable probe lamp (12V/3.4W) between the sensor connector on the harness side and ground.
3. Turn on the ignition.
4. If all components are functioning properly, the probe lamp should light up and the temperature gauge needle should deviate. If the lamp works properly, but the needle does not move, replace the meter (see chapter Onboard electrical equipment), after checking the condition of the appropriate fuse and wiring. If neither the lamp nor the meter respond to the ignition, check the condition of the corresponding electrical wiring, make the necessary repairs, replace the failed components.
Sensor test
1. Drain the coolant from the engine block, lowering its level below the level of the sensor.
2. Disconnect the electrical wiring and remove the sensor block.
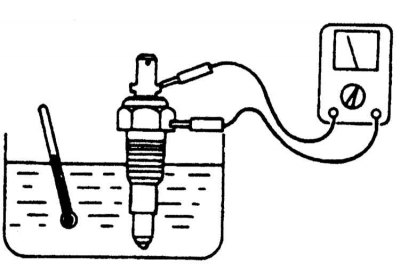
3. Lower the working tip of the sensor into a vessel with hot water, fixing the temperature of the latter with a thermometer.
4. Using an ohmmeter, measure the resistance between the connector terminals of the sensor lowered into the water.
5. Compare the measurement result with the requirements of the Specifications (the nominal value should not go beyond the range of 2.21÷2.69 kOhm for a temperature of 20°C, 264÷328 Ohm for a temperature of 70°C and 90.5÷117.5 Ohm for a temperature of 80°C).
6. A defective sensor must be replaced.
Replacement
1. Disconnect the negative cable from the battery.
Attention! If the stereo system installed in the car is equipped with a security code, before disconnecting the battery, make sure that you have the correct combination to activate the audio system!
2. Place a suitable drain container under the radiator of the cooling system.
3. Drain the coolant, lowering its level below the level of the sensor.
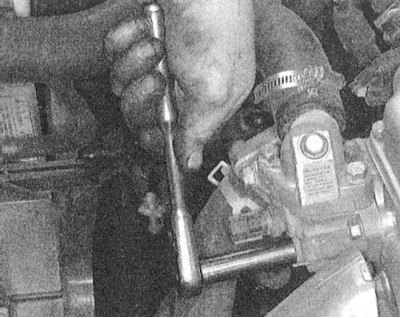
4. Disconnect the electrical wiring from the sensor and unscrew it from the thermostat casing using a deep end head.

5. Screw a new sensor into place of the removed sensor, the threads of which must first be lubricated with conductive sealant (not teflon tape or fum tape). Tighten the sensor to the required torque (10÷12 Nm).
6. Connect electrical wiring.
7. Recharge the cooling system and check that the temperature gauge is working properly (see above).