
Vehicles from 9.88 to 3.92
Removing
Hatchback: Remove luggage compartment trim
Loosen the wheel nuts with the vehicle on the ground.
Mark with paint the position of the rim relative to the hub. Thanks to this, the balanced wheel is installed in its original place during installation.
Raise the back of the car see par. 29.
Remove wheel.

Support the suspension beam with a brace or hydraulic jack so that it does not fall when the spring strut is removed.
Attention: Place the jack in the middle of the beam and lay a wooden spacer between the jack support platform and the suspension body. The jack must not touch the Panhard rod.
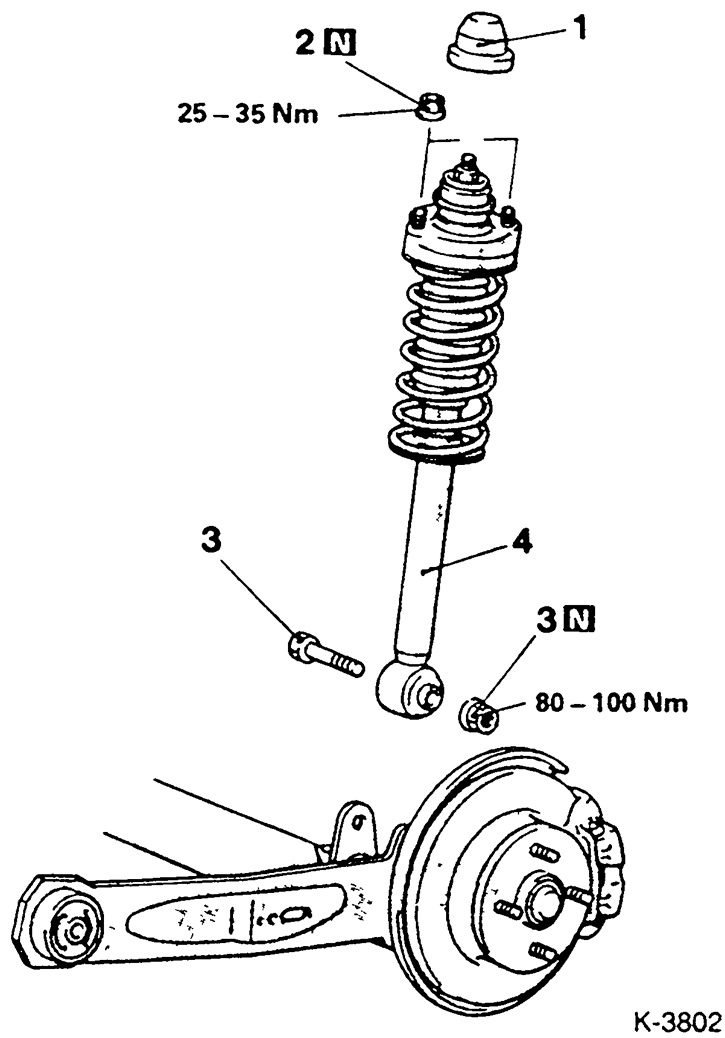
Remove cap -1-.
Remove 2 securing nuts -2- from above.
Give and pull out the lower bolt -3-.
Pull out spring strut -4-. In this case, you may have to slightly deflect the suspension arm.
Installation
Install the spring strut and lightly fasten. Be sure to install new self-locking nuts. It may be necessary to slightly deflect the lever.
Tighten both top nuts, put on the cap
Put the wheel on, while observing the markings made. Lower the vehicle and cross-tighten the wheel nuts. See item 19 for tightening torque. 4.
Tighten the lower mounting nut.
Attention: The car must be on the ground.
If removed, install luggage compartment trim.
Check rear wheel alignment.