



Contents: Removal ⤓ Installation ⤓
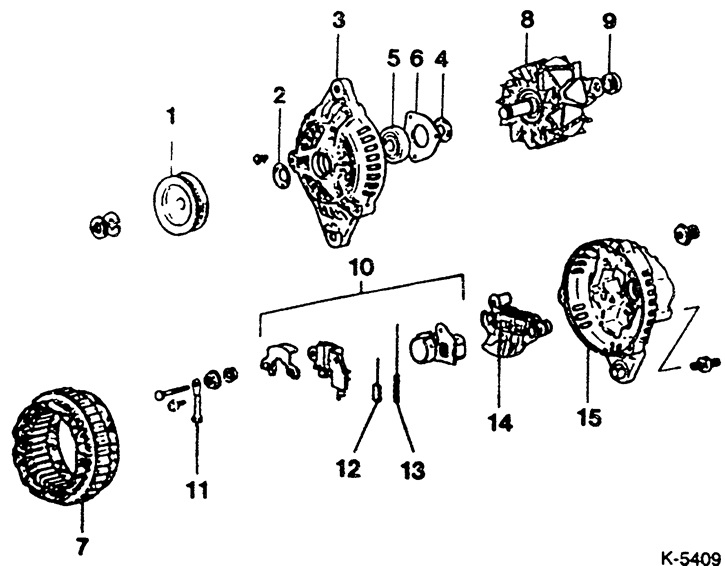
1 - Belt pulley
2 - Seal
3 - Support flange
4 - Seal
5 - Drive side bearing
6 - Bearing retaining plate
7 - Stator
8 - Rotor
9 - Rotor bearing
10 - Brush holder / Voltage regulator
11 - Connection terminals
12 - Carbon brush
13 - Spring
14 - Rectifier
15 - Back cover
Generator carbon brushes wear out quite slowly; on average, they wear out after 120,000 km. It is recommended to replace the brushes in advance, which requires disassembling the generator.
Removal
Remove the generator.
Loosen the 3 through bolts and separate the support flange from the stator on the drive side, without resting against the winding inside the generator.
Carefully clamp the rotor in a vice and loosen the central pulley bolt. Remove the pulley with the fan impeller and spacer sleeve.
Disconnect the rectifier from the rear cover of the generator.
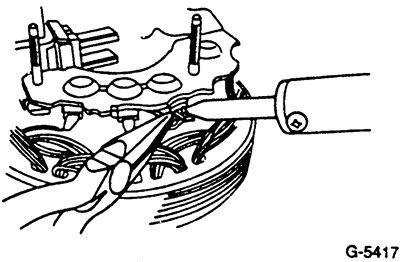
Unsolder the 3 wires on the stator winding coming from the rectifier, while holding the connection terminal with pliers to remove heat from the rectifier.
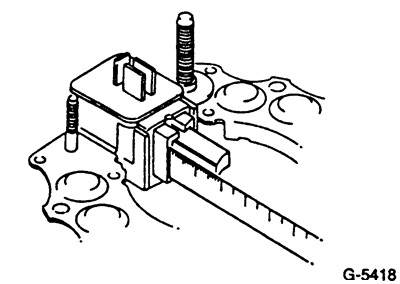
Replace the carbon brushes if the wear has reached the wear mark (length about 5 mm or less). To do this, unsolder the supply wires.
Check the ease of rotation of both rotor bearings, replace if necessary. The rear bearing is pressed in, a removal and pressing tool is required to replace it.
Installation
Insert the brushes and springs into the brush holder and solder the leads. Trim the protruding ends.
Since during soldering the solder should not penetrate into the wires of the brush leads, hold the brush leads with pliers.
Caution: Any solder that gets in will make the brush leads hard, after which the brushes cannot be used.
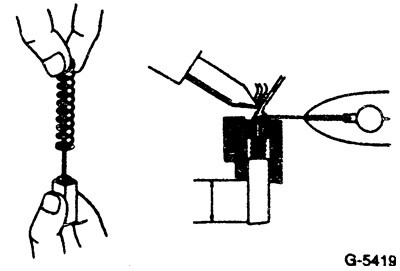
After installing new brushes, check that they move easily in the brush holder.
Solder the wires from the stator to the rectifier, preventing the rectifier from overheating.
Place the rear part of the housing on the rotor and close it. Place the front support flange with the spacer sleeve and place the connecting sleeve.
Place the fan impeller with the pulley and spring ring on and tighten the nut to 60 Nm.
Insert into the generator housing, bending the ends of the rectifier connection wires so that they do not touch the rotor. In addition, when assembling, hold the brushes in a compressed position with a suitable wire.
Fasten the body with 3 through bolts.
Make sure the generator rotates easily by hand.
Install the generator.
Connect the ground cable to the battery.
If they are available, set the time on the clock and enter the security code into the radio.