Contents: Removal and installation ⤓ Examination ⤓
Removal and installation
− Before you begin removing parts, perform the following operations:;
a) Remove the rear door trim.
b) Remove the waterproof film.
− The parts are removed in the order of the numbers indicated in the figure "Removing the rear door lock and handle".
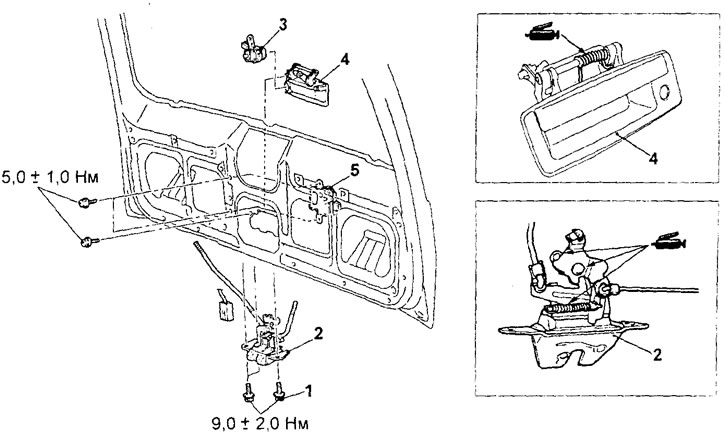
Removal the rear door lock and handle. 1 - rear door lock mounting bolt, 2 - rear door lock assembly, 3 - rear door lock cylinder, 4 - rear door outer handle, 5 - rear door lock electric drive.
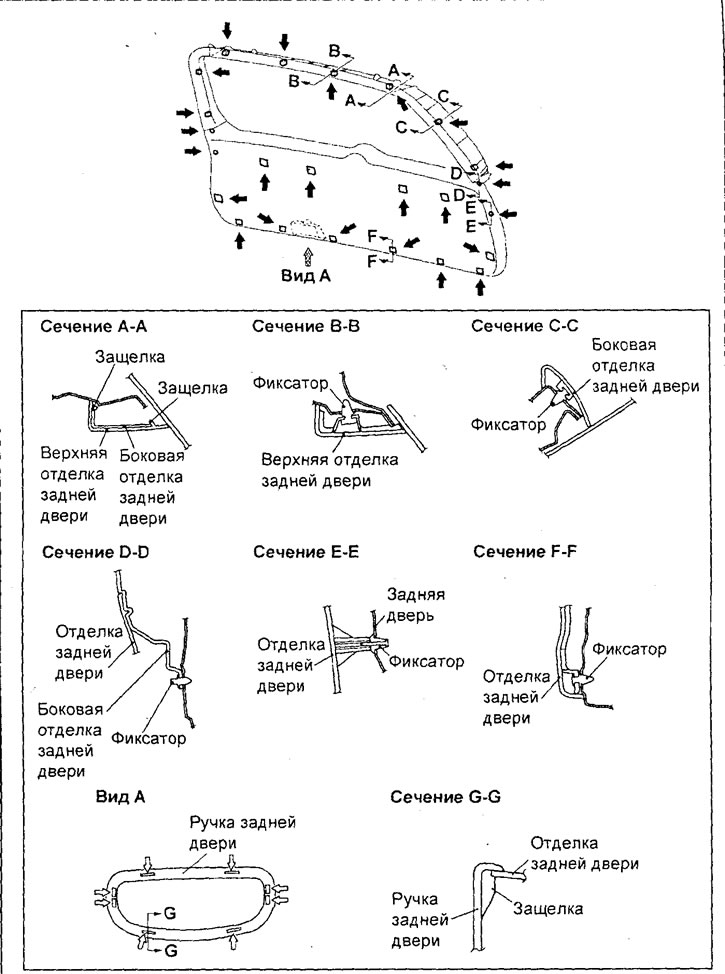
Location of fasteners and latches on the rear door.
Note: The arrows show the location of the fasteners.
− Installation of parts is carried out in the reverse order of removal.
- After completing the installation of the parts, perform the following operations:
- a) Install waterproof film.
- b) Install the rear door trim.
- c) Check the operation of the outer rear door handle.
Examination
1. Checking the rear door lock drive.
a) Set the door lock rod to the "LOCKED" position, apply battery voltage to terminal "2" of the connector and check that the lock actuator lever moves to the "UNLOCKED" position when terminal "3" of the connector is connected to ground.
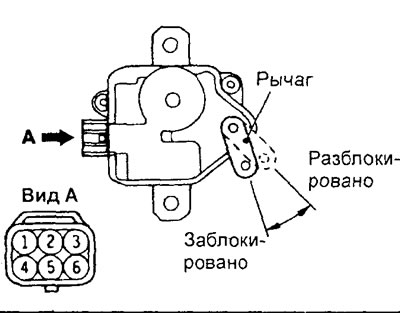
b) Set the door lock rod to the "UNLOCKED" position, apply battery voltage to terminal "3" of the connector and check that the lock actuator lever moves to the "LOCKED" position when terminal "2" of the connector is connected to ground.
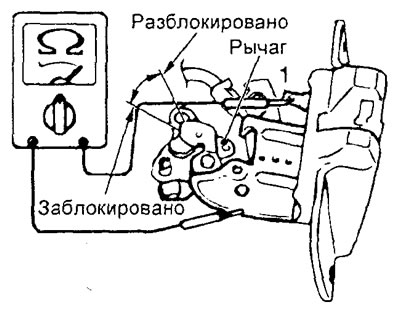
2. (Models with central locking) Checking the rear door lock switch.
a) Check that the circuit is open between terminals "1" and "2" ("ground") when the lever is in the "LOCK" position.
b) Check that the circuit is closed between terminals "1" and "2" ("ground") when the lever is in the "UNLOCKED" position.