Removal
− Removal is performed in the order of numbers indicated in the figure "Removing the rear suspension strut". When removing parts, pay attention to the operation of disconnecting the lower arm from the trailing arm.
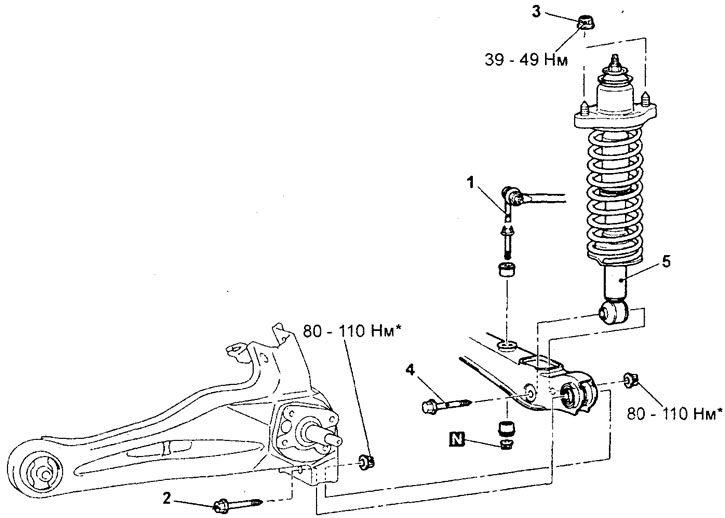
Removal the rear suspension strut. 1 - connection of the stabilizer strut and the lower arm, 2 - connection of the lower arm and the longitudinal arm, 3 - shock absorber mounting nut, 4 - connecting bolt of the shock absorber and the lower arm, 5 - rear suspension strut.
Note: It is only necessary to pre-tighten the nuts marked with the sign, and to perform the final tightening on an unloaded vehicle after lowering it onto its wheels.
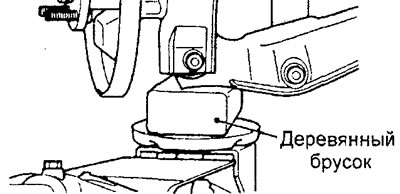
a) Place a wooden block under the lower arm as shown in the figure. Then unscrew the bolt and disconnect the lower arm from the trailing arm.
Examination
1. Check rubber parts for cracks and wear.
2. Make sure that the shock absorber operates normally, check for oil leaks and extraneous noise during operation.
Disassembly and assembly
— The parts are removed in the order of numbers shown in the figure "Rear suspension strut disassembly".
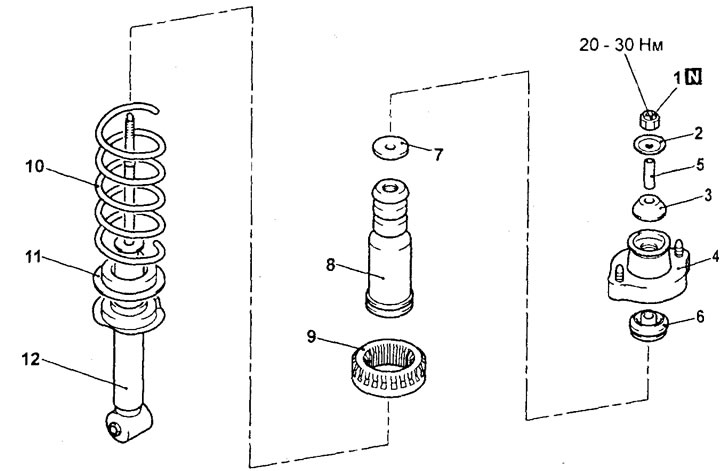
Disassembling the rear suspension strut. 1 - self-locking nut, 2 - washer, 3 - upper bushing "B", 4 - upper support assembly, 5 - sleeve, 6 - upper bushing "A", 7 - lining, 8 - compression stroke buffer, 9 - upper spring seat, 10 - spring, 11 - lower spring seat, 12 - shock absorber.
- When removing parts, pay attention to the operation of removing the self-locking nut.
a) Using special tools, compress the spring.
Attention:
- Install the levers of the special device symmetrically so that their maximum length does not exceed the installation limits (spring length).
- Do not use an air tool (impact wrench) when tightening the special tool bolt.
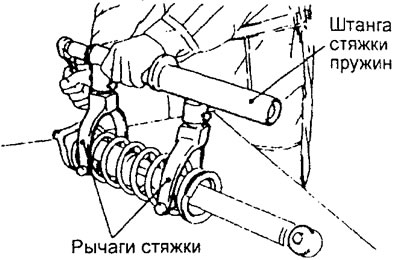
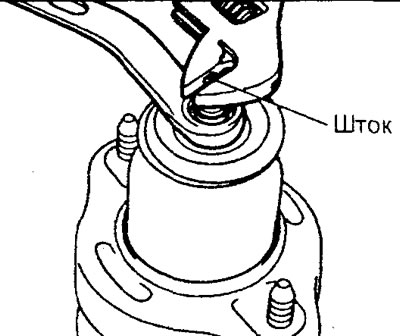
b) Holding the shock absorber rod with a special key, unscrew the self-locking nut.
Caution: Do not use pneumatic tools (impact wrench).
- Assembly is performed in the reverse order of disassembly. When assembling, pay attention to the following operations.
1. Installing the rear suspension spring.
Caution: Do not use an air tool (impact wrench) when tightening the special tool bolt.
a) Using special tools, compress the spring and install it on the shock absorber.
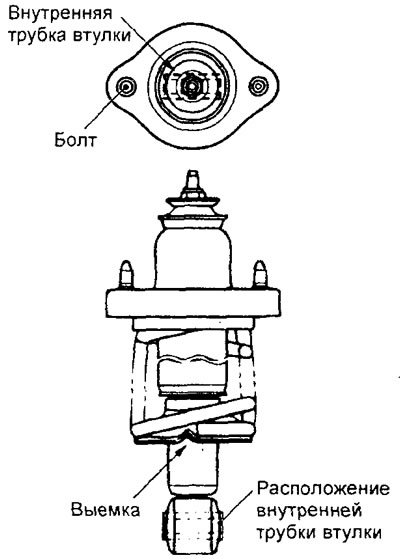
b) Align the lower coil of the spring with the recess in the spring seat.
2. Installing the upper support of the rack.
Install the upper strut support so that the axis of the lower shock absorber support bushing is parallel to the line between the upper support mounting bolts (view from the upper support side).
4. Installing the self-locking nut,
a) Pre-tighten the self-locking nut.
Caution: Do not use pneumatic tools (impact wrench).
b) Remove the special tools and tighten the self-locking nut.
Installation
− Installation is performed in the reverse order of removal. When installing parts, pay attention to the following operations:
1. Installing the rear suspension strut assembly.
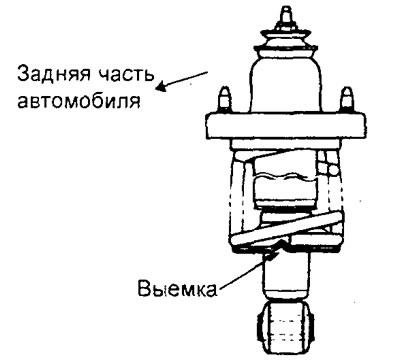
Position the strut so that the spring seat recess faces toward the rear of the vehicle.
2. Installing the stabilizer bar.
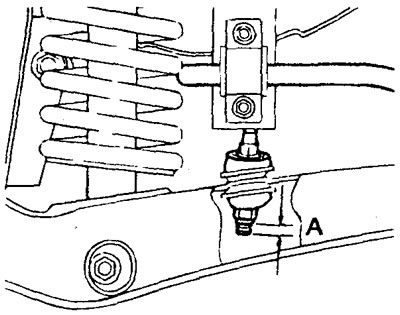
Install the stabilizer bar so that the length of its protruding threaded part "A" is within the nominal value.
Nominal value "A" - 6-8 mm