
Removing
- Raise the rear of the vehicle and secure it to stands. Remove the corresponding rear wheel.
- Place a jack under the lower rear suspension arm.
- Unscrew the nut and remove the bolt connecting the lower and trailing arms (see fig. 14.64).
- Unscrew the self-locking nuts securing the upper part of the shock absorber strut to the car body (pic. 14.68).
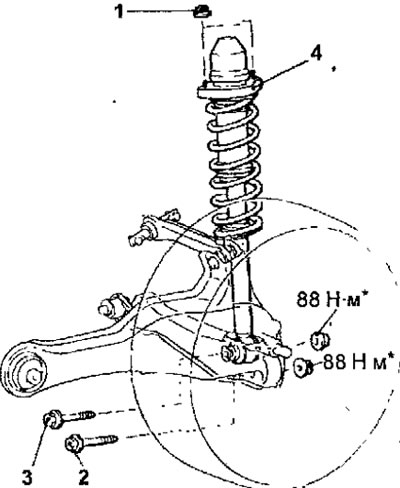
Pic. 14.68. Rear shock absorber strut: 1 - self-locking nut, 49 Nm; 2 - a bolt of fastening of the bottom and longitudinal levers; 3 - a bolt of fastening of a shock-absorber rack to the lower arm of a back suspension bracket; 4 - rear suspension shock absorber
Warning. Details marked with * in Figure 14.68 must be pre-tightened, and the final tightening should be done after lowering the car in an unloaded state on the wheels.
- Turn away a nut and take a bolt of fastening of the bottom and longitudinal levers.
- Loosen the nut and remove the bolt securing the shock absorber to the lower arm of the rear suspension.
- Remove the shock absorber from under the wheel arch.
Examination
- Check the rubber elements for wear and cracks.
- Check the shock absorber for malfunctions, fluid leaks and abnormal noise during operation.
Installation
- Installation is carried out in the reverse order of removal.