
Disassembly
- Remove the protective cap with a screwdriver blade as a lever (pic. 14.69).
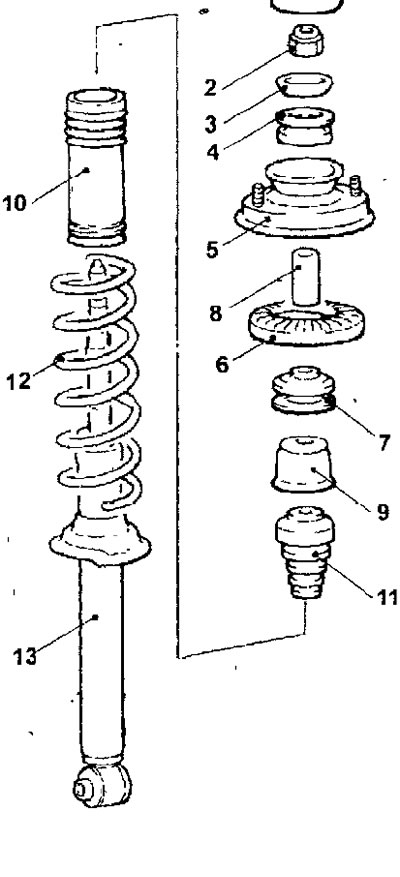
Pic. 14.69. Elements of the shock absorber strut of the rear suspension: 1 - protective cap; 2 - self-locking nut, 25 Nm; 3 - washer; 4 - upper sleeve B; -5 - top support of the rack; 6 - upper spring plate; 7 - upper sleeve A; 8 - sleeve; 9 - shock absorber cup; 10 - protective cover; 11 - rubber buffer stroke compression; 12 - cylindrical spring; 13 - shock absorber strut rear suspension
- Fasten the front suspension stack and, using a special tool with grippers, compress the spring so that it moves away from the upper plate (pic. 14.70).
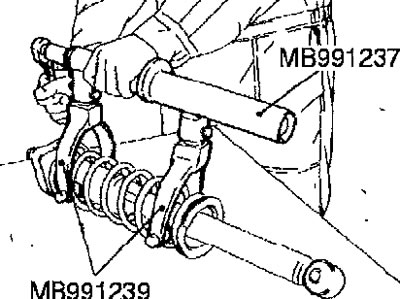
Pic. 14.70. Using a Special Tool to Compress the Rear Shock Absorber Spring
- With one wrench, fix the shock absorber rod from turning, and with the second ring wrench, unscrew the central nut of the shock absorber rod (pic. 14.71). Do not use an impact wrench to prevent loosening of the piston locknut on the rod.
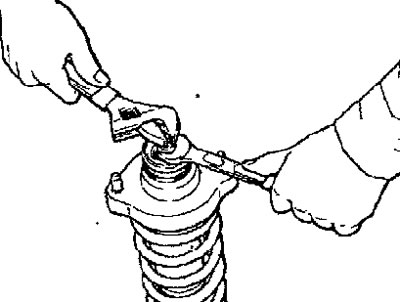
Pic. 14.71. Unscrewing the central nut of the shock absorber rod
- Remove the washer, upper bushing B, upper strut support, upper spring plate, upper bushing A, sleeve and shock absorber cup from the shock absorber rod.
- Remove the spring along with the spring compressor, guard and rubber compression stroke buffer.
- Loosen the tool bolt until the spring is fully extended and remove the tool from the spring.
Shock Absorber Disposal
- Fully extend the shock absorber rod.
- To remove gas from the shock absorber cylinder, drill a hole with a diameter of 3.0 mm in the place shown in Figure 14.72. Gas escaping from the shock absorber is safe, but care must be taken to avoid injury from flying chips.
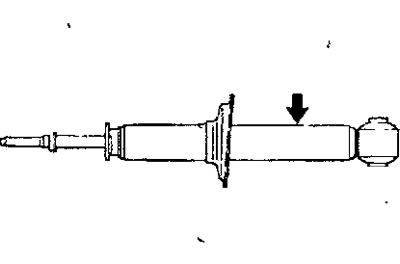
Pic. 14.72. Place of drilling of a hole for removal of gas from the cylinder of the shock-absorber
Examination
- Check rubber parts for damage or deterioration.
- Check the coil spring for deflection and loss of elasticity.
Assembly
Warning. When installing, it is necessary to use springs with the same technical characteristics on the same axle of the car (with the same color marking).
- Install the special tool MB991237 and MB991239 on the new spring and compress it to install on the shock absorber. Do not use an impact wrench to tighten the special tool bolt as this will block the bolt.
- Install the compression stroke buffer and protective cover.
- Install the spring and align the lower coil of the spring with the notch on the lower spring plate.
- Install the sleeve, upper bushing A and the upper spring plate.
- Install the upper shock absorber mount so that the axis of the inner tube of the lower shock absorber bushing coincides with the line between the bolts of the upper shock absorber mounting when viewed from above (pic. 14.73).
- Temporarily tighten the shock absorber rod mounting nut, then loosen and remove the spring compression tool.
- Secure the shock absorber rod against turning with a wrench and tighten the central nut of the shock absorber rod to the required torque (see fig. 14.71).
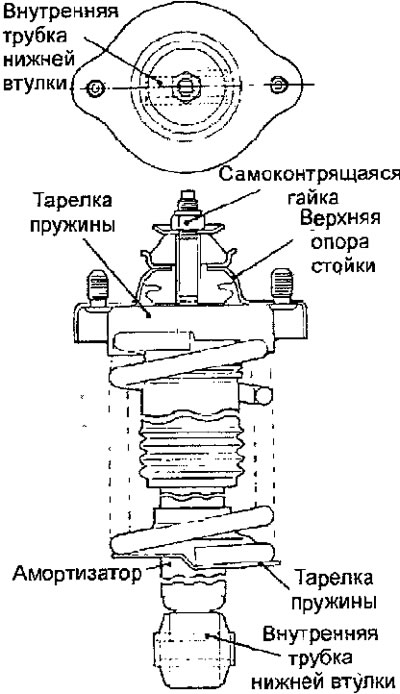
Pic. 14.73. Arrangement of the top support of a shock-absorber rack of a back suspension bracket
Warning. Do not use an impact wrench to prevent loosening of the piston locknut on the stem.