



Warning: Parts marked with * in Figure 14.56 must be pre-tightened and final tightened after the vehicle has been lowered onto its wheels in an unladen condition.
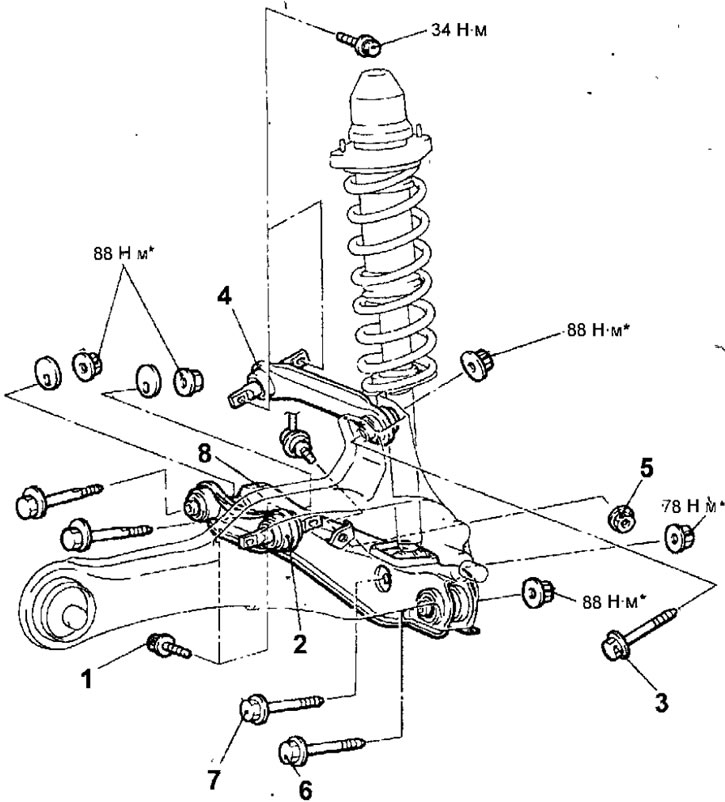
Fig. 14.56. Correction, upper and lower arms of the rear suspension: 1 - bolt, 34 Nm; 2 - correction lever; 3 - lower arm and trailing arm mounting bolt; 4 - upper arm; 5 - anti-roll bar and lower arm mounting nut, 44 Nm; 6 - lower arm and trailing arm mounting bolt; 7 — lower arm and rear shock absorber assembly mounting bolt; 8 - lower arm
Removal
- Raise the rear of the vehicle and support it on jack stands. Remove the appropriate wheel and wheel hub.
- After aligning the alignment marks on the rear wheel alignment or camber adjustment bolts, you can remove the adjusting and lower arms (Fig. 14.57).
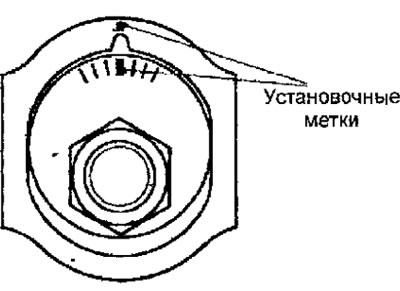
Fig. 14.57. Alignment of the alignment marks on the rear wheel alignment bolt
- Unscrew and remove the bolts connecting the adjusting lever and the longitudinal lever.
- Before removing the upper arm, install a jack under the lower arm of the rear suspension (Fig. 14.58).
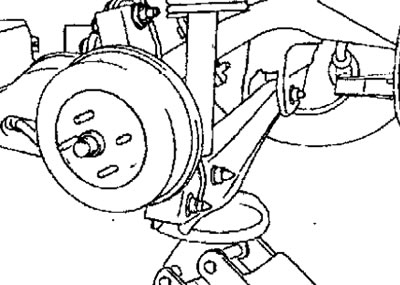
Fig. 14.58. Installing the jack before removing the upper arm of the rear suspension
- Loosen the nut and remove the bolt connecting the upper arm and the trailing arm.
- Remove 2 bolts and remove the upper control arm
- Loosen the nut and disconnect the anti-roll bar from the lower arm.
- Before removing the lower arm, place a jack under it (Fig. 14.59).
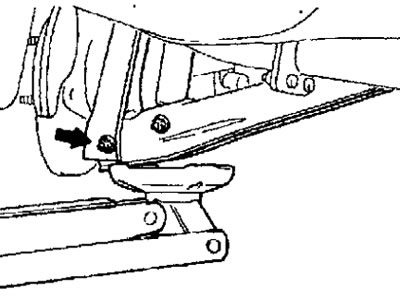
Fig. 14.59. Installing a jack under the lower arm of the rear suspension
- Loosen the nut and remove the bolt connecting the lower and longitudinal arms.
- Loosen the nut and remove the bolt connecting the lower arm and the rear shock absorber strut.
- Remove the rear lower control arm.
[The article was taken from the website www.MitsubishiMan.ru]
Examination
- Check the bushings for wear or damage.
- Check the control arm and lower control arm for deformation or damage.
- Check all bolts for wear or damage.
Installation
- Installation is carried out in the reverse order of removal, taking into account the following.
- Use your fingers to squeeze the dust cover and check for cracks or damage.
- Check the rear wheel alignment angles.