
Galant models through 1993 no.
Removing
1. Disconnect the negative cable from the battery.
Attention! If the stereo system installed in the car is equipped with a security code, before disconnecting the battery, make sure that you have the correct combination to activate the audio system!
2. Jack up the car and put it on stands. Remove the corresponding rear wheel.
3. Jack up the lower arm of the rear suspension.
4. Turn out a coupling bolt of a collar of fastening of the brake line.
5. Loosen the fixing nut and use the special tool type MB9f35 to release the upper ball joint from the trailing arm / knuckle of the hub assembly - if the support is to be used further, proceed with extreme caution.
6. Mark position of an eccentric of the top adjusting bolt and turn out the last from an operating lever.
7. Remove the top arm from the car.
Installation
1. Install the lever in its regular place, screw in the set bolt and tighten it slightly, achieving alignment of the landing marks made during the dismantling process.
2. Press the upper ball joint into the spindle assembly and tighten to the required torque (72 Nm) new ball stud nut.
3. Install the wheel and lower the vehicle to the ground.
4. Final tighten to the required torque (160 Nm) upper arm mounting bolt.
5. Connect the negative cable to the battery.
6. Check rear wheel alignment and correct if necessary.
Models Galant 1994÷1998 y.
Removing
1. Jack up the car and put it on stands. Remove the appropriate rear wheel assembly.
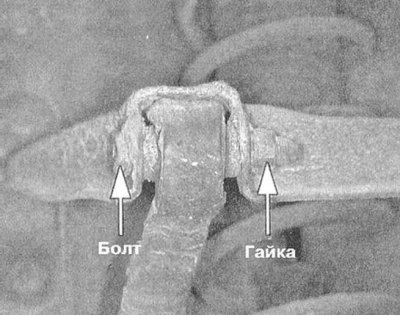
2. Turn out a through bolt of fastening of the top lever to a fist of a hub assembly.
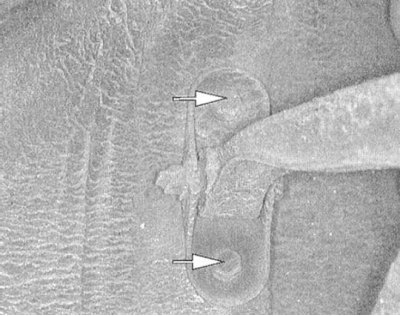
3. Turn out bolts of fastening of the top lever to a car body.
 |  |
4. Remove the upper arm assembly.
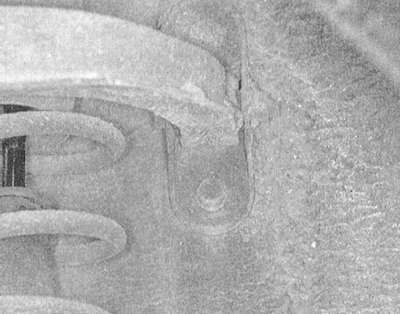
5. In case of need give fixing nuts and take through bolts of fastening of basic arms of the top lever.
Installation
1. Install the support brackets to the upper arm assembly. Tighten the nuts of the fixing bolts to the required torque (57 Nm).
2. Install the upper arm assembly to the vehicle and tighten the four mounting bolts to 39 Nm.
3. Install the through bolt securing the upper arm to the knuckle of the hub assembly, loosely tighten the fixing nut.
4. Install the wheel and lower the vehicle to the ground.
5. Final tighten to the required torque (98 Nm) through bolt nut.
6. Check rear wheel alignment and correct if necessary.
Diamante Models
Removing
1. Jack up the car and put it on stands. Remove the corresponding rear wheel.
2. Disconnect the anti-roll bar and remove the suspension strut assembly.
3. Support the trailing arm with a jack and release the self-locking nut that secures the control arm to it.
4. Using a puller, release the upper ball joint from the trailing arm.
5. Disconnect the control arm from the subframe and remove it from the vehicle.
Installation
1. Install the control arm on the subframe, lightly tighten the mounting bolt.
2. Connect the control arm to the trailing arm and tighten the self-locking nut to the required torque (75÷89 Nm).
3. Install the rack assembly and connect the anti-roll bar.
4. Install the wheel and lower the vehicle to the ground.
5. Finally tighten the bolt securing the lever to the subframe with the required force (75÷89 Nm).
6. Check rear wheel alignment and correct if necessary.