



Galant models up to 1993.
Removal
1. Jack up the car and place it on supports.
2. Support the rear axle beam with a jack.
3. Loosen the self-locking mounting nuts and remove the lower beam support brackets.
4. Loosen the mounting bolts and remove the anti-roll bar mounting clamps.
5. While holding the stabilizer bar from turning with a wrench, loosen the self-locking nut.
6. Remove the support cups and rubber bushing.
7. Use a wrench to lock the stabilizer bar from turning and loosen the self-locking nut that secures it. Proceed in a similar manner to disconnect the second bar.
8. Lower the jack supporting the rear axle beam, leaving a small gap between the suspension and the car body.
9. Remove the anti-roll bar from under the vehicle.
10. Check the condition of the stabilizer bar and assess the degree of wear of its mounting components.
Installation
1. Place the anti-roll bar in its regular place and lift the rear axle beam with a jack.
2. Connect the stabilizer struts to the rod and secure them with new self-locking nuts, tightening the latter to 45 N·m.
3. Install the central bushings and stabilizer mounting clamps. Screw in the mounting bolts and tighten them to the required torque (14 N·m).
4. Replace the parking brake cable and tighten the wheel sensor mounting bolt.
5. Install the lower beam support bracket, tighten the mounting bolt to 85 Nm, and the nut to 130 Nm.
6. Install new rubber cushions into the beam brackets, tighten the new self-locking nuts with the required force (110÷130 Nm).
7. Lower the vehicle to the ground.
Diamante and Galant models 1994÷1998.
Removal
1. Disconnect the negative cable from the battery.
Warning! If the car stereo system is equipped with a security code, make sure you have the correct combination to activate the audio system before disconnecting the battery!
2. Jack up the car and place it on supports.
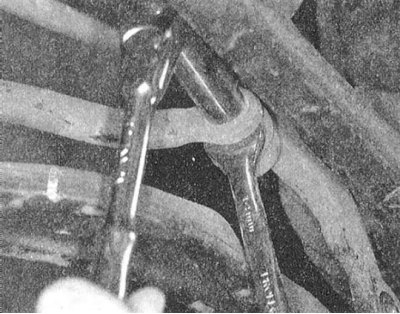
3. Loosen the self-locking nuts securing the anti-roll bar struts.
4. Unscrew the mounting clamp bolts and remove the rubber bushings.
5. Remove the stabilizer bar from the vehicle.
6. Check the condition of the stabilizer bar and assess the degree of wear of its mounting components.
Installation
1. Place the stabilizer bar in its regular place.
(The material was copied from the website: «MITSUBISHIMAN.ru»)
2. Loosely fasten the mounting clamps.
3. Ensure that the installation markings are correctly aligned - the marks on the rod should be approximately 10 mm from the outer edges of both mounting clamps.
4. Once the rod is aligned as required, tighten the mounting nuts to the required torque (38 Nm).
5. Connect the stabilizer struts to the damper forks and rod. Tighten the mounting nuts to the required torque (38 N·m).
6. Lower the car to the ground.
7. Connect the negative cable to the battery.