



Contents: Examination ⤓ Adjustment ⤓
Examination
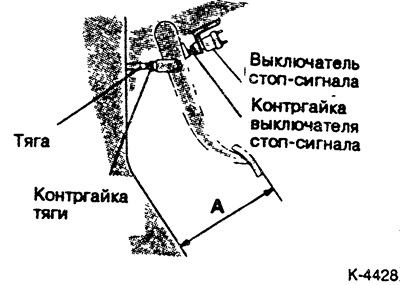
Measure the height of the brake pedal. Required value A: 168 - 170 mm.
Adjustment
Remove the connector from the brake light switch, loosen the lock nut and turn the brake light switch until it no longer contacts the brake pedal.
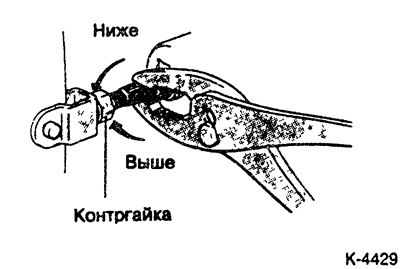
Loosen the lock nut and use pliers to turn the lock nut until the brake pedal is at the required height.
Note: On vehicles with hydraulic clutch, adjust the pedal free play.
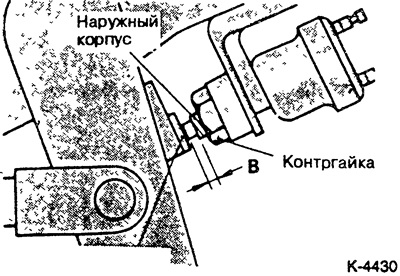
Screw in the brake light switch until it lightly touches the brake pedal, then screw it back ½-1 turn and tighten the lock nut. Required value B: 0.5-1.0 mm.
Connect the connector and turn on the ignition.
Press the brake pedal, while the assistant watches the brake lights. The brake lights should light up already when the brake pedal is pressed lightly, otherwise adjust the switch accordingly.
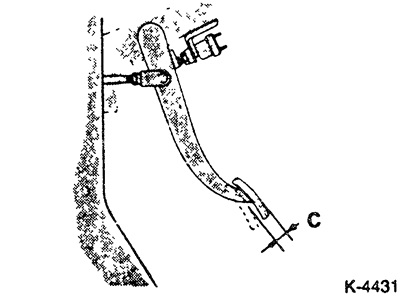
Press the brake pedal 2-3 times with the engine off to create a vacuum in the power steering. Then press the brake pedal with your hand until you feel a noticeable resistance. The required value C: 3-8 mm.
Start the engine and let it idle.
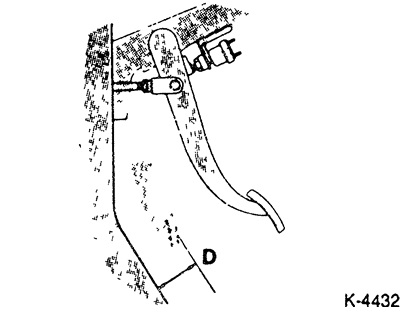
Press the brake pedal with a force of approximately 500 N (50 kg) and measure the distance between the brake pedal and the floor of the car. Required value D: not less than 80 mm.
The original material is posted on the website (MITSUBISHIMAN)
If the D dimension is smaller, check the brake fluid level in the reservoir, bleed the brake system, check the ease of movement of the automatic brake shoe installation device of the drum brakes. Check for brake fluid leakage.