



Contents: Examination ⤓ Adjustment ⤓
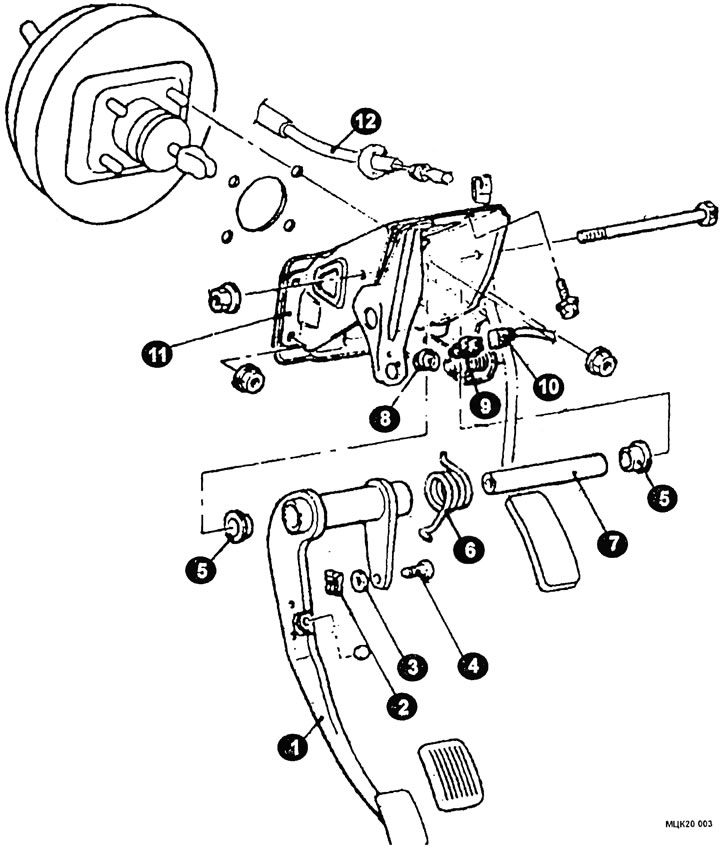
Brake pedal mounting elements
1 - brake pedal; 2 - retainer; 3 - washer; 4 - bolt; 3 - bushing; 6 ~ spring; 7 - sleeve; 8 - ring; 9 - brake light switch; 10 - connector; 11 - bracket; 12 - gas cable connection.
Examination
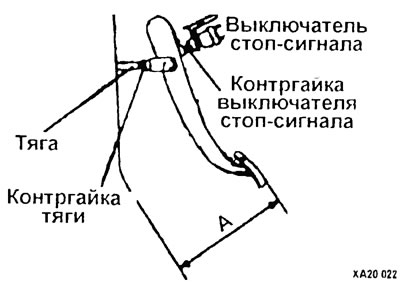
Measure the height (A) of the brake pedal. The required value A: 163-167 mm.
Adjustment
Disengage the brake light switch by loosening the lock nut, turn the brake light switch until it no longer touches the brake pedal.
The article is based on data from the website (MITSUBISHIMAN)
Slightly loosen the tie rod lock nut and turn it until the brake pedal is at the desired height.
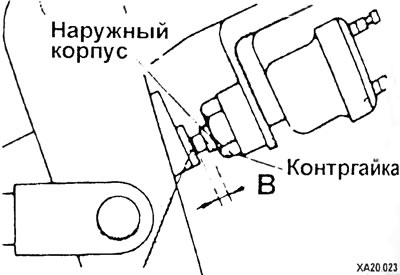
Adjust the pedal free play.
Screw in the brake light switch until it lightly touches the brake pedal, then unscrew it 1/2-1 turn back and tighten the lock nut. The required value: B=0.5-1.0 mm (see Figure XA20.023).
Connect the brake light switch.
Press the brake pedal and watch the brake light. It should light up even when you press the brake pedal lightly.
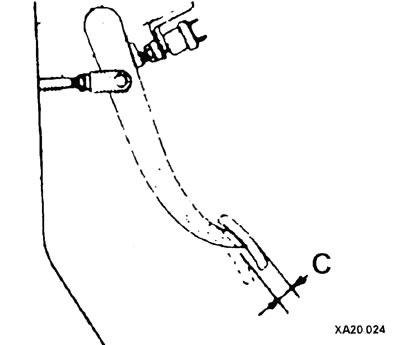
Press the brake pedal several times with the engine off, creating a vacuum in the power steering. Press the brake pedal with your hand until you feel a noticeable resistance. The required value is C=3-8 mm.
Turn on the engine and let it idle.
Press the brake pedal with a force of approximately 500 N and measure the distance between the brake pedal and the car floor. The required value D is at least 80 mm.
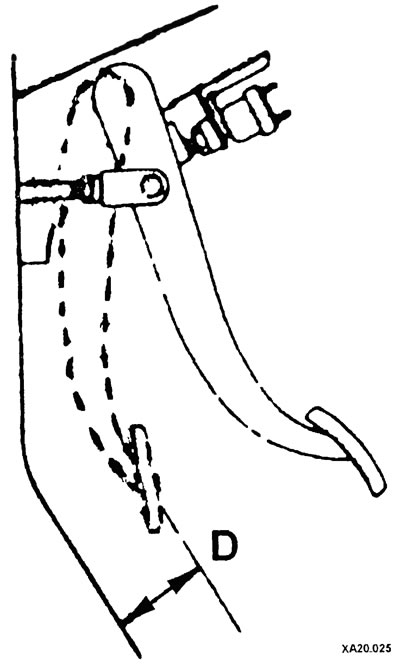
If the dimension D is less than the required value, check the brake fluid level in the reservoir, remove air from the brake system, check the ease of movement of the automatic brake shoe setting device of the drum brakes, and whether there is any brake fluid leakage.