



Contents: Brake pedal height ⤓ Free travel of the brake pedal ⤓ Distance between the brake pedal and…⤓ Checking the brake light switch ⤓ Checking the operation of the brake…⤓
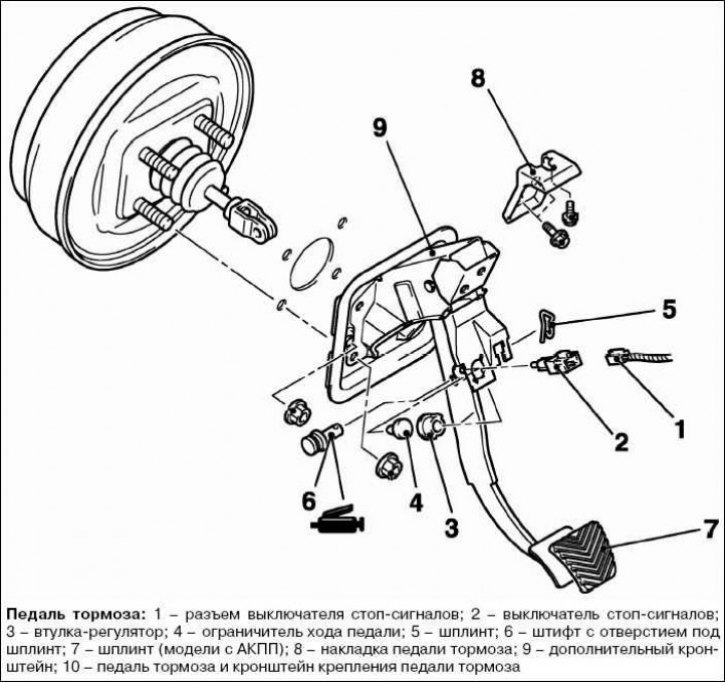
Brake pedal height
Remove the mat from under the brake pedal.
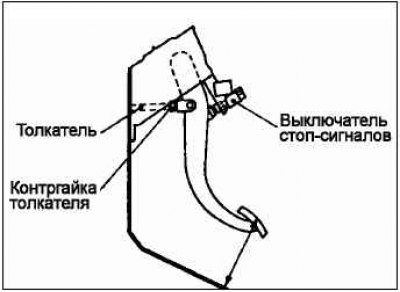
Measure the height of the pedal position as shown in the figure. If the measured height does not correspond to the nominal value, then the following operations must be performed.
Nominal size: 160-168 mm or more.
Disconnect the brake light switch connector.
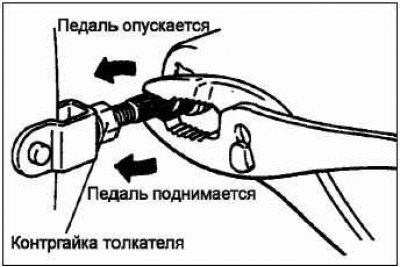
Loosen the pusher lock nut and, by rotating the pusher in one direction or another using pliers, adjust the required height of the pedal above the floor.
Tighten the pushrod lock nut.
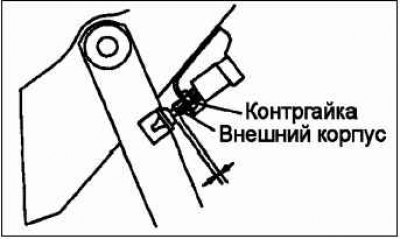
Push the brake light switch in the direction of pedal travel until it stops. (The switch moves when pressed hard.).
Raise the pedal until the pushrod is fully extended, and then move the brake light switch to the desired position. Rotate the switch to adjust its position so that the gap matches the one shown in the figure.
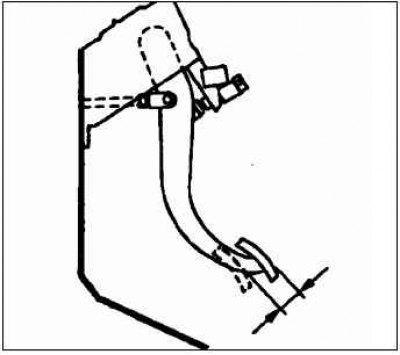
Connect the switch connector.
Make sure that the brake lights do not come on when the brake pedal is not pressed.
Free travel of the brake pedal
With the engine off, press the brake pedal two or three times. After releasing the vacuum from the brake booster, press the pedal by hand and make sure that the pedal travel before resistance begins (free play) is in the optimum range.
Nominal size: 3–8 mm.
If the brake pedal free play exceeds the nominal value, there is probably an increased gap in the connection of the brake pedal lever to the pedal mounting bracket. Check the gap and replace damaged parts if necessary.
Distance between the brake pedal and the floor
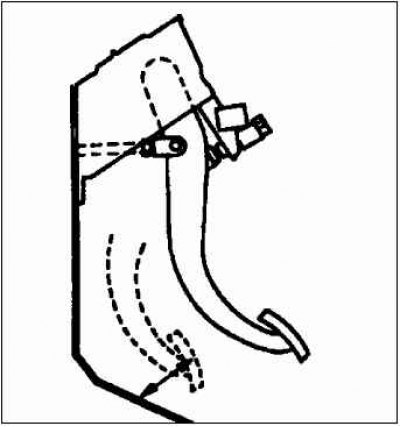
Remove any carpet, etc. from under the brake pedal.
Start the engine, press the brake pedal with a force of approximately 490 N, and measure the distance between the brake pedal and the floor.
Nominal value: 100mm or more
If the distance is not within the standard value, check for air in the brake line, the distance between the brake shoe linings and the drum, and the operation of the parking brake.
Adjust or replace faulty parts as necessary.
Place the mat back in place.
Checking the brake light switch
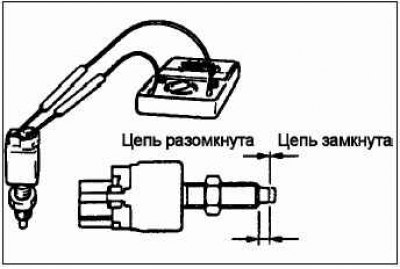
Connect a universal tester to the brake light switch and check the brake light switch circuit with the pusher pressed and not pressed. If the pusher is pressed so that its length is 4 mm from the end of the housing, then with a working switch the circuit should be open, and with the pusher not pressed, it should be closed.
Checking the operation of the brake booster
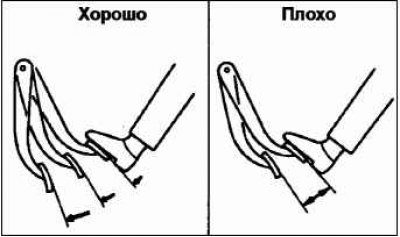 | 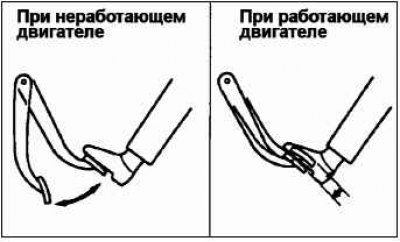 |
A simple check of the brake booster operation is performed in the manner described below.
Run the engine for one or two minutes and turn it off.
If the first time you press the brake pedal, it is pressed all the way down, and with subsequent presses, its travel gradually decreases, then the vacuum booster is working normally. If, with successive presses, its travel remains unchanged, then the vacuum brake booster is faulty.
With the engine not running, press the brake pedal several times. Then, without releasing the pedal, start the engine. If the brake pedal drops slightly, the vacuum booster is working properly. If the pedal remains in place after starting the engine, the vacuum booster is faulty.
With the engine running, press the brake pedal and then turn off the engine.
Hold the pedal down for 30 seconds. If the pedal position does not change, the vacuum booster is working properly. If the pedal rises, the booster is faulty. If the results of one of the tests are unsatisfactory, then you should look for a fault in the vacuum hose, check valve or brake booster.