



Caution! Do not unscrew the tie rod end nut from the ball joint. Loosen it using a special tool to avoid possible damage to the ball joint thread.
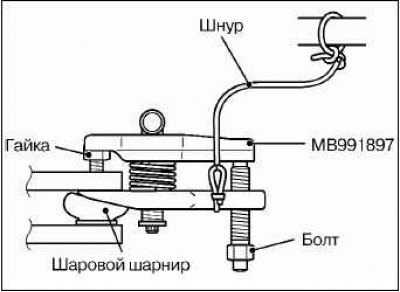 |  |
Hang the special tool with a cord to prevent it from falling.
Install the ball joint puller (MB991897) as shown in the figure.
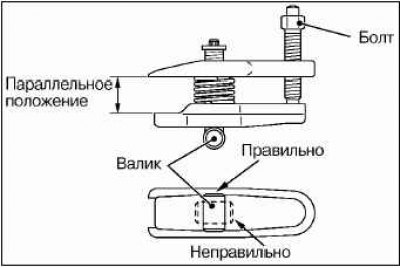
After setting the clamping plates of the special tool parallel to each other by rotating the bolt and the adjustment knob, tighten the bolt by hand and finally make sure that the clamping plates are parallel to each other.
Note: When installing the clamping plates parallel, make sure the tool handle is in the position shown in the figure.
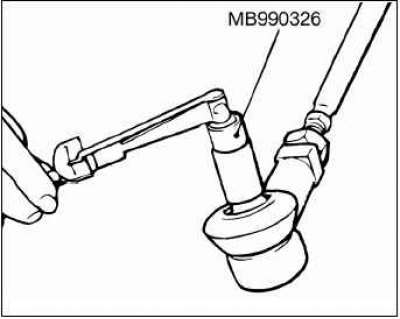
Tighten the tool bolt with a wrench to disconnect the tie rod end.
Grasp the threaded part of the ball joint stud with your hand, rotate the joint several times, then screw the nut onto its threaded part. Using a torque wrench (MB990326), measure the moment the ball joint starts to rotate.
Nominal value: 0.5–2.5 Nm.
If the measured torque value exceeds the standard value, replace the tie rod end.
If the measured value is less than the nominal value, make sure that the ball joint rotates freely, without significant play or binding. If there is no axial play or binding, the ball joint is suitable for reuse.
Attention! It is necessary to replace the ball joint nut with a new one each time, since this nut is self-locking.
Connect the steering rod end to the steering knuckle and tighten the connection with the self-locking nut to the specified torque.
Nominal tightening torque: 25 + 5 Nm.