



Contents: Removal ⤓ Installation ⤓
In specialized workshops, MITSUBISHI MD-997110 sealant is used to seal the oil pan, but another equivalent sealant can also be used.
Note: Do not apply too much sealant and be especially careful around the bolt holes. After applying the mass, the parts must be assembled within a quarter of an hour. If this time is exceeded, remove the sealant layer and apply a new one.
Removal
Disconnect the ground cable from the battery.
Caution: This erases data in the electronic memory, such as the engine fault memory or the radio receiver code. Disconnect the battery only when the ignition is switched off, otherwise the fuel injection control unit may be damaged. Before disconnecting the battery, read the instructions in the sections "Radio" and "Removal and installation the battery".
Raise the vehicle, see point 29.
Drain the engine oil, see item 32.
Remove the oil pan mounting bolts.
Note: On a 16-valve engine, mark the holes for bolts that are 10 mm long.
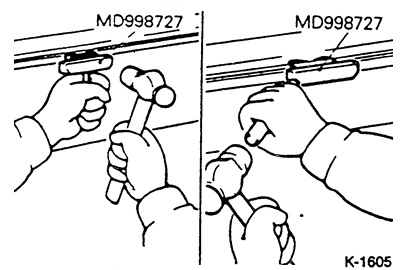
Cut the sealing compound between the engine block and the oil pan. The workshop uses the MD-998727 tool for this, which is inserted between the engine block and the oil pan.
If you don"t have a special tool, you can use an old knife. Carefully use a hammer to insert the knife between the engine block and the oil pan.
Caution: Never pry the oil pan with a screwdriver or chisel before the seal has been cut. When removing the oil pan, be careful not to damage the oil pan sealing flange.
Remove the oil pan.
It is recommended that when removing the oil pan, you also unscrew the oil receiver and clean it with a cold cleaning agent. Check the oil receiver mesh for damage, such as breaks, and replace it if necessary.
Installation
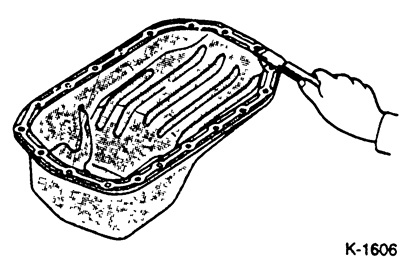
Carefully clean the mating surfaces of the oil pan and engine block from sealing material using a triangle scraper and a razor blade.
Thoroughly wipe the engine block, crankshaft and oil pump. Otherwise, the oil pan seal may be damaged by the dripping oil.
Install the oil receiver with a new gasket and tighten to 20 Nm.
Wipe the mating surfaces of the oil pan and engine block with a degreaser. Alcohol or acetone can be used as a cleaning agent.
The material was created based on the website: mitsubishiman
Caution: Do not use detergents that are aggressive towards painted surfaces.
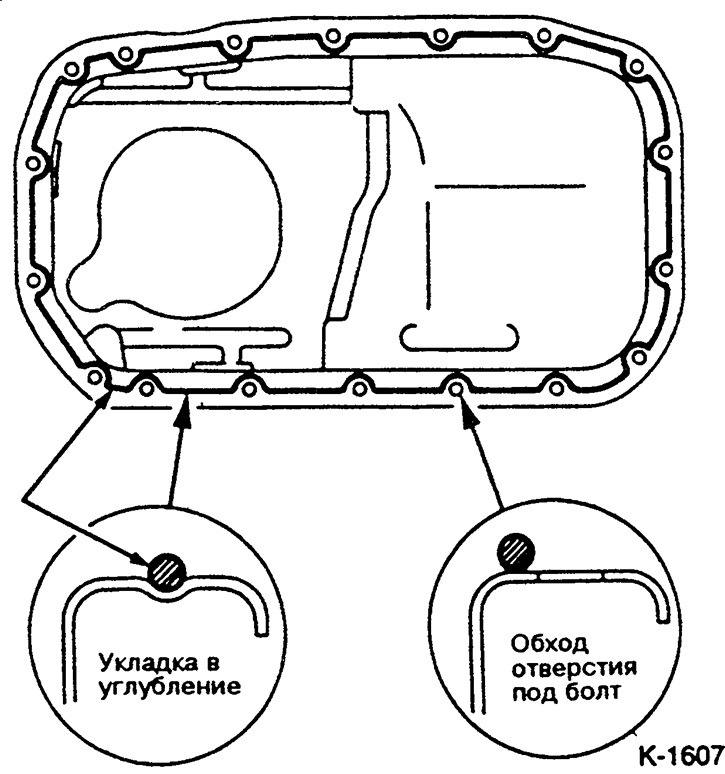
The sealant - as shown in the figure - should be applied in the form of a cord with a diameter of 4 mm along the entire contour of the mating surface of the oil pan. In this case, the sealing cord between the holes for the bolts should be placed in the recess of the oil pan (figure on the left below). The lower right figure shows the outline of the hole for the bolt.
Place the oil pan on the engine block. Tighten the bolts first by hand and then crosswise with a force of 7 Nm.
Note: On a 16-valve engine, insert 10 mm long bolts into the marked holes. (Front side of the oil pan in the direction of the V-belt).
Lower the car.
Fill with engine oil.
Connect the ground cable to the battery.
If available, set the time on the clock and set the security code for the radio receiver.
Conduct a test drive, check the oil level and check the tightness of the oil pan, possibly carefully tighten all the bolts.