English Русский
Български
Беларускі
Український
Српски
Hrvatski
Română
Polski
Slovenský
Magyar
Articles Bookmark Contacts Sitemap   
Company Audi Company Ford Company Hyundai Company Kia Company Mazda Company Mercedes-Benz Company Nissan
MitsubishiMan.ru


Home Colt Lancer Galant L200 Outlander Pajero Others
Galant 6 and 7 (1987-1998) Galant 5 (1983-1989, petrol)

Removal, installation and adjustment of the hood position (Mitsubishi Galant 6)

  • Home
  • Galant
  • 6 (1987-1998)
  • Body and interior
  • Exterior (external elements)
  • Removal, installation and adjustment of the hood position
0
Contents: Removal ⤓ Installation ⤓ Adjustment ⤓

Removal


1. Open the hood and support it with the stop rod


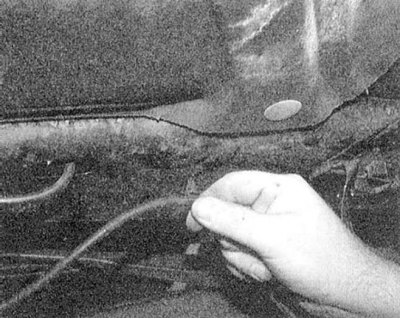
2. Use a marker to trace the hinge strips attached to the hood.

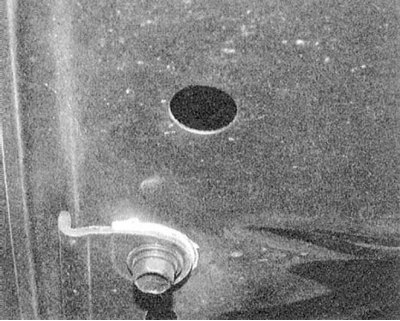
3. Disconnect the plastic tubes from the windshield washer nozzles mounted in the hood.
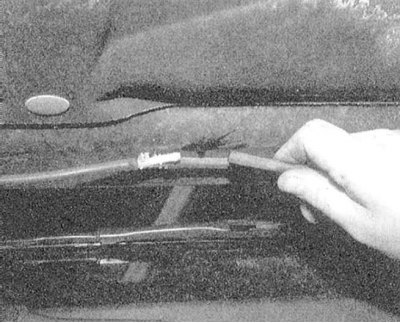

4. Disconnect the relevant electrical wiring.

(The original article is on: «mitsubishiman»)
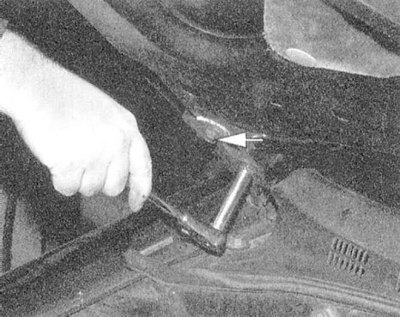


5. Remove the bolts securing the hood to the hinge strips - ask an assistant to hold the rear edge of the hood.


6. Carefully release the thrust rod and remove the hood.

Installation


Attention! Work extremely carefully - the slightest mistake can cause damage to the windshield!


1. Carefully place the hood in its regular place and tighten the hinge bolts by hand. Immediately support the hood with a stop rod.

2. Align the hinge strips with the mounting marks made during dismantling, then tighten the mounting bolts securely.

3. Restore the original connection of the windshield washer wiring and tubes.

4. Check that the hood is correctly installed in the body opening; if necessary, make the appropriate adjustments (see below).

Adjustment


1. Close the hood and check that it is correctly positioned in the body opening. If necessary, open the hood again and make the necessary adjustments by loosening the fastening of the hinge strips and moving them in the appropriate direction. After completing the adjustment, tighten the fastening bolts again securely.

2. Check the proper operation of the hood latch. If necessary, loosen the latch mounting bolts and adjust the latch's position relative to the striker accordingly.

3. Make sure that the hood is flush with the surrounding body panel surfaces when closed. If necessary, adjust the rubber stops by rotating them.
This article is available at: russian, bulgarian, belarusian, ukrainian, serbian, croatian, romanian, polish, slovak, hungarian
This article was reviewed by: Dmitry Vasiliev
Share with friends:
◀ Previous
Galant 6 and 7: Exterior (external elements)
Next ▶

Repair of seriously damaged body panels
Repair of minor damage to body panels
Car body and underbody components care
Tightening forces of threaded connections
General information about the car body
Replacing the radio antenna
Removal and installation front fenders
Similar materials for other Mitsubishi models

➤ Throttle Position Sensor — Adjustment Mitsubishi Colt 4 and 5 (1991-2003)
➤ Removal and installation/adjustment of the engine… Mitsubishi Lancer 3 and 5 (1984-1992)
➤ Accelerator pedal position sensors (primary and secondary) Mitsubishi L200 4 (2005-2014, diesel)
➤ Hood — opening and closing Mitsubishi Outlander 1 (2003-2008)
➤ Opening and closing the hood Mitsubishi Pajero 1 and 2 (1982-1999)
➤ Front seat adjustment Mitsubishi Carisma (1995-2004)
Link in different formats to this article
Comments and feedback from visitors
No comments yet


Add up two numbers 23 + 35


Galant 6 and 7 (1987-1998) 
  • General information
  • Introduction to guide
  • User manual
  • Driving and operation
  • Maintenance
  • Power unit
  • Dismantling the engine
  • Engine overhaul
  • Cooling and heating
  • Power and exhaust systems
  • Engine electrical equipment
  • Engine management systems
  • Transmission
  • Mechanical gearbox
  • Automatic gearbox
  • Clutch
  • Drive shafts and transfer case
  • Chassis and running gear
  • Brake system
  • Car suspension
  • Steering
  • Body and interior
  • Exterior (external elements)
  • Interior (internal elements)
  • Doors, locks and windows
  • Electrical equipment
  • Equipment and devices
  • Wiring diagrams Galant
  • Wiring diagrams Mirage
  • Wiring diagrams Diamante
Galant 5 (1983-1989, petrol) 
  • General information
  • Troubleshooting
  • Maintenance
  • Power unit
  • Engine repair
  • Engine overhaul
  • Cooling and heating
  • Fuel and exhaust system
  • Engine electrical equipment
  • Reducing exhaust toxicity
  • Transmission
  • Manual gearbox
  • Automatic gearbox
  • Clutch and drive shafts
  • Chassis and running gear
  • Brake system
  • Car suspension
  • Steering
  • Body and interior
  • Exterior (external elements)
  • Interior (internal elements)
  • Doors, locks and windows
  • Electrical equipment
  • Equipment and devices
  • Electrical diagrams
MitsubishiMan.ru © 2018–2026 • Mobile version • Articles about Mitsubishi • Contacts • Sitemap: EN BG BY UA RS HR RO PL SK HU • Site search • Bookmark
Colt 2 and 3 (1983-1993) · Colt 4 and 5 (1991-2003) · Colt 5 (1995-2003) · Lancer 3 and 5 (1984-1992) · Lancer 9 (2000-2007) · Galant 5 (1983-1989) · Galant 6 and 7 (1987-1998) · L200 4 (2005-2014) · Outlander 1 (2003-2008) · Pajero 1 and 2 (1982-1999) · Pajero 4 (2006-2021) · Carisma (1995-2004) · Space Star (1998-2005) ·
This resource sets cookies 🍪 to avoid bothering you with repeated data entry.