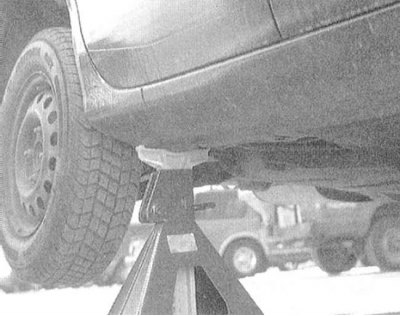
English Русский
Български
Беларускі
Український
Српски
Hrvatski
Română
Polski
Slovenský
Magyar
Articles Bookmark Contacts Sitemap   
Company Audi Company Ford Company Hyundai Company Kia Company Mazda Company Mercedes-Benz Company Nissan
MitsubishiMan.ru


Home Colt Lancer Galant L200 Outlander Pajero Others
Galant 6 and 7 (1987-1998) Galant 5 (1983-1989, petrol)

Jacking up a car (Mitsubishi Galant 6)

  • Home
  • Galant
  • 6 (1987-1998)
  • General information
  • Introduction to guide
  • Jacking up a car
0
The jack included in the standard vehicle package is intended only for performing wheel-change procedures. When performing any other repair or maintenance work, the vehicle must be lifted using a hydraulic (or trolley) jack and must be installed on special supports placed under the load-bearing points of the underbody (standard jack points).

If there is no need to remove the wheels, the car can be driven onto an inspection pit or overpass.

Never place the jack under the vehicle's sills, oil pan, floor panels, or directly under steering or suspension components!

Do not perform any repair work under a vehicle that is supported in a raised position using only a jack! Be sure to use reliable supports!

To jack up the car, park it on a flat horizontal surface, preferably with a hard surface. If there is the slightest slope, take precautions against rolling back: support the wheel diagonally from the one to be removed with wheel chocks, firmly set the parking brake, engage reverse gear (manual transmission), or move the selector lever to the "P" position (automatic). Try not to go far from the jacked car, especially if there are children nearby.

When changing wheels, before jacking up the car, remove the decorative cap and use a wheel brace to loosen the nuts securing the wheel to be replaced. Have a spare wheel ready.

On some models, the cap is secured to the rim with wheel nuts, which at this stage only need to be loosened!

Place the jack under the car: the rear jacking points are located at the rear edges of the door gutters; when jacking up the front, place the jack under the subframe.
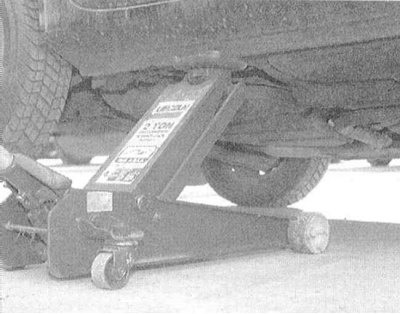


Make sure the jack head is securely engaged. Turn the jack handle to raise the vehicle until the wheel to be replaced is off the ground. Remove the lug nuts, remove the wheel, and install the spare wheel in its place. Screw on the lug nuts, then lower the vehicle to the ground, remove the jack, and tighten the lug nuts diagonally to the required torque. Replace the cap. Fold and put away the tool. Don't forget to remove the wheel chocks.
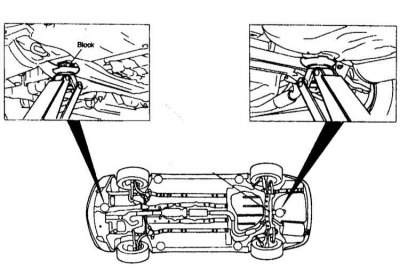


When jacking up a vehicle to secure it in a raised position for more serious repairs than changing a wheel, the head of the hydraulic jack should be positioned under the front center beam and/or under the bracket secured to the rear floor panel. A wooden block should be placed between the head of the jack and the surface of the jacking point to distribute the load.

Never place the jack under the rear floor panel beam! The supports are placed under the standard front and rear jacking points (see above).
This article is available at: russian, bulgarian, belarusian, ukrainian, serbian, croatian, romanian, polish, slovak, hungarian
This article was reviewed by: Dmitry Vasiliev
Share with friends:
◀ Previous
Galant 6 and 7: Introduction to guide
Next ▶

Necessary tools and equipment for the workplace
Car maintenance technology
Purchase of spare parts
Vehicle Identification Numbers
Towing a car
Starting the engine from an auxiliary power source
Automotive chemicals, cleaners, sealants
Diagnostics of faults in vehicle components and systems
Similar materials for other Mitsubishi models

➤ Jacking up a car Mitsubishi Lancer 9 (2000-2007, petrol)
➤ Jacking up a car Mitsubishi Pajero 1 and 2 (1982-1999)
Link in different formats to this article
Comments and feedback from visitors
No comments yet


Add up two numbers 26 + 12


Galant 6 and 7 (1987-1998) 
  • General information
  • Introduction to guide
  • User manual
  • Driving and operation
  • Maintenance
  • Power unit
  • Dismantling the engine
  • Engine overhaul
  • Cooling and heating
  • Power and exhaust systems
  • Engine electrical equipment
  • Engine management systems
  • Transmission
  • Mechanical gearbox
  • Automatic gearbox
  • Clutch
  • Drive shafts and transfer case
  • Chassis and running gear
  • Brake system
  • Car suspension
  • Steering
  • Body and interior
  • Exterior (external elements)
  • Interior (internal elements)
  • Doors, locks and windows
  • Electrical equipment
  • Equipment and devices
  • Wiring diagrams Galant
  • Wiring diagrams Mirage
  • Wiring diagrams Diamante
Galant 5 (1983-1989, petrol) 
  • General information
  • Troubleshooting
  • Maintenance
  • Power unit
  • Engine repair
  • Engine overhaul
  • Cooling and heating
  • Fuel and exhaust system
  • Engine electrical equipment
  • Reducing exhaust toxicity
  • Transmission
  • Manual gearbox
  • Automatic gearbox
  • Clutch and drive shafts
  • Chassis and running gear
  • Brake system
  • Car suspension
  • Steering
  • Body and interior
  • Exterior (external elements)
  • Interior (internal elements)
  • Doors, locks and windows
  • Electrical equipment
  • Equipment and devices
  • Electrical diagrams
MitsubishiMan.ru © 2018–2026 • Mobile version • Articles about Mitsubishi • Contacts • Sitemap: EN BG BY UA RS HR RO PL SK HU • Site search • Bookmark
Colt 2 and 3 (1983-1993) · Colt 4 and 5 (1991-2003) · Colt 5 (1995-2003) · Lancer 3 and 5 (1984-1992) · Lancer 9 (2000-2007) · Galant 5 (1983-1989) · Galant 6 and 7 (1987-1998) · L200 4 (2005-2014) · Outlander 1 (2003-2008) · Pajero 1 and 2 (1982-1999) · Pajero 4 (2006-2021) · Carisma (1995-2004) · Space Star (1998-2005) ·
This resource sets cookies 🍪 to avoid bothering you with repeated data entry.