



Contents: Removal the air conditioning…⤓ Removal the alternator drive belt…⤓ Removal the pulley ⤓ Installing the pulley ⤓
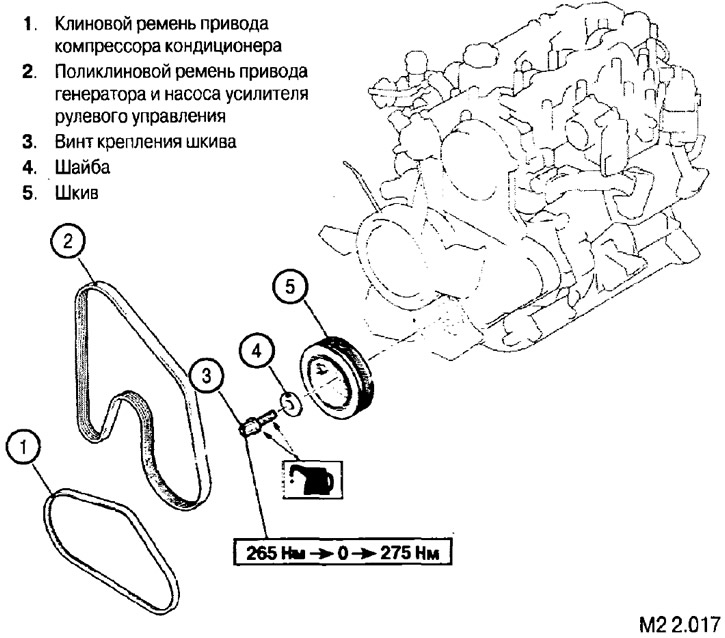
Note: After assembly, check the tension of belts (1) and (2) and adjust the tension of belt (2) if necessary. Due to the presence of an automatic tensioner, adjustment of the tension of belt (1) is not required.
These operations are described in the section "Maintenance".
Removal the air conditioning compressor drive belt
Note: If you plan to continue using this belt, before removing it, mark an arrow with chalk on its non-working surface indicating the direction of rotation of the pulleys.
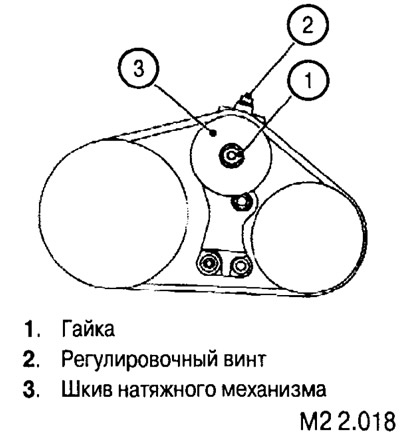
Loosen the pulley mounting nut. Turn the tensioner adjusting screw (counterclockwise) to loosen and remove the belt from the pulleys.
Removal the alternator drive belt and power steering pump
Note: If you plan to continue using this belt, before removing it, mark an arrow with chalk on its non-working surface indicating the direction of rotation of the pulleys.
Using a spanner, turn the automatic tensioner and insert a hex key into its hole (to lock the mechanism). Remove the belt from the pulleys.
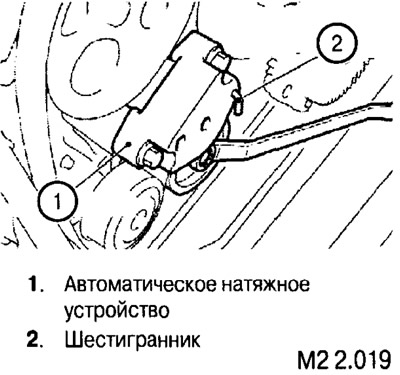
The belt is installed in the reverse order.
Removal the pulley
To loosen the pulley mounting screw, use the mounting studs (1) and holder (2) as shown in the figure.
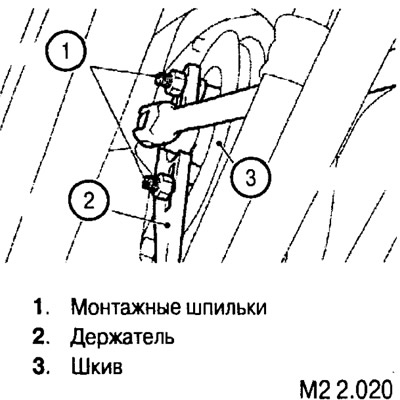
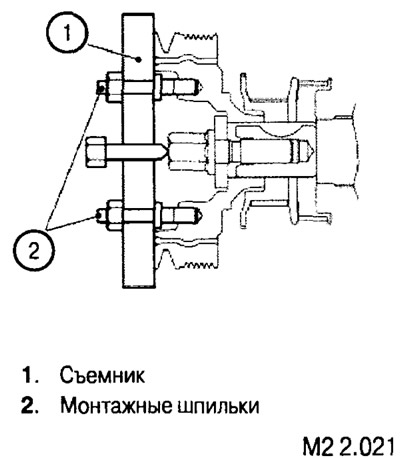
The pulley is removed using a puller (1).
Installing the pulley
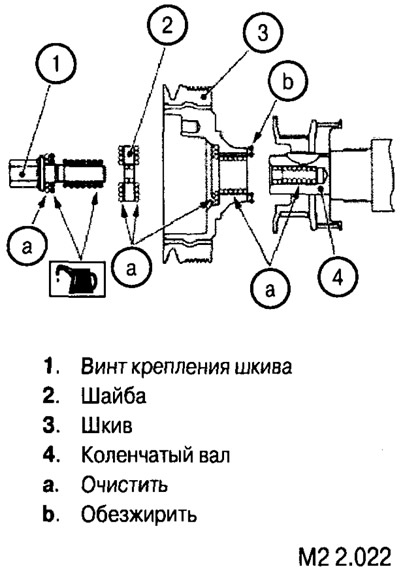
When installing the pulley on the shaft, clean, degrease and lubricate the mounting elements as shown in the figure.
The article is reprinted from a web resource MITSUBISHIMAN
Place the pulley on the shaft and, holding it with the holder, tighten the fastening screw to a torque of 265 Nm (see Fig. M2 2.020). Then completely loosen the screw and tighten it again to a torque of 275 Nm.
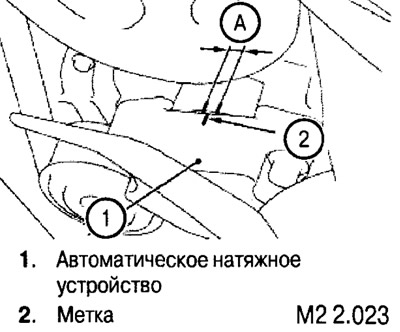
Caution: After installing the automatic tensioner and belt, turn the crankshaft clockwise (one or more times) and make sure that the mark on the automatic tensioner is within the "A" zone as shown in the figure. Otherwise, the belt must be replaced.