



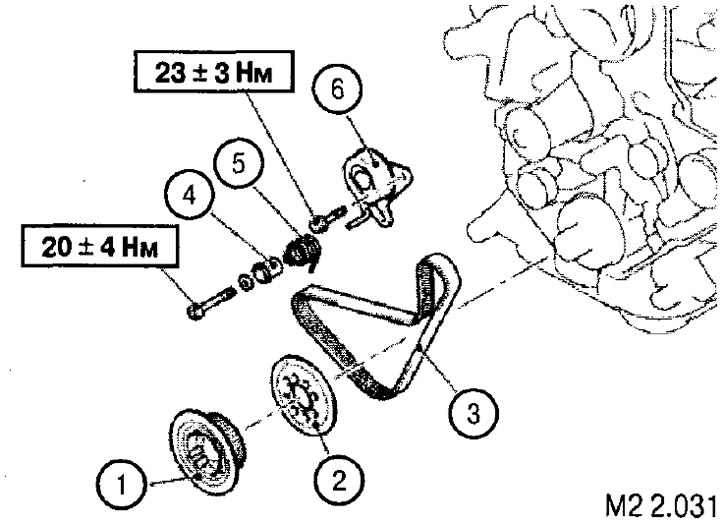
1. Crankshaft toothed pulley; 2. Flange; 3. Belt "B"; 4. Tensioner bushing; 5. Tensioner spring; 6. Tensioner assembly
Removal the "B" belt
Note: If you plan to continue using this belt, before removing it, mark an arrow with chalk on its non-working surface indicating the direction of rotation of the pulleys.
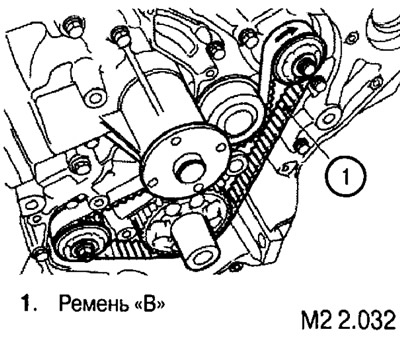
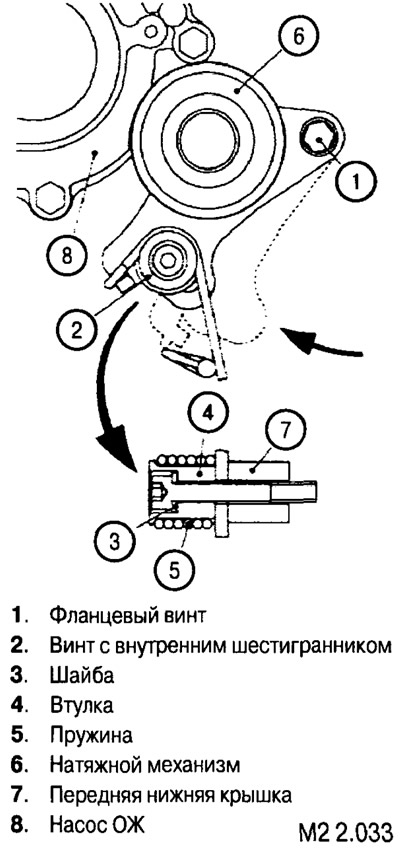
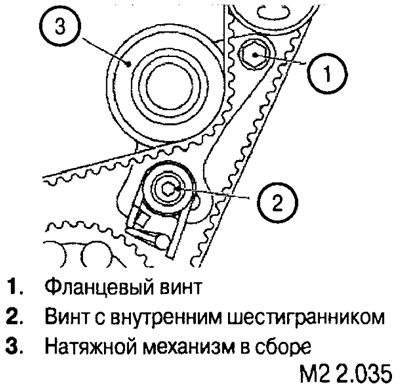
Loosen the mounting screws (flange and Allen) of the belt tensioner, move it towards the coolant pump and tighten the screws to secure the mechanism.
Remove the belt from the pulleys.
Installing the "B" belt
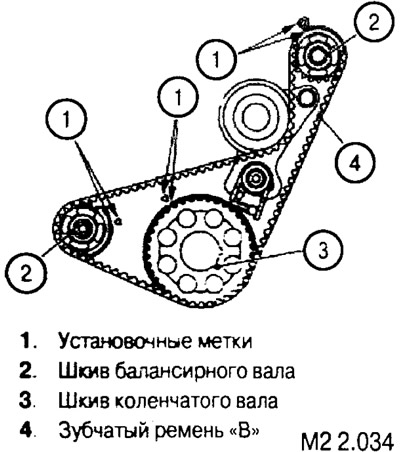
Check that the piston of the first cylinder is in the TDC position. Align the pulley marks and install the belt on the pulleys in accordance with the direction of rotation (if using the previously removed belt).
The article is reprinted from a web resource (MitsubishiMan)
Loosen the tensioner mounting screws (flange screw - 1 turn, and Allen screw - 1-2 turns). This will cause the tensioner to move and tighten the belt.
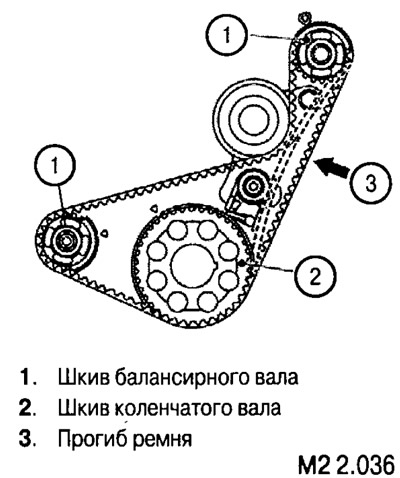
Check that the belt deflection at the point indicated in Figure M2 2.036 (when pressing the belt with the index finger) is within 4-5 mm.
After this, tighten the hex screw first and then the flange screw.
Tightening torques:
- flange screw - 23±3 Nm;
- allen screw -20±4 Nm.