
English Русский
Български
Беларускі
Український
Српски
Hrvatski
Română
Polski
Slovenský
Magyar
Articles Bookmark Contacts Sitemap   
Company Audi Company Ford Company Hyundai Company Kia Company Mazda Company Mercedes-Benz Company Nissan
MitsubishiMan.ru


Home Colt Lancer Galant L200 Outlander Pajero Others
Pajero 4 (2006-2021) Pajero 1 and 2 (1982-1999)

Trip computer (optional) — date and time (Mitsubishi Pajero 4)

  • Home
  • Pajero
  • 4 (2006-2021)
  • General information
  • User manual
  • Trip computer (optional) — date and time
0
Contents: Date and time ⤓ Setting date and time ⤓

Date and time
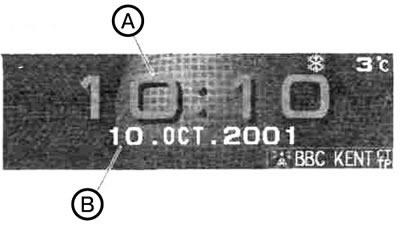


In this mode, the time (A) and date (B) are displayed on the display.

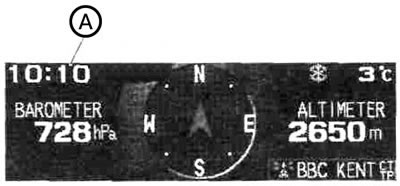
If another parameter display mode (not "date and time") is selected, only the time is displayed in the upper left corner (A).


Setting date and time


The electronic clock can be set up in the following modes:


  • Cars equipped with the original MITSUBISHI audio system: in automatic and manual modes.
  • Vehicles not equipped with genuine MITSUBISHI audio system: manual mode only.

Automatic mode (cars equipped with original MITSUBISHI audio system)


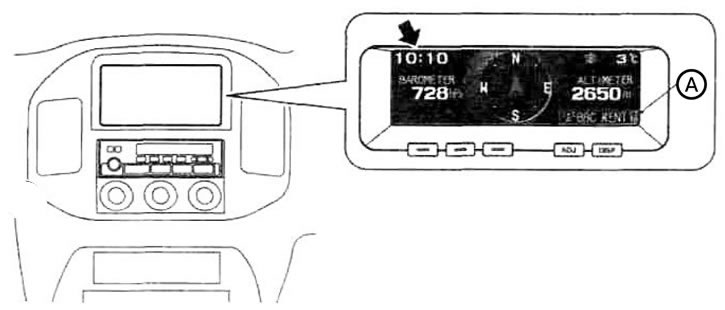
In the automatic mode, the local time is set automatically based on the signals of local RDS stations. In this mode, the "CT" symbol (A) is displayed on the audio system display (local time is transmitted with the RDS signal).

Manual setting mode


You can also enter manual mode if the time displayed in automatic mode is incorrect because the nearest RDS radio stations are in a different time zone.

The original can be found on the website: mitsubishiman.ru

To set the time manually, follow these steps:

1. Press the ADJ button.
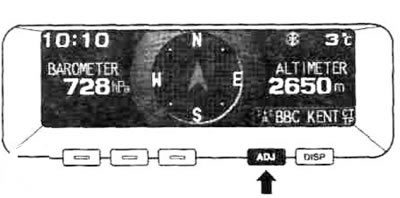


Please note: You can set the date and time only after stopping the vehicle in a place where stopping and parking is permitted.


Note: For safety reasons, the date and time can only be set when the driving speed does not exceed 3 km/h (2 mph).


2. Press the CLOCK button.
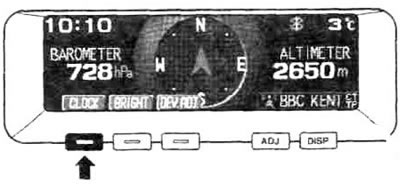


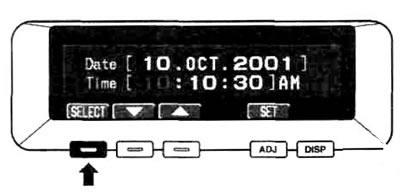
3. Press the SELECT function button to move to the month, date, year, hour and minute settings. Each press of the SELECT button moves from hours to minutes, seconds, date, month and year.


If you hold down the SELECT button for more than one second, the system will enter fast forward mode. When selecting seconds, the display automatically shows "0".


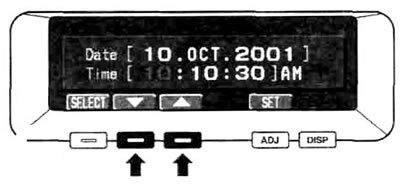
4. Set the desired value by pressing the function buttons ▲ or ▼. If you hold the button ▲ or ▼ for more than 1 second, the value will begin to change quickly.


5. After setting the clock, press the SET function button.
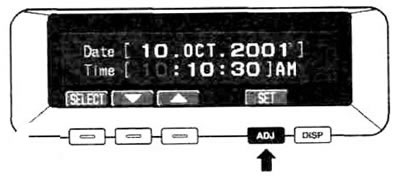


Note: When the battery cable is removed, the data is erased from the memory. After removing the wire, you must set the clock again by repeating the operations described in points 1-5.
This article is available at: russian, bulgarian, belarusian, ukrainian, serbian, croatian, romanian, polish, slovak, hungarian
This article was reviewed by: Miroslav Rakov
Share with friends:
◀ Previous
Pajero 4: User manual
Next ▶

Trip computer (optional) — change display mode
On-board computer (optional)
Central multifunction display (optional)
Control lamps and warning lamps for malfunctions
Control and measuring instruments
Trip computer information (petrol engine vehicles)
Average driving speed/average fuel consumption
Power reserve
Refueling a small amount of fuel
Climate data
Similar materials for other Mitsubishi models

➤ Odometer and trip meters Mitsubishi Lancer 9 (2000-2007, petrol)
➤ Trip computer (Galant 2000) Mitsubishi Galant 6 and 7 (1987-1998)
➤ Optional audio system jack (vehicle with RV or… Mitsubishi L200 4 (2005-2014, diesel)
➤ Odometer «trip meter/trip meter» Mitsubishi Outlander 1 (2003-2008)
Link in different formats to this article
Comments and feedback from visitors
No comments yet


Add up two numbers 27 + 16


Pajero 4 (2006-2021) 
  • General information
  • User manual
  • Troubleshooting
  • Maintenance
  • Technical specifications
  • Power unit
  • Engine repair
  • Cooling system
  • Lubrication system
  • Fuel system
  • Engine management system
  • Intake and exhaust system
  • Engine electrical equipment
  • Transmission
  • Clutch
  • Manual gearbox
  • Automatic gearbox
  • Drive shafts
  • Chassis and running gear
  • Front suspension
  • Rear suspension
  • Brake system
  • Steering
  • Body and interior
  • Exterior (external elements)
  • Interior (internal elements)
  • Doors, locks and windows
  • Body dimensions
  • Electrical equipment
  • Safety system (SRS)
  • Air conditioner
  • Equipment and devices
  • Electrical diagrams
Pajero 1 and 2 (1982-1999) 
  • General information
  • User manual
  • Seats and seat belts
  • Instruments and controls
  • Driving and operation
  • Maintenance
  • Power unit
  • Gasoline engines
  • Diesel engines
  • Ignition system
  • Engine electrical equipment
  • Cooling and lubrication system
  • Power and exhaust system
  • Fuel system (gasoline)
  • Fuel system (diesel)
  • Transmission
  • Clutch
  • Mechanical gearbox
  • Automatic gearbox
  • Drive shafts and axles
  • Chassis and running gear
  • Front suspension
  • Rear suspension
  • Steering
  • Brake system
  • Body and interior
  • Exterior (external elements)
  • Interior (internal elements)
  • Doors, locks and windows
  • Electrical equipment
  • Equipment and devices
  • Heater and air conditioner
  • Cruise control
  • Headlights and lighting
  • Electrical circuits
MitsubishiMan.ru © 2018–2026 • Mobile version • Articles about Mitsubishi • Contacts • Sitemap: EN BG BY UA RS HR RO PL SK HU • Site search • Bookmark
Colt 2 and 3 (1983-1993) · Colt 4 and 5 (1991-2003) · Colt 5 (1995-2003) · Lancer 3 and 5 (1984-1992) · Lancer 9 (2000-2007) · Galant 5 (1983-1989) · Galant 6 and 7 (1987-1998) · L200 4 (2005-2014) · Outlander 1 (2003-2008) · Pajero 1 and 2 (1982-1999) · Pajero 4 (2006-2021) · Carisma (1995-2004) · Space Star (1998-2005) ·
This resource sets cookies 🍪 to avoid bothering you with repeated data entry.