
Removing
To remove, follow the steps below.
1. Remove the rheostat.
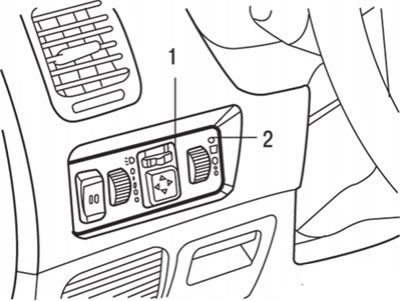
Pic. 19.44. Removing the rheostat: 1 – facing of the switch; 2 - rheostat
2. To remove the rheostat, using the blade of a screwdriver as a lever, remove the rheostat facing, then disconnect the electrical connector and remove the rheostat from the facing (pic. 19.44).
Examination
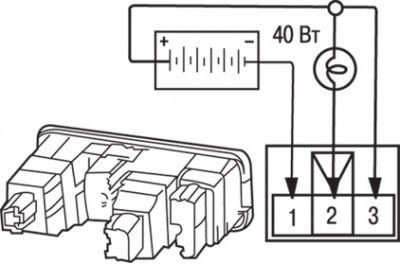
Pic. 19.45. Checking the instrument panel illumination rheostat
Connect the battery to the terminals of the rheostat through a test lamp (40 W) as shown in fig. 19.45.
If, when the rheostat knob is slowly turned, the brightness of the light changes smoothly and without turning off, then the rheostat is working normally.
Installation
Installation is carried out in the reverse order of removal.