



Contents: Removal ⤓ Installation ⤓
COLT/LANCER release since 9.88
Removal
Mark the position of the wheel disk on the wheel hub with paint. This ensures that the balanced wheel can be reinstalled in its original position.
Raise the front of the car, see item 29.
Remove the wheel.
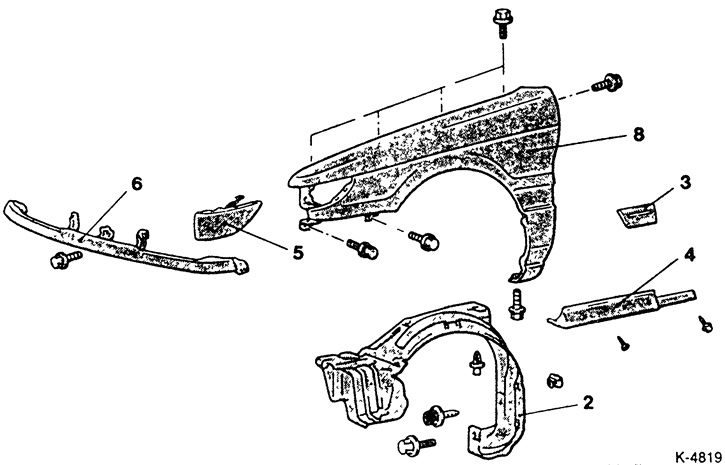
Disconnect the wheel arch liner "2" from the inside, press the liner from the front wing flange inward and pull it out.
Remove the radiator grille.
Remove the front bumper.
Remove the headlights and front turn signals, see item 24.4.
Disconnect the intermediate strip "6" of the radiator grille, see Fig. K-4819.
If equipped, remove the mudguard behind the front wheel.
Remove the protective side molding "3" from the front wing.
Disconnect air duct "4".
The front wing sits very firmly thanks to the underbody protection and sealing tape. Therefore, to separate the wing, a hair dryer with a temperature of at least 450°C is required. If such a hair dryer is not available, it is recommended to cut the underbody protection from the joints with a sharp knife
Attention: Warm up the underbody protection (material - PVC) only slightly and briefly. PVC should not change color and should not form bubbles. Otherwise, gases harmful to health are released, and hydrochloric acid is released, which actively promotes the formation of rust.
Carefully separate the front wing step by step.
Installation
If necessary, paint the front fender.
Clean and, if necessary, straighten the mating surfaces of the front wing.
Apply an anti-corrosion agent to the threaded connection points in the area where the front wing meets the wheel well and on the A-pillar (the pillar to which the front door is attached).
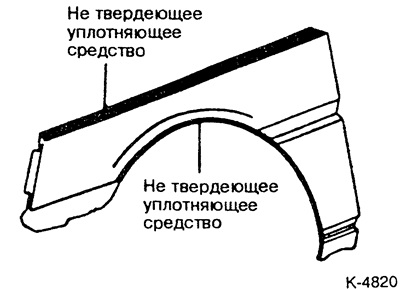
Apply commercially available sealing tape for front fenders to the mating surface of the front fender. MITSUBISHI recommends using sealing agent 3M ATD No.8625 or equivalent sealants.
Install the front wing, straighten it and secure it. At the same time, ensure uniform clearance between the engine compartment hood and the front wing.
Attention: Tighten the fastening screws (self-tapping screws) with a force of no more than 5 Nm, i.e. lightly.
Apply underbody protection to the inside of the front fender.
Seal the front fender liner with sealant, see fig.
Install the protective side molding, air duct and front bumper, see the corresponding sections.
Install headlights and front turn signals, adjust headlights, see item 24.5.
Position the wheels according to the markings, screw on the wheel nuts. Lower the vehicle and tighten the wheel nuts crosswise. Tightening force see item 19.4.