



Contents: Examination ⤓ Disassembly ⤓
Because the gearbox on the car is offset to the side, the left and right drive shafts have different lengths. To reduce vibration of the drive shafts, vibration dampers or torsion dampers are installed. In both cases, we are talking about compensation weights fixed to the drive shaft in a precisely defined place using clamping clamps.
Examination
Inspect the cuffs, replace defective cuffs immediately. To replace the protective cuffs, remove and disassemble the drive shaft. If dirt is found in the joint, wash the joint with gasoline and lubricate with new special grease (included in the repair kit for cuffs).
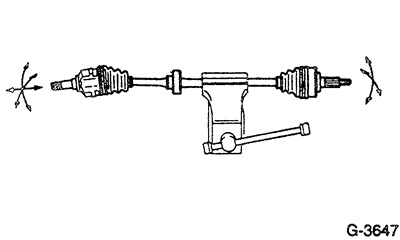
Secure the removed drive shaft in a vice and check the mobility of the joints.
Check the integrity and degree of wear of the V-grooves.
Check the reliability of the fastening, make sure there are no cracks or damage to the vibration dampers and torsion dampers.
If defects are detected, disassemble the drive shaft.
Disassembly
Before removing, mark the edges of the hinge cuff on the shaft with a felt-tip pen, which will facilitate subsequent assembly.
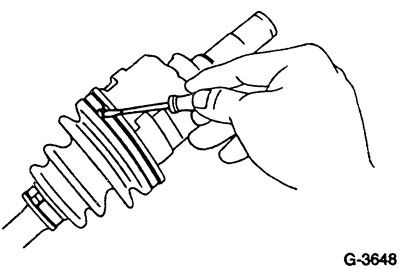
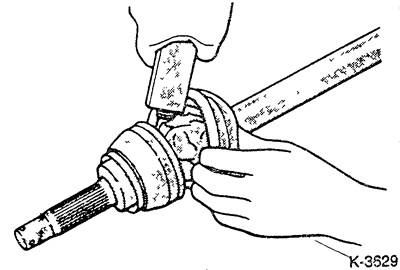
Use a screwdriver to pry up the cuff tape on the inner hinge and remove it.
Slide the cuffs along the shaft.
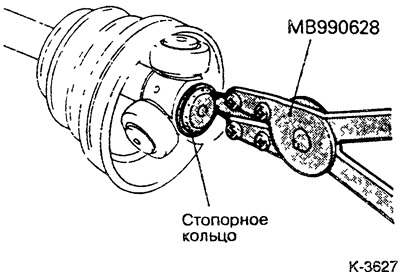
Spread the retaining ring with special pliers (for example, from HAZET) and remove it from the hinge axis.
Remove the crosspiece of the joint and clean it.
Caution: Do not disassemble the crosspiece.
Apply adhesive tape to the V-grooves to prevent damage to the cuffs when tightening.
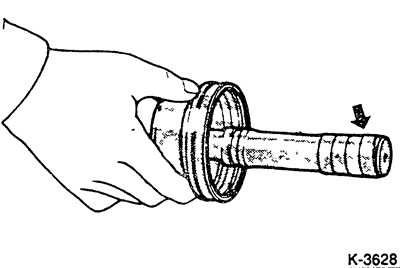
Mark the position of the vibration damper or torsion damper with a felt-tip pen.
Remove the joint, vibration damper, torsion damper and joint seals from the shaft.
Caution: The outer hinge must not be disassembled.
Thoroughly wipe the cavities of the joint, internal parts, flanges, cap and cuffs. Remove any old grease with a solvent and compressed air.
Check the wear of the working surfaces and mating elements of the hinge; replace the hinge if necessary.
Assembly
Replace porous and defective cuffs. New tension strips and retaining rings must be installed.
Lightly lubricate the shaft surface to help the seal slide better. In addition, wrap the splined joints of the shaft with adhesive tape to avoid damaging the seals when putting them on.
Put on the outer hinge cuff with the clamp, do not fasten the clamp. Do not mix up the hinge cuffs: the outer hinge cuff and clamp are smaller than those of the inner hinge.
Fill the inside of the joint and the cuff with the prescribed amount of grease. Grease is included in the cuff repair kit.
Engine - Lubricant Quantity:
- 1.3/1.5 l — 75 - 95 g
- 1.6 l (16 cl.) / 1.8 l diesel - 90 g
- 1.8 l (16 cells) - 100-120 g
Note: Fill the joint with half of the grease and the seal with the other half.
Fasten the clamps.
Note: The hinge must not be tilted.
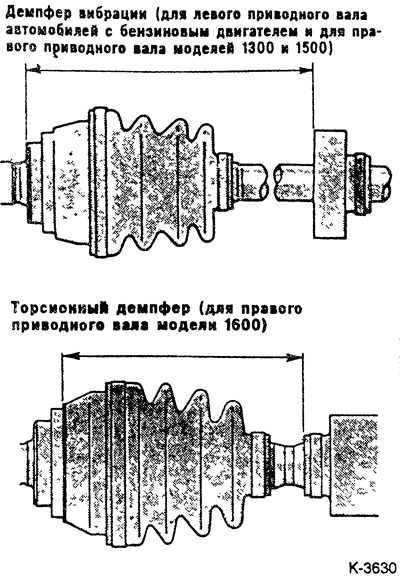
Install the vibration damper and/or torsion damper in the marked location and secure with a clamp. When installing a new drive shaft, the following distances apply:
Engine - Distance:
- 1.3/ 1.5 l — 434-440 mm
- 1.6 l (16-valve)/ 1.8 l diesel left — 140-145 mm
- 1.6 l (16-valve)/ 1.8 l diesel right — 221-227 mm
- 1.8 l (16 valves) torsion damper - 195-201 mm
Caution: Do not allow grease to come into contact with the rubber part of the vibration damper and torsion damper, otherwise it must be wiped off immediately.
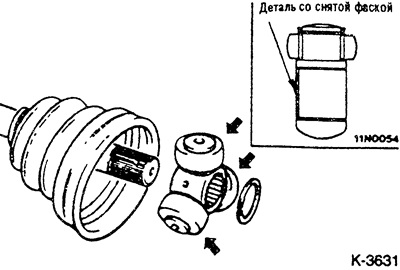
Apply special grease (from the repair kit) to the crosspiece of the joint.
Caution: Do not use other lubricants, do not mix old and new lubricants, do not mix lubricants of different types.
Mount the crosspiece of the joint on the shaft with the chamfered parts facing forward.
Insert a new retaining ring into the shaft groove.
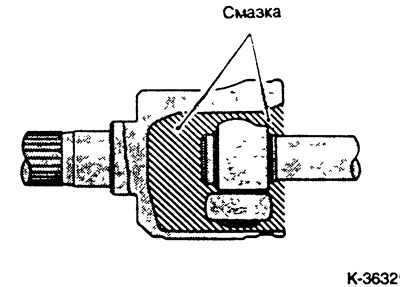
Fill the inside of the joint and the cuff with the prescribed amount of grease. Grease is included in the cuff repair kit.
Engine - Lubricant Quantity
- 1.3/1.5 l — 115-135g
- 1.6 l (16 cells) / 1.8 l diesel - 110 g
- 1.8 l (16 cells) - 110-130 g
Note: Fill the joint with half of the grease and the seal with the other half.
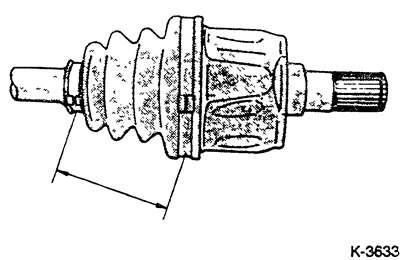
Push and position the clamps, keeping the correct distances:
Engine - Distance
- 1.3/1.5 l left - 80 ±3 mm
- 1.3/1.5 l right - 85 ±3 mm
- 1.6 l (16-valve)/ 1.8 l diesel left — 80 ±3 mm
- 1.6 l (16-valve)/ 1.8 l diesel right 1.8 l — 85 ±3 mm
- (16 valves) - 85 ±3 mm
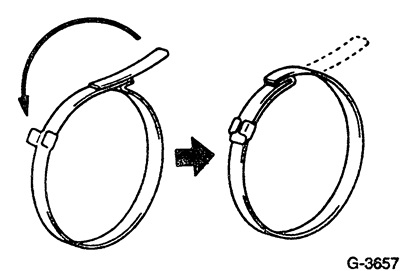
The cuffs must be securely seated in the shaft grooves. Bend the cuff tapes with a screwdriver and, as shown in the figure, secure by bending the noses.
In the installed position, the cuffs should not be stretched or flattened. Pull and secure the cuff strips.
Install the drive shaft.