



Front (top) and rear doors
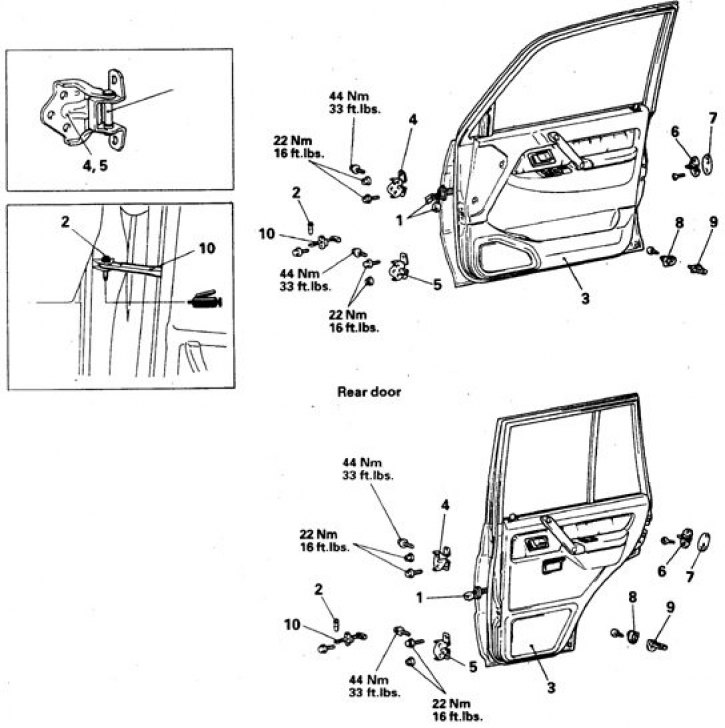
1. Connector; 2. Pin; 3. Door; 4, 5. Loops; 6. Retainer; 7. Adjusting plate; 8. Switch cap; 9. Limit switch; 10. Limiter
Front doors
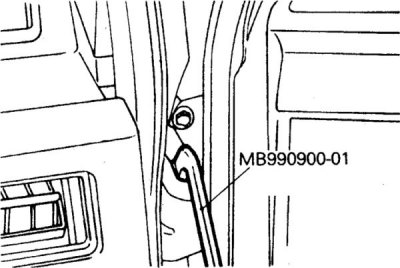
1. Remove the door frame trim.
2. To access the wires, remove the front mudguard trim panel.
3. Disconnect all wires leading to the door and set them aside.
4. Place a support under the door and outline the hinges.
5. Remove the hinge covers, remove the small door stop pin.
6. Unscrew the bolts securing the hinges to the door (the assistant must hold the door).
7. Using two people, carefully remove the door, being careful not to lose the adjusting plates under the hinges. Remember the number and location of the plates on each of the loops.
8. Installation is carried out in reverse order.
9. Install the door along the outlined contours, install the plates in the same order.
10. Tighten the fasteners to the required torques.
11. Adjust the door (see subsection 12.12).
Rear doors
1. Remove the threshold cover.
2. Remove the B-pillar trim.
3. Disconnect all wires leading from the pillar to the door and move them to the side.
4. Place a support under the door and outline the hinges.
5. Remove the small door stop pin.
6. Unscrew the bolts securing the hinges to the door (the assistant must hold the door), together, carefully remove the door.
7. Installation is carried out in reverse order.
[Original material on the website: www.MitsubishiMan.ru]
8. Install the door along the outlined contours.
9. Tighten the fasteners to the required torques.
10. Adjust the door (see subsection 12.12).