



Door lock and handle of the front (top) and rear doors (on the inserts - lubrication points during assembly)
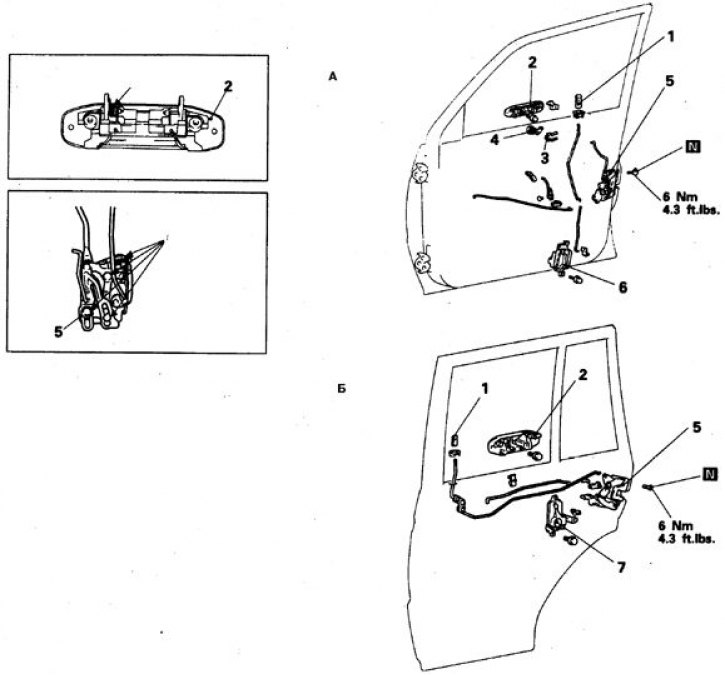
1. Lock button; 2. Pen; 3. Bracket; 4. Lock switch; 5. Lock mechanism; 6, 7. Electric drive
Door lock and rear lid handle (1992-98) (on the insert - place for lubrication during assembly)
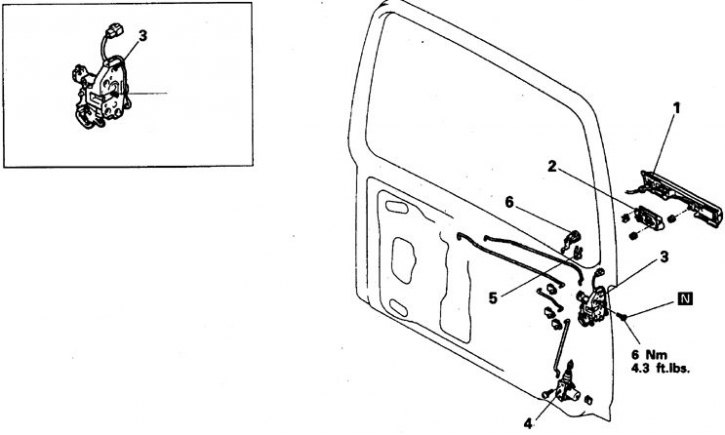
1. License plate light trim; 2. Pen; 3. Lock mechanism; 4. Electric drive; 5. Bracket; 6. Lock switch
Door lock and rear lid handle (1992-98) (on the insert - place for lubrication during assembly)
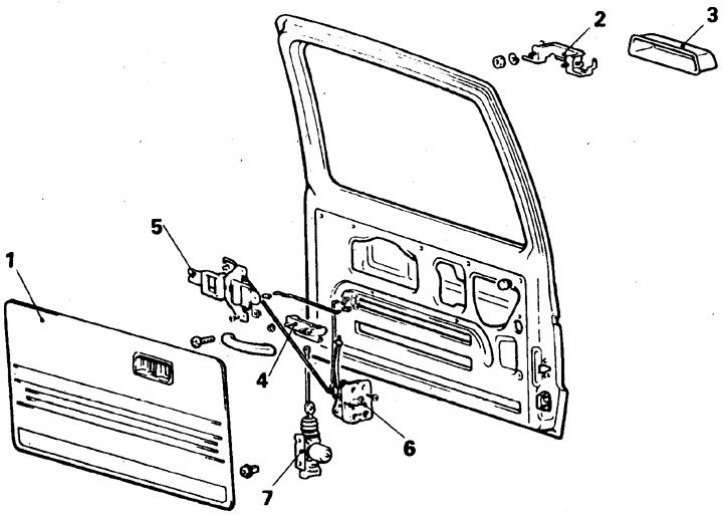
1. Inner panel and water-resistant screen; 2. Bracket; 3. Facing; 4. External handle; 5. Internal handle; 6. Castle; 7. Electric drive
Removal and installation
Attention! When dismantling the door locks, some of the fasteners of the lock drive mechanism rods will be damaged, so prepare new fasteners for assembly (staples, latches, etc.)
1. Lower the glass and remove the inner door panel.
2. Carefully remove the window glass seal.
3. Remove the brackets securing the lock rods to the handle and switch drum (on some vehicles it is recommended to disconnect the rods on the lock mechanism).
Lock switch built into the handle
4. Disconnect the wire connectors.
5. Unscrew the nuts and remove the handle. The lock from the handle should be removed in a workshop by a qualified person.
6. Installation is carried out in reverse order.
Door mounted lock switch
7. Remove the U-shaped bracket and remove the switch drum. The switch is repaired in a workshop by a qualified specialist.
8. Installation is carried out in reverse order.
Rear lid lock switch
9. The procedure is no different from that described for door locks.