



Contents: Inner door panel ⤓ Removal and installation ⤓
Inner door panel
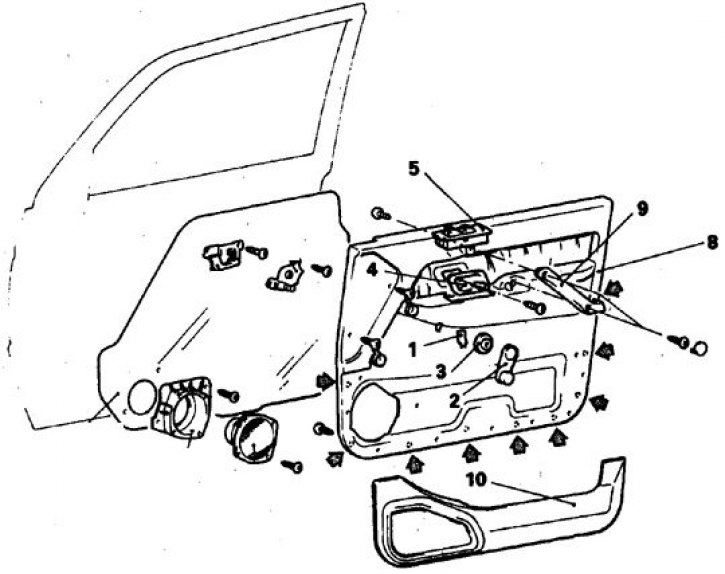
1. Figured spring ring; 2. Window lifter handle; 3. Overlay; 4. Inner handle; 5. Window switch; 8. Panel; 9. Door handle; 10. Pocket
Removal and installation
1. Remove the triangular side mirror trim.
2. Remove the plugs, unscrew the screws and remove the armrest and handle.
3. Loosen the screw, remove the plug, and remove the inner door handle cover.
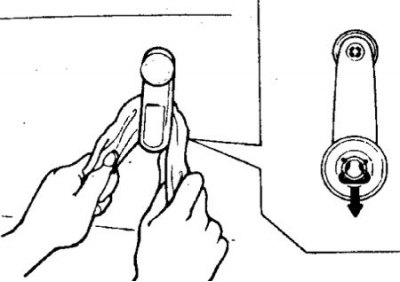
4. Press the shaped spring ring and remove the window lift handle.
It is recommended to mark the position of the handle with adhesive tape.
5. On some vehicles, unscrew the door lock handle (the square release button is removed after lifting the door panel).
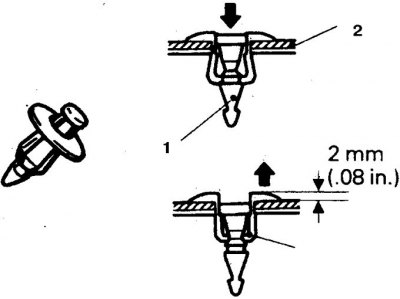
6. Unscrew the fastening screws along the panel contour, use a thin, flat fork-shaped tool to remove the latches (6 to 12 pcs. (1 – rod, 2 – trim)).
7. Lift the panel, disengaging it from the lower tabs, and disconnect the wires (if any) and remove the panel. Do not damage the water shield inside the door frame, otherwise water will enter the interior.
8. When installing, connect the wires and align the panel with the top edge of the door and press it onto the tongues with light blows of the palm.
9. Then assembly is carried out in reverse order.
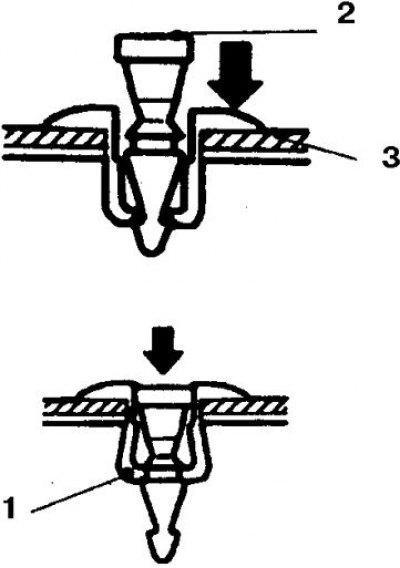
10. Install the latches (1 – seal, 2 – rod, 3 – trim).
11. Install the window lift handle along the glued tape, aligning the splines of the handle and the shaft.
12. With a sharp blow of the palm of your hand to the center of the roller, drive the handle in until it stops.