Contents: General information ⤓ Headlights and parking lights ⤓ Headlight bulb ⤓ Side light lamp ⤓ Front turn signal lamp ⤓ Side turn signal repeater lamp ⤓ Fog light bulb ⤓ Rear combination light bulbs ⤓ Additional brake light bulbs ⤓ License plate light bulb ⤓ Interior light lamp ⤓ Local lighting lamp ⤓
General information
Each time you replace a lamp, follow these guidelines:
- before starting work, turn off the ignition and disconnect the wire from the negative terminal of the battery;
- please note that if the lamp has recently been turned off, it may be very hot;
- always check the contacts of the lamp and socket to ensure that there is reliable contact between the lamp, the power cable and the ground. Remove any dirt or corrosion before installing a new lamp;
- always check that the new bulb is of the correct power and that it is absolutely clean before installation. This applies especially to headlight and front fog light bulbs.
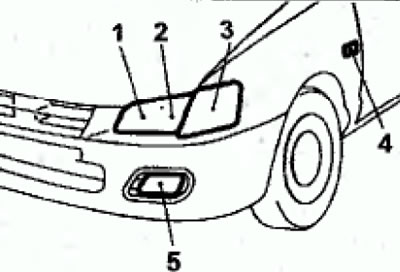
1. Overall lighting - 4 W; 2. Headlights, high/low beam - 55 W; 3. Front direction indicators -21W; 4. Side turn signal repeaters - 5 W; 5. Fog lights - 55 W
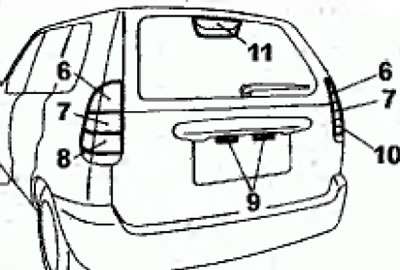
6. Brake lights and side lights - 21/5 W; 7. Rear direction indicators - 21 W; 8. Rear fog light - 21W; 9. License plate lights - 5W; 10. Rear lights - 21 W; 11. High Brake Light* - 5W x 4
Headlights and parking lights
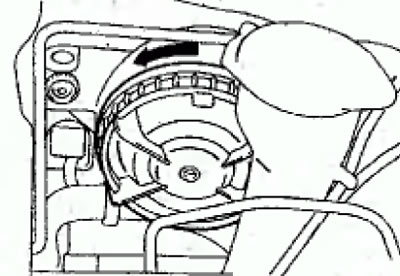
Open the hood, remove the headlight cover by turning it counterclockwise and disconnect the connector.
Headlight bulb
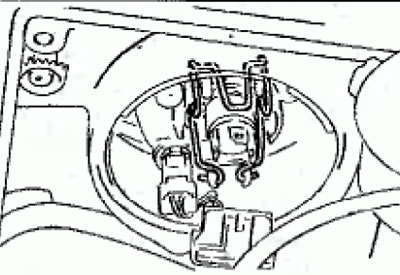
Compress the spring clips that secure the bulb, move them to the side and remove the bulb from the headlight.
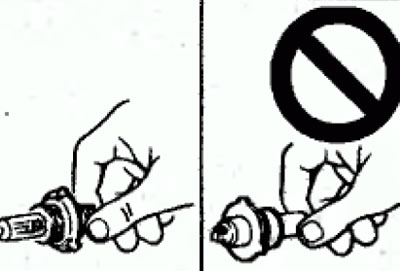
Warning: Do not touch the surface of the halogen bulb with your hands or dirty gloves. If the surface of the bulb is dirty, wipe it with alcohol or solvent and dry it well before installing it in the headlight
Side light lamp
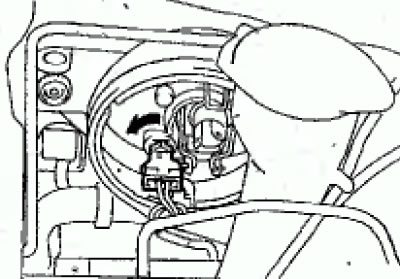
Remove the socket by pressing it and turning it counterclockwise in this position, then remove the lamp from the socket.
Front turn signal lamp
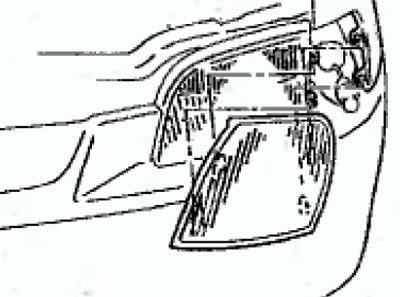
Insert the screwdriver as shown in the figure and loosen the screw securing the diffuser.
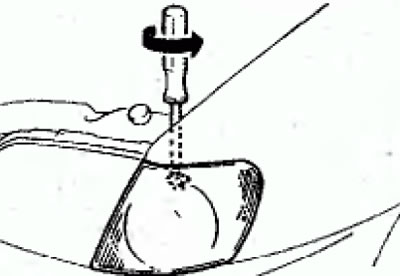
Remove the turn signal by pulling it forward and disconnecting the electrical connector from it.
Turn the cartridge counterclockwise, remove it and remove the cartridge from the cartridge.
Before installing the diffuser, align the protrusions on the diffuser with the holes in the body.
Side turn signal repeater lamp
Using a flat-head screwdriver, release the retainer and remove the side turn signal repeater on the front fender panel
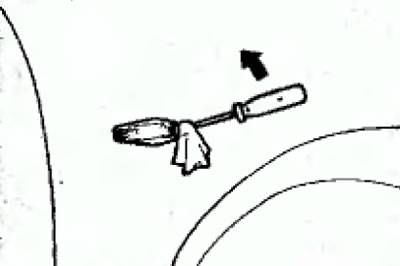
Note: To avoid damaging the paint on the fender panel, wrap the screwdriver blade in a cloth.
Turn the socket counterclockwise, remove it and take the lamp out of the socket.
Fog light bulb
use a screwdriver to remove the screw securing the fog light trim. Using a flat-head screwdriver, carefully pry up and remove the fog light trim.
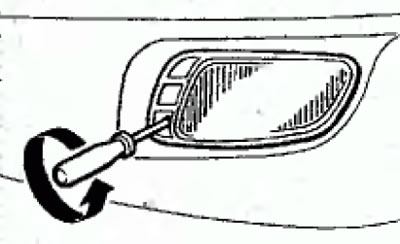
Disconnect the connector attached to the bracket (2) and remove the fog lamp
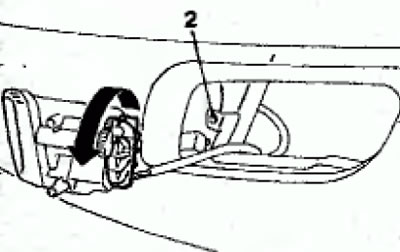
Turn the protective cover counterclockwise.
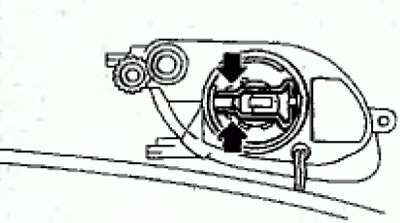
Compress the spring clips holding the bulb, move them to the side and remove the bulb from the fog light.
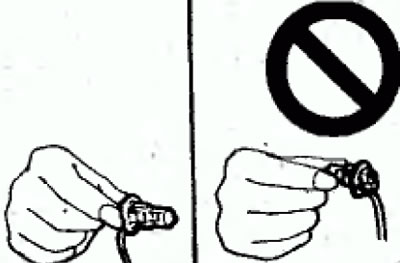
Warning: Do not touch the surface of the halogen bulb with your hands or dirty gloves. If the surface of the bulb is dirty, wipe it with alcohol or solvent and dry it well before installing it in the headlight.
Rear combination light bulbs
Remove the screws securing the rear light and remove it from the vehicle.
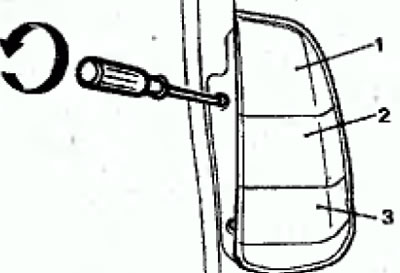
1. Brake lights and side lights; 2. Rear direction indicator; 3. Reversing light (driver side) or fog light (passenger side)
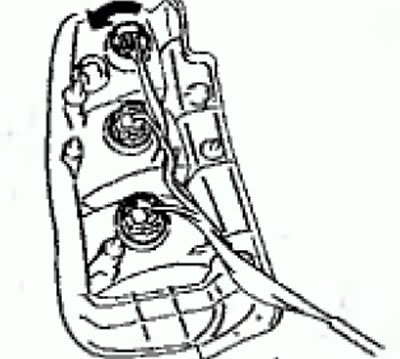
To remove each bulb, press down on the socket and turn it counterclockwise at the same time.
Additional brake light bulbs
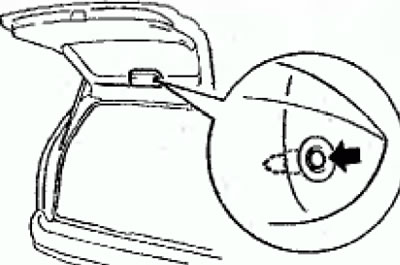
Press the round button in the center of the retainer and remove the brake light cover.
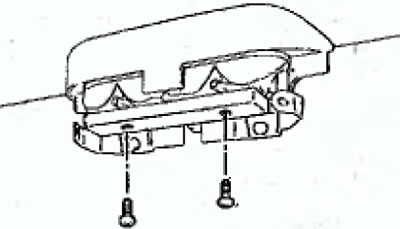
Turn the screws counterclockwise to remove the high brake light housing.
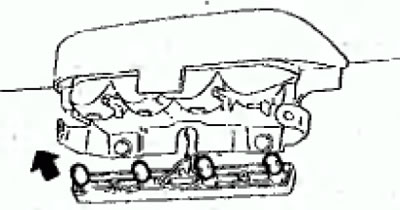
Each lamp is removed from the socket by simply pulling it out.
License plate light bulb
Loosen the screws securing the headlight diffuser and remove it
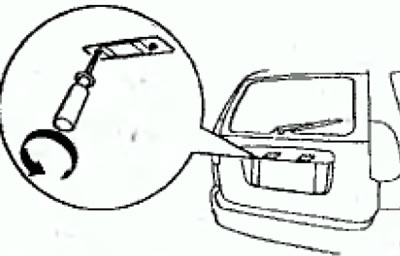
To remove the bulb, press down on the socket and turn it counterclockwise at the same time, then remove the bulb by pulling it out of the socket
Interior light lamp
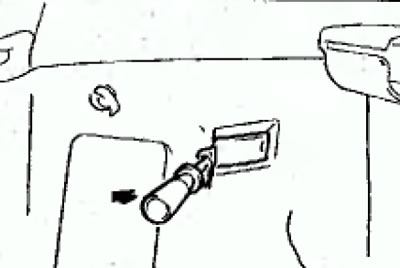
Insert the blade of a flat-head screwdriver between the lampshade and the lens and, pressing on the screwdriver, remove the lens. Remove the incandescent bulb from the socket.
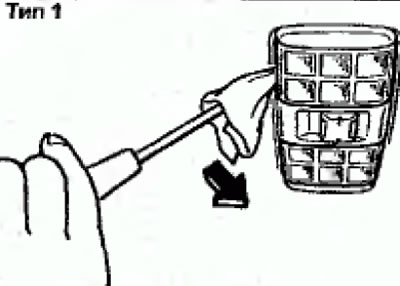
Note: To avoid damaging the lens and lampshade, wrap the screwdriver blade in a cloth.
Local lighting lamp
Insert the blade of a flat-head screwdriver under the lens and, pressing on the screwdriver, remove the lens. Remove the incandescent bulb from the socket. To avoid damaging the lens and lampshade, wrap the blade of the screwdriver in a cloth.